
Urbit: Access Landscape Externally over HTTPS with Cloudflared
So you've just deployed Urbit on your local server and now you realize you want to to be able to access Urbit anywhere. You've heard of Tailscale, an amazing VPN solution that allows you to access Urbit but you do not want a VPN solution. You want your Urbit externally available, everywhere, without the need to enable any VPN agent on your device. Well guess what? We've found the perfect solution and it might be exactly what you are looking for too.
 Shahraiz
Here at InterestingSoup we are accessing our Urbit over a private tunnel service called Cloudflare Tunnel (Cloudflared), previously known as Argo Tunnel. Cloudflared is a tunneling daemon that proxies traffic from the Cloudflare network to your local server. This daemon sits between Cloudflare network and your local server. Cloudflare attracts client requests and sends them to you via this daemon, without requiring you to open any ports. Your server can remain closed as possible!
This guide assumes the following:
- You have a Urbit running as a service on your server
- You've purchased a domain
- Your domain is using Cloudflare DNS
Installing Cloudflared
Our current setup is Urbit Aarch64 APT installed on a Raspberry Pi 4 8GB with Ubuntu booted off an M.2 SSD via USB3.0. Our Urbit is using http://localhost:80 for Landscape.
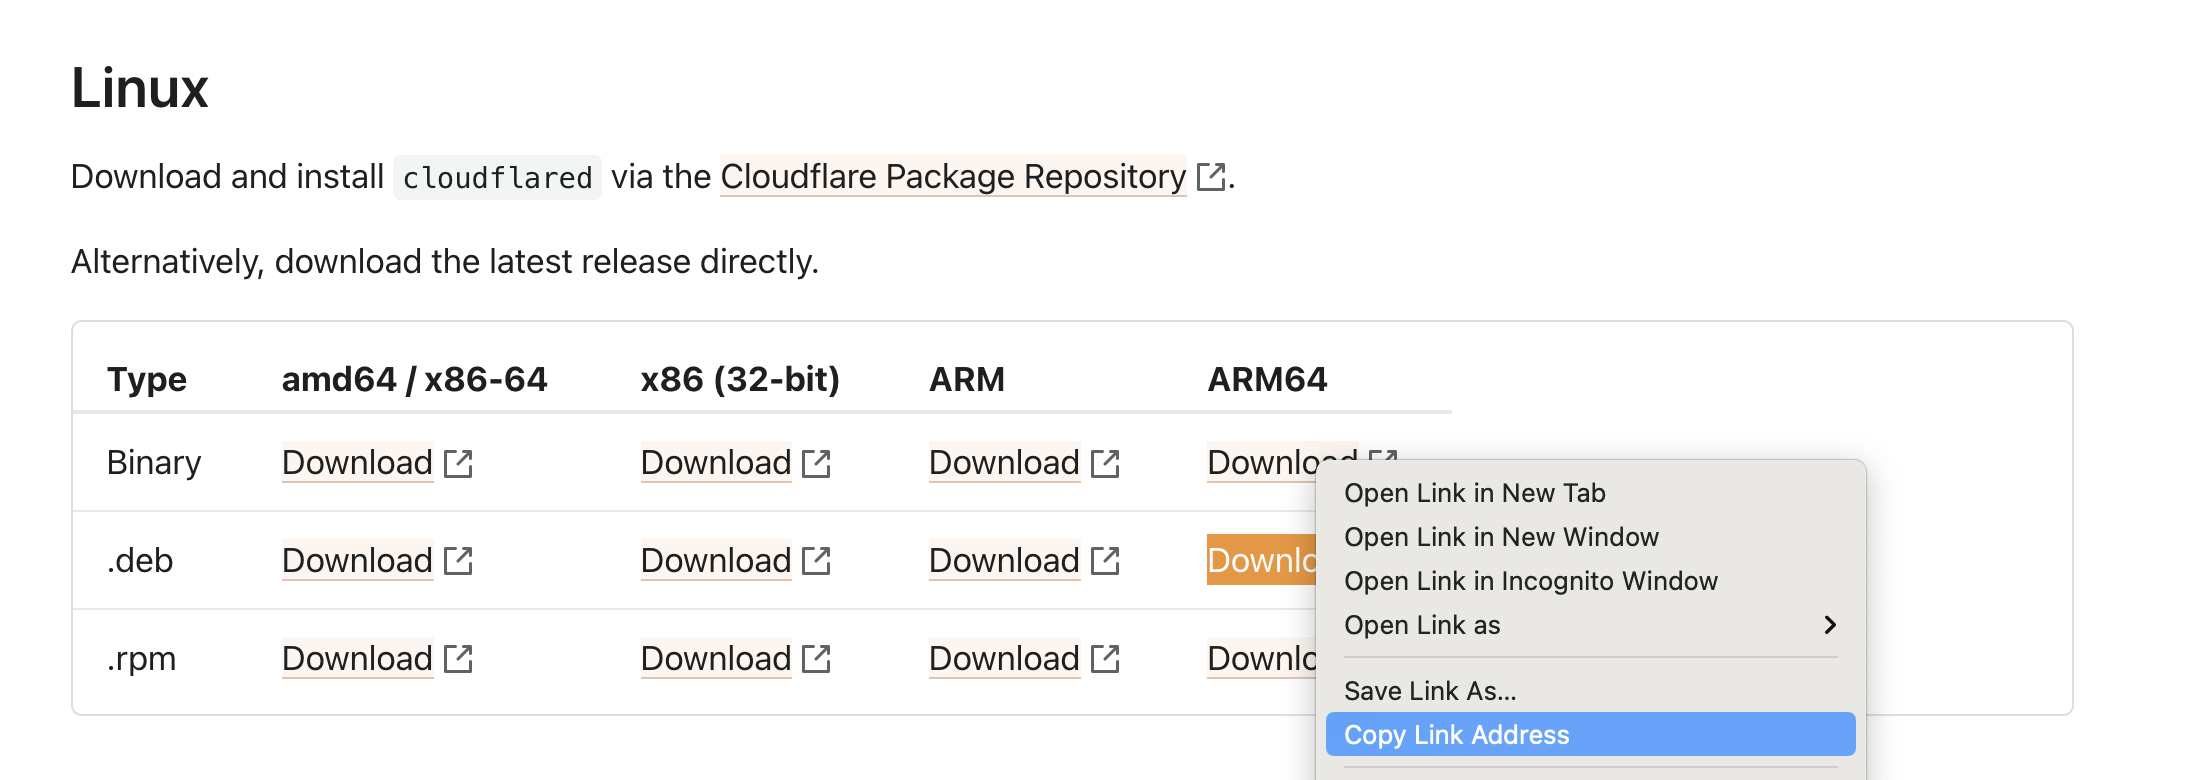
1. First, download cloudflared on your machine. Visit the downloads page to find the right package for your OS, right click it, and 'Copy Link Address'.
2. Use the deb package manager to install cloudflared on compatible machines. Be sure to use replace the .deb link you copied in the previous step. arm64 is used in this example.
wget -O cloudflared https://github.com/cloudflare/cloudflared/releases/latest/download/cloudflared-linux-arm643. You should now see cloudflared in your present working directory. You can type ls to list all files and verify. Once downloaded, move cloudflared to /usr/local/bin/ and change its permission so that your user can execute it. Once all thats done, run cloudflared -v to verify everything is working. It should output the version of cloudflared.
sudo mv cloudflared /usr/local/bin
sudo chmod +x /usr/local/bin/cloudflared
cloudflared -v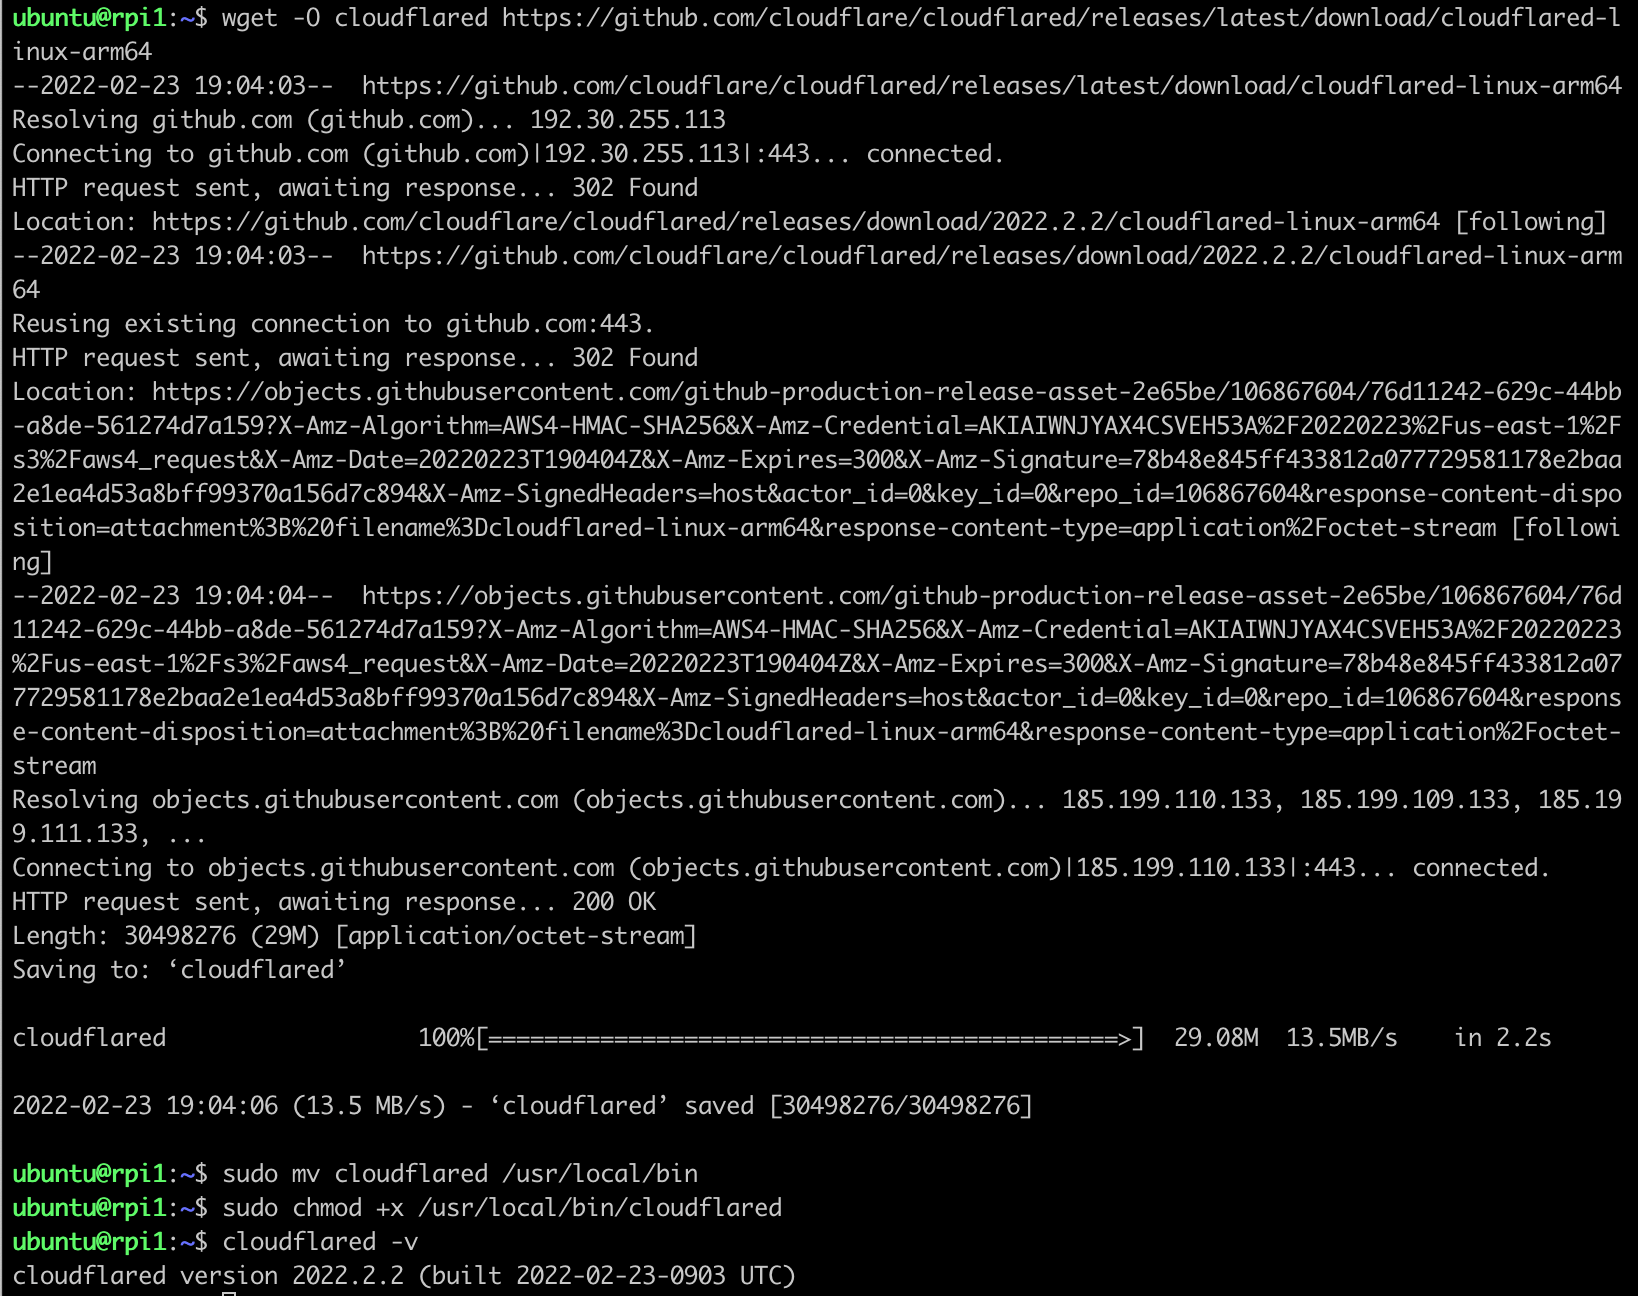
Login to Cloudflared
4. Now that we have Cloudflared installed let's create a tunnel. First you need to authenticate cloudflared with your cloudflare account.
Run cloudflared login , open the link that gets generated, login to your cloudflare account, and select the domain you would like to use to access your Urbit.

In our case, we will use a subdomain https://urbit.interestingsoup.com, so we would select the interestingsoup.com site.
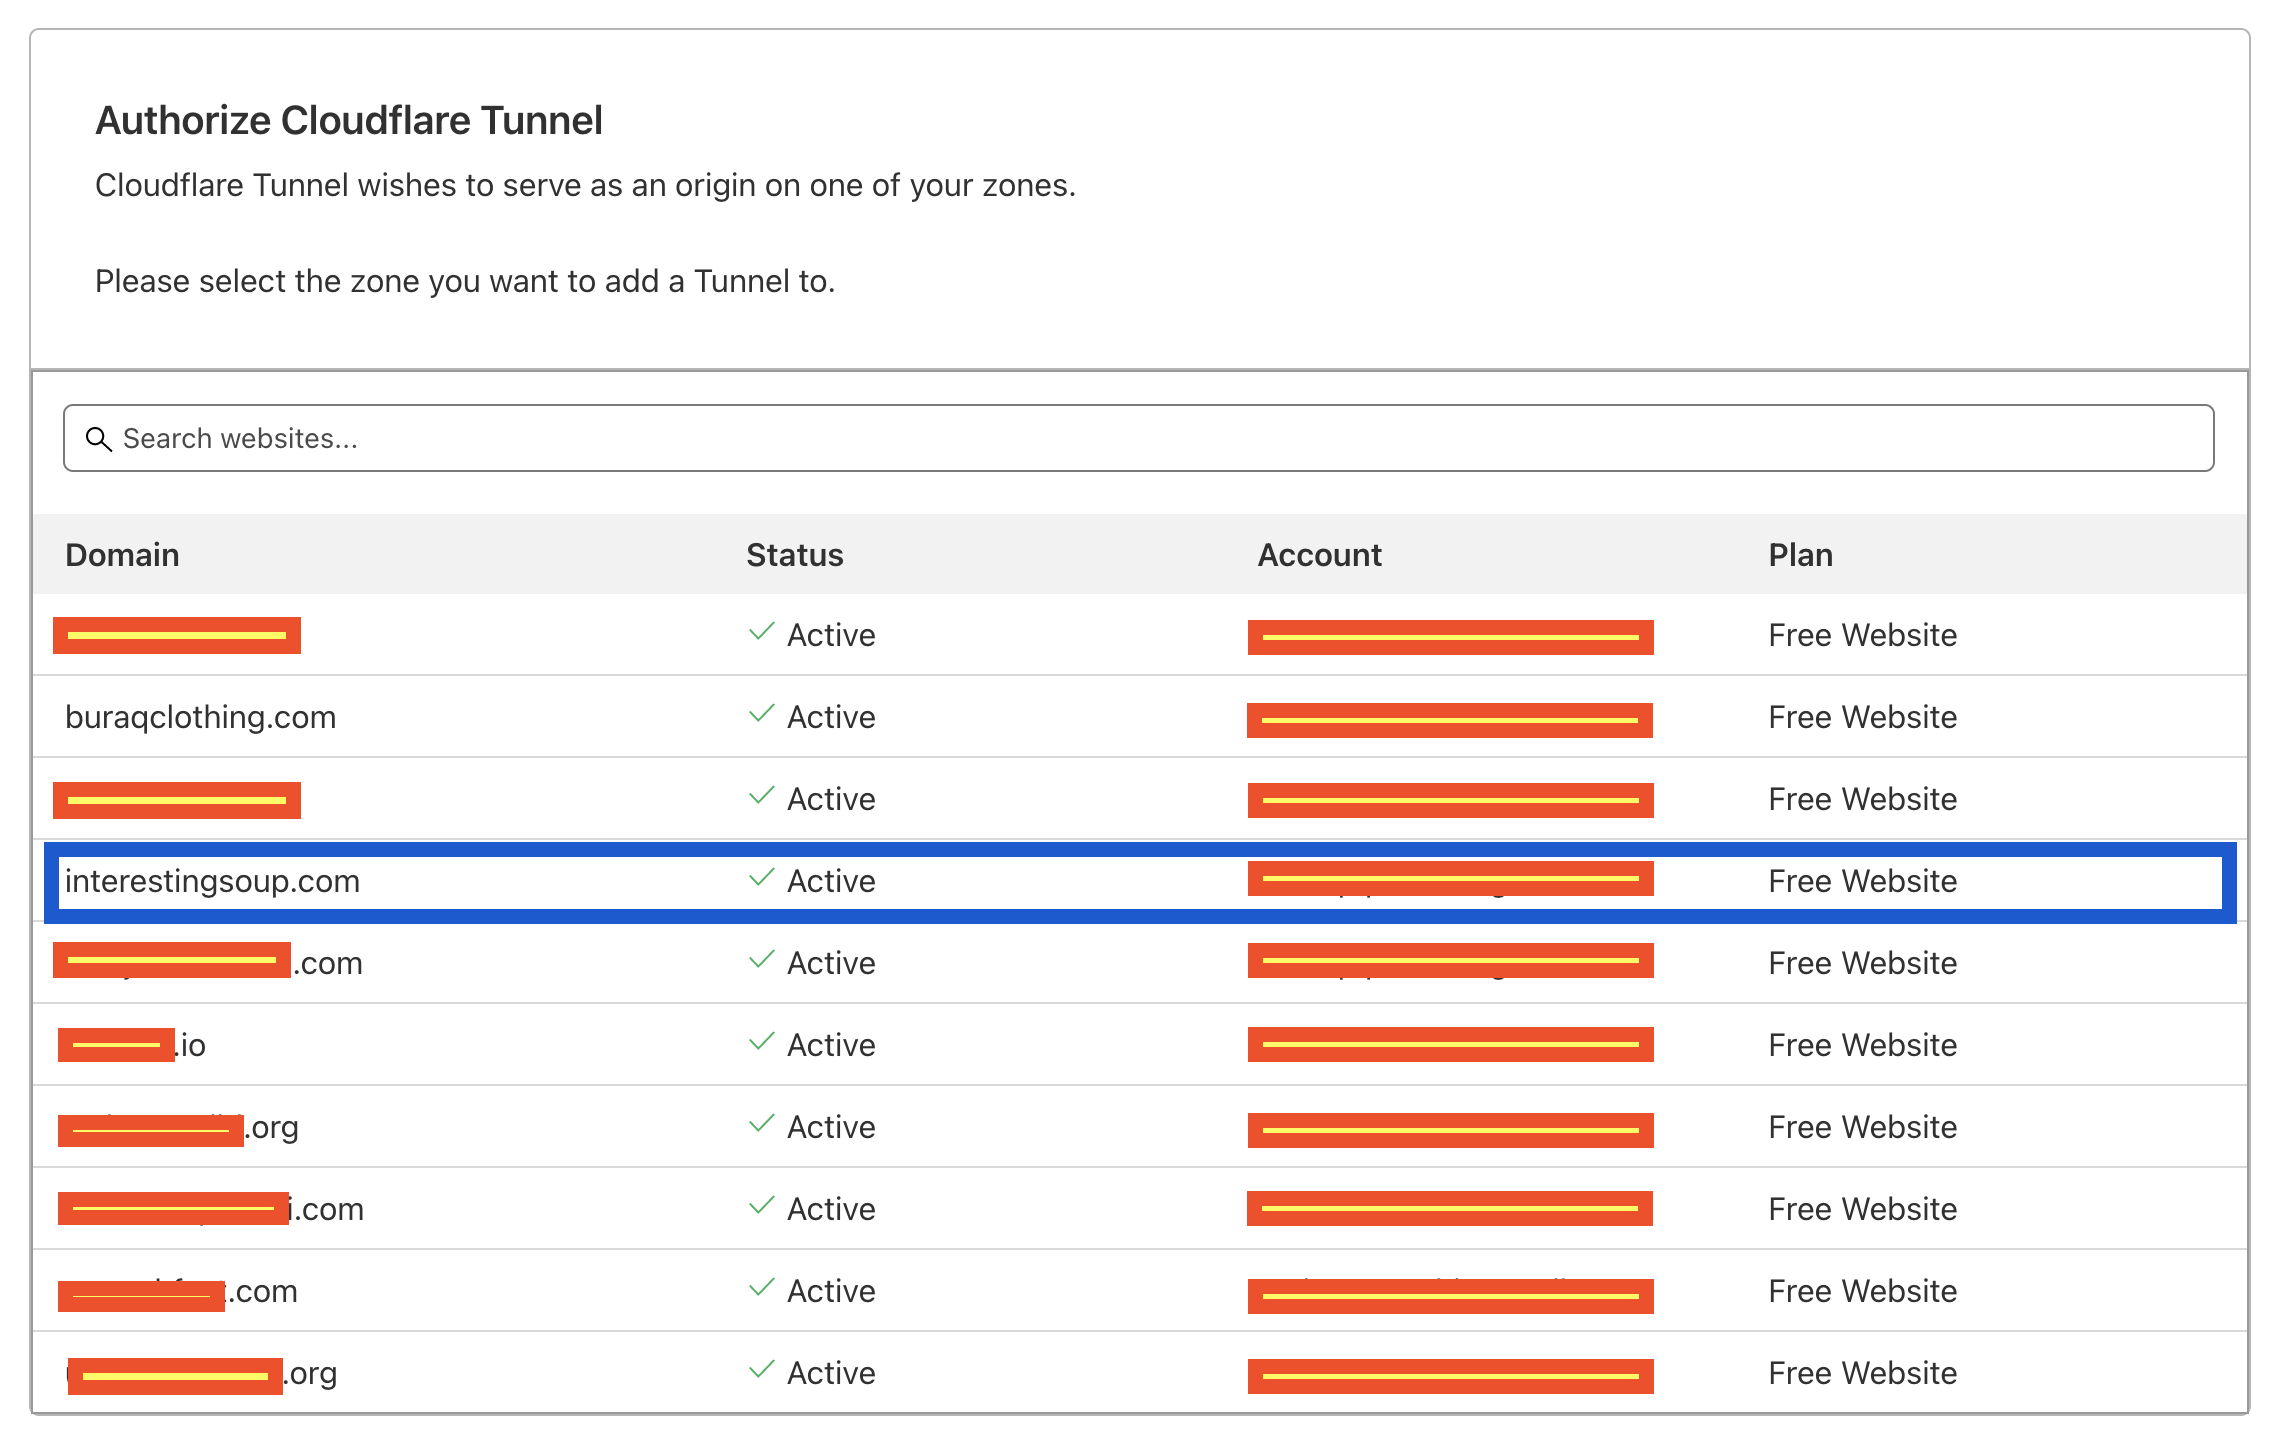
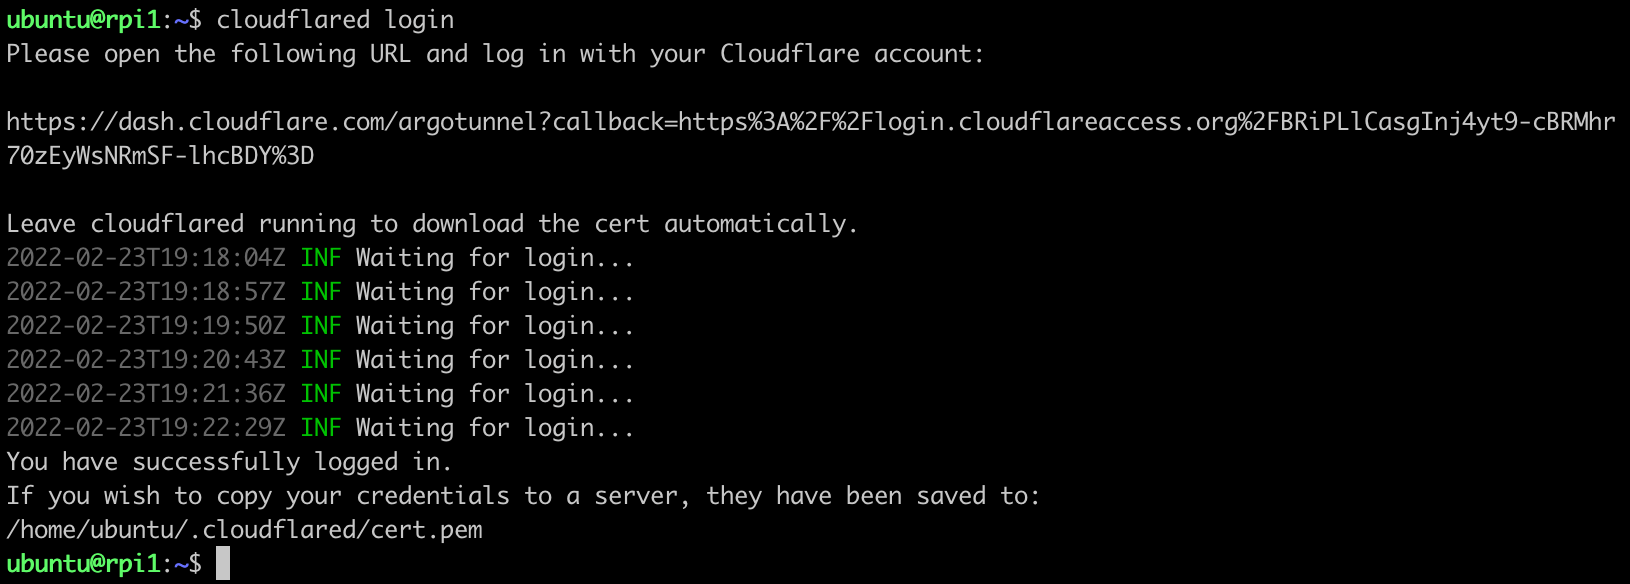
Once you click the domain, click authorize, and you should get a successful pop up on your browsers window and a successful message on the server you ran the login command on. Please note the path that is outputted in terminal, in our case it was /home/ubuntu/.cloudflared/cert.pem . This shows us where our tunnels, certs, and config will be saved.
Create Cloudflared Tunnel
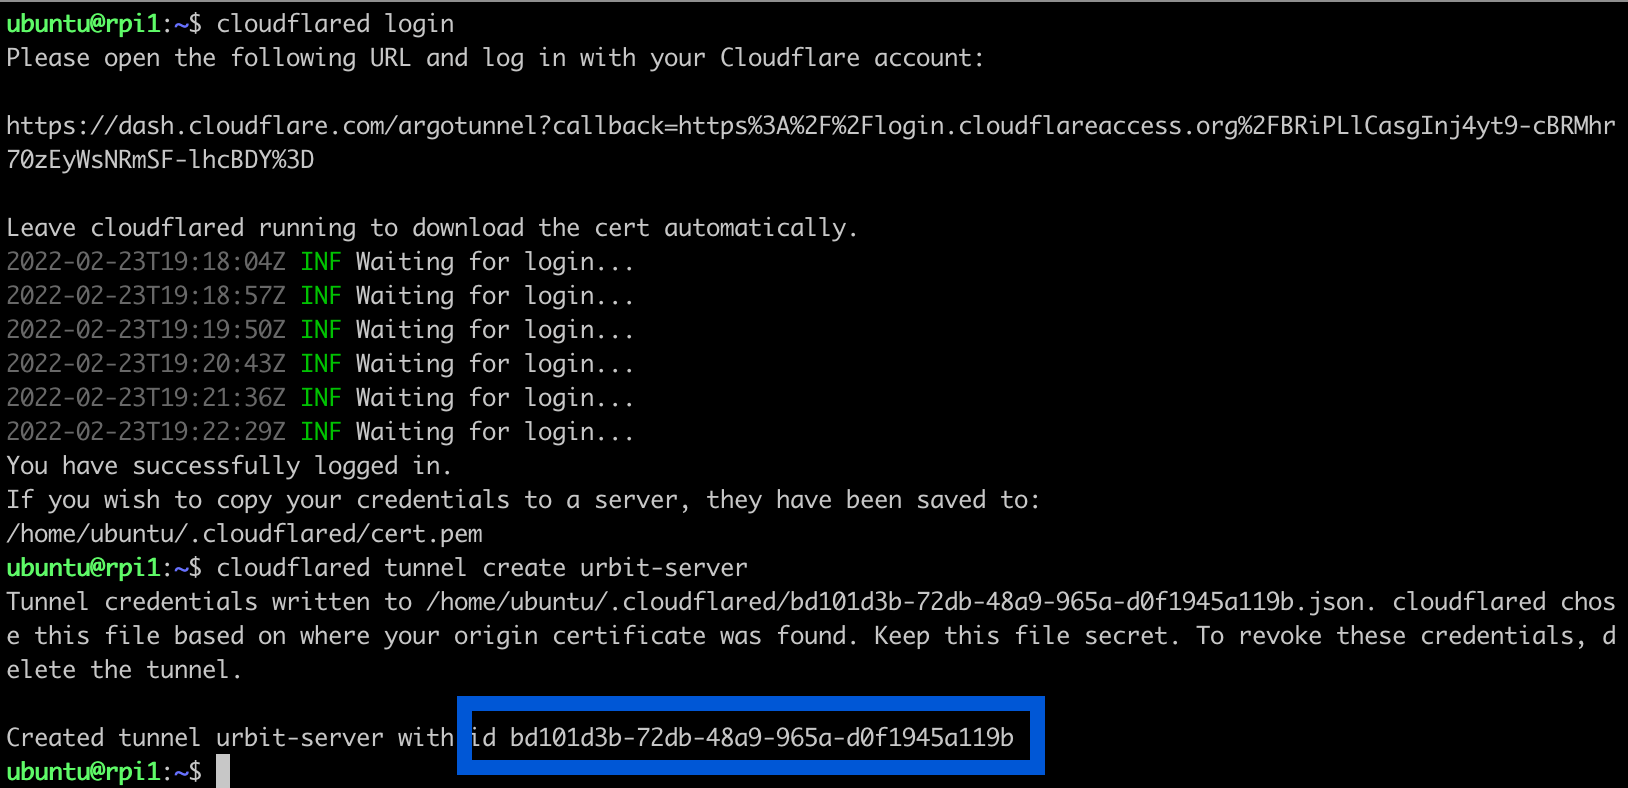
5. Now we create a tunnel, config file, and route from our domain to our tunnel.
Run cloudflared tunnel create urbit and take note of the tunnel id that was generated.
Now go to the .cloudflared directory (noted in the end of step 4) and create a config.yaml file. You can use nano, we use VIM.
cd .cloudflared/
vim config.yaml
In config.yaml, add the following lines replacing the tunnel ids with your tunnel id that was generated above and url being whatever IP you already use to access your Urbit:
url: http://localhost:80
tunnel: bd101d3b-72db-48a9-965a-d0f1945a119b
credentials-file: /home/ubuntu/.cloudflared/bd101d3b-72db-48a9-965a-d0f1945a119b.json:wq! ... whoops sorry thought I was in VIM for a bit. Ignore that. Please save and exit out of config.yaml file.
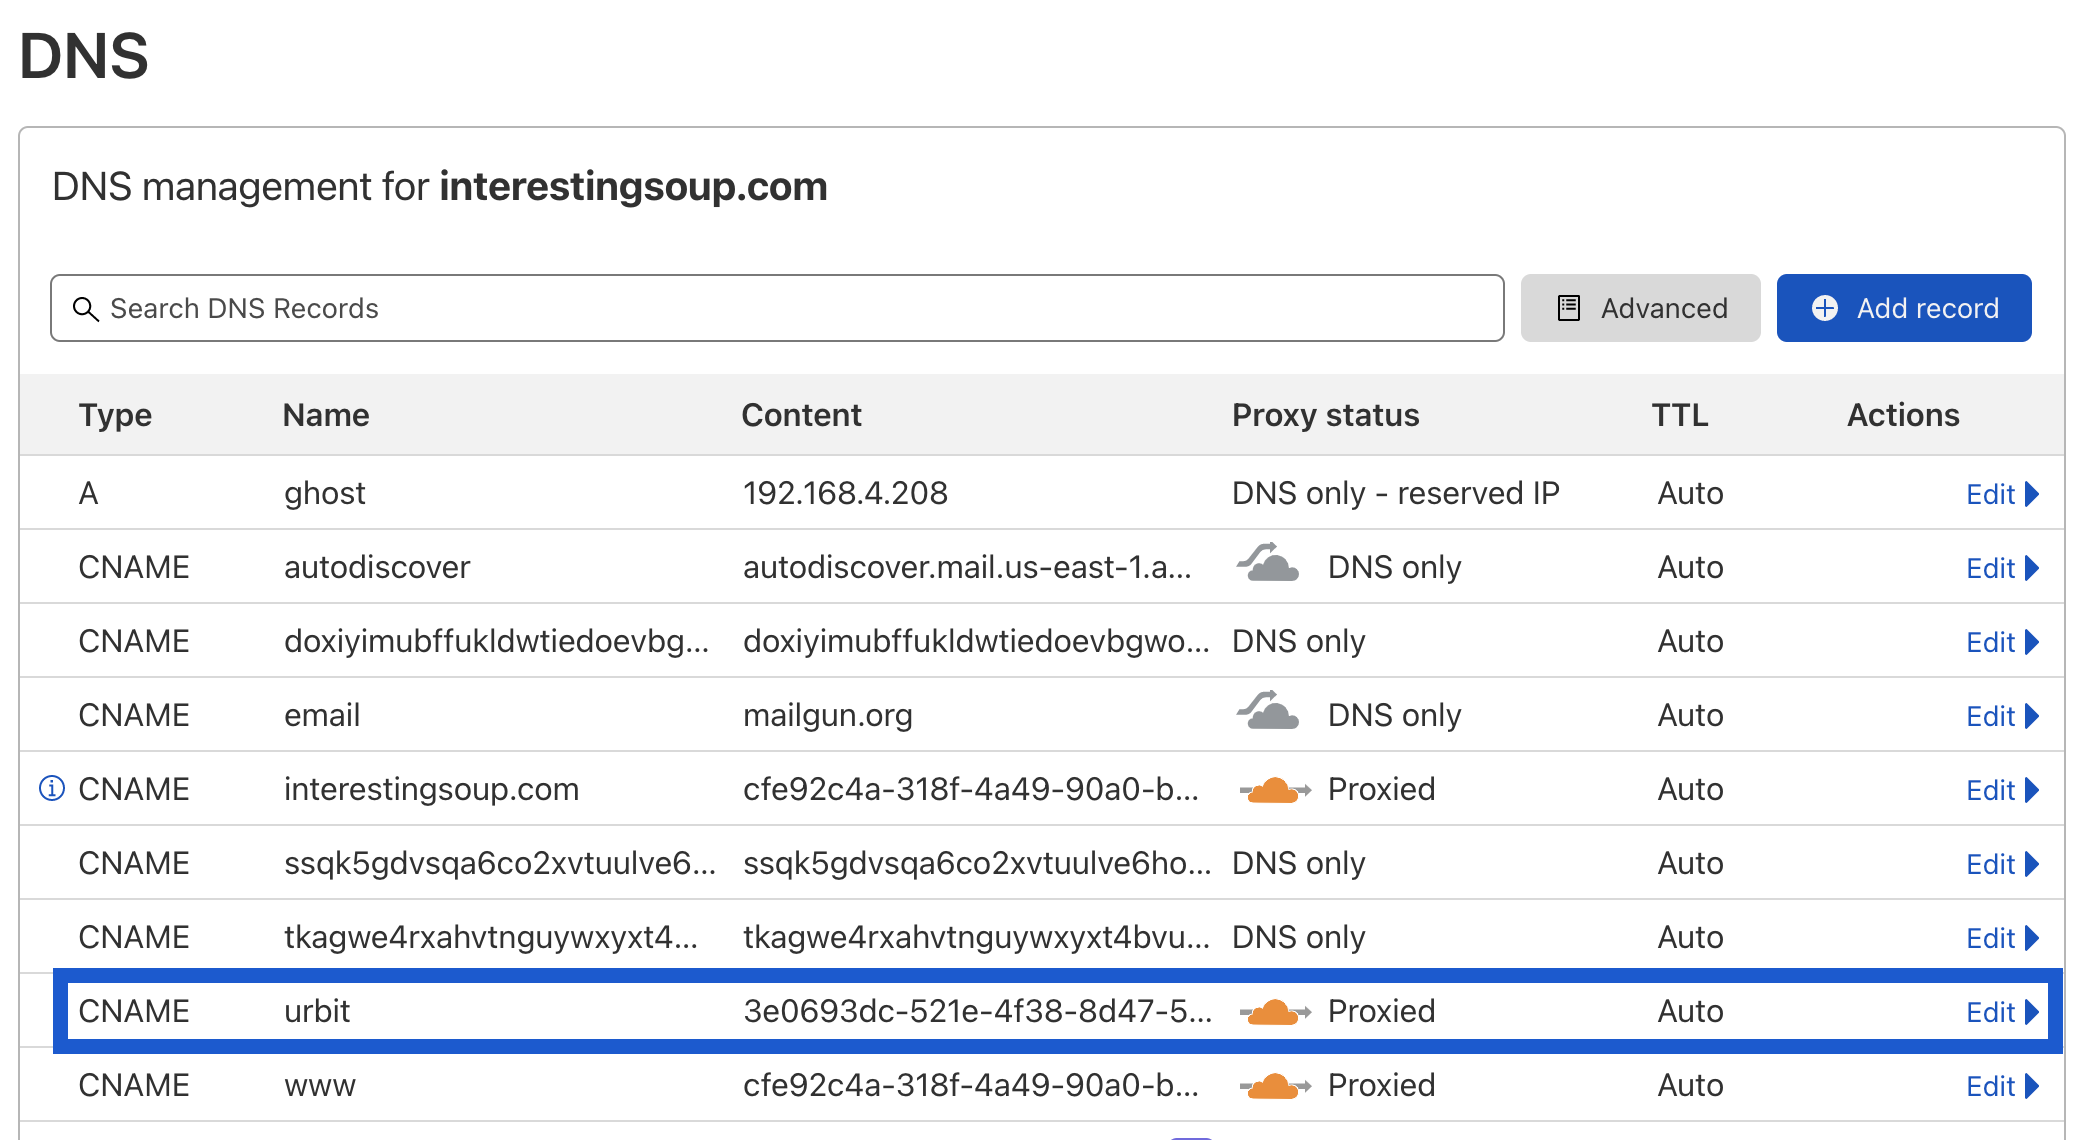
Lastly, we need to add a CNAME record to our DNS, which will allow our tunnel to be accessed with our domain. Usually this is done manually but since we have cloudflared authenticated with cloudflare, we have the ability to programmatically make these changes. Simply run the command below replacing urbit.interestingsoup.com with the domain you chose in step 4. In our case we chose to go with a subdomain because our domain is used for our blog.
cloudflared tunnel route dns urbit urbit.interestingsoup.com
If all goes well you should see a DNS record created in your Cloudflare DNS settings online:
Run Cloudflared Tunnel
Awesome, you made it this far! With all that out the way, you are ready to rock! Let's run that tunnel and get ready to Urbit all day long ~ !
cloudflared tunnel runIf that does not work, you may need to specify the location of your config file:
cloudflared tunnel --config config.yaml run urbit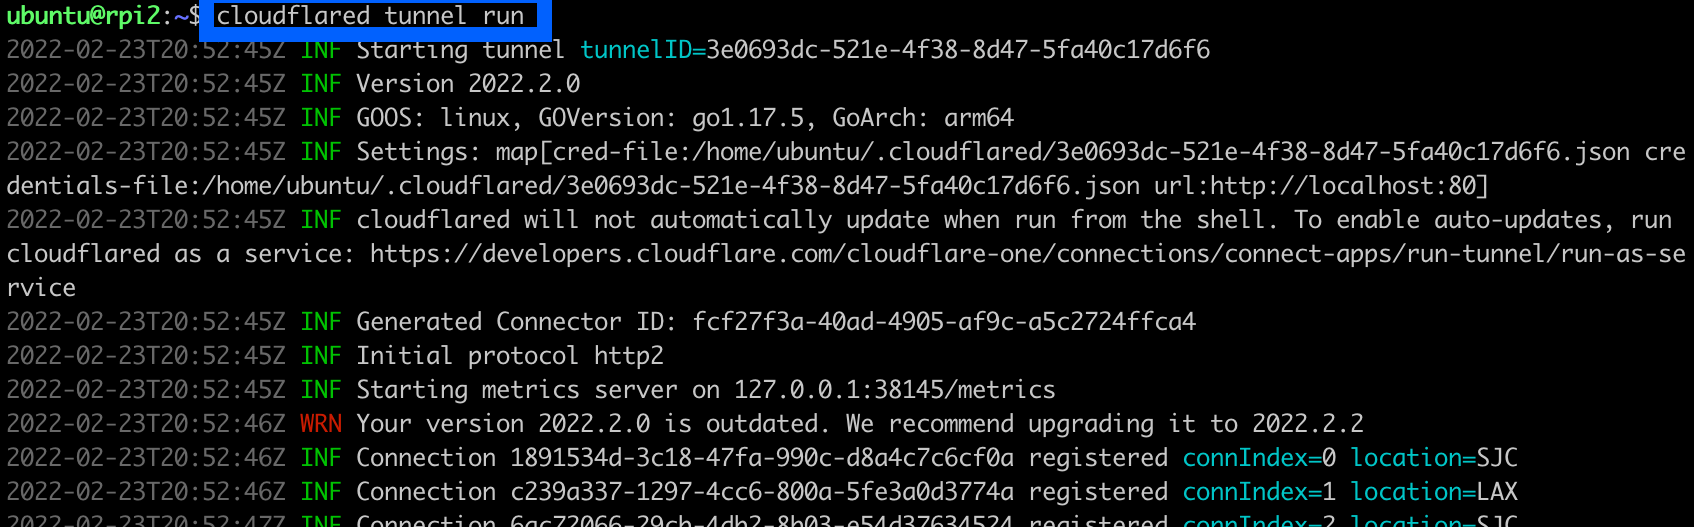
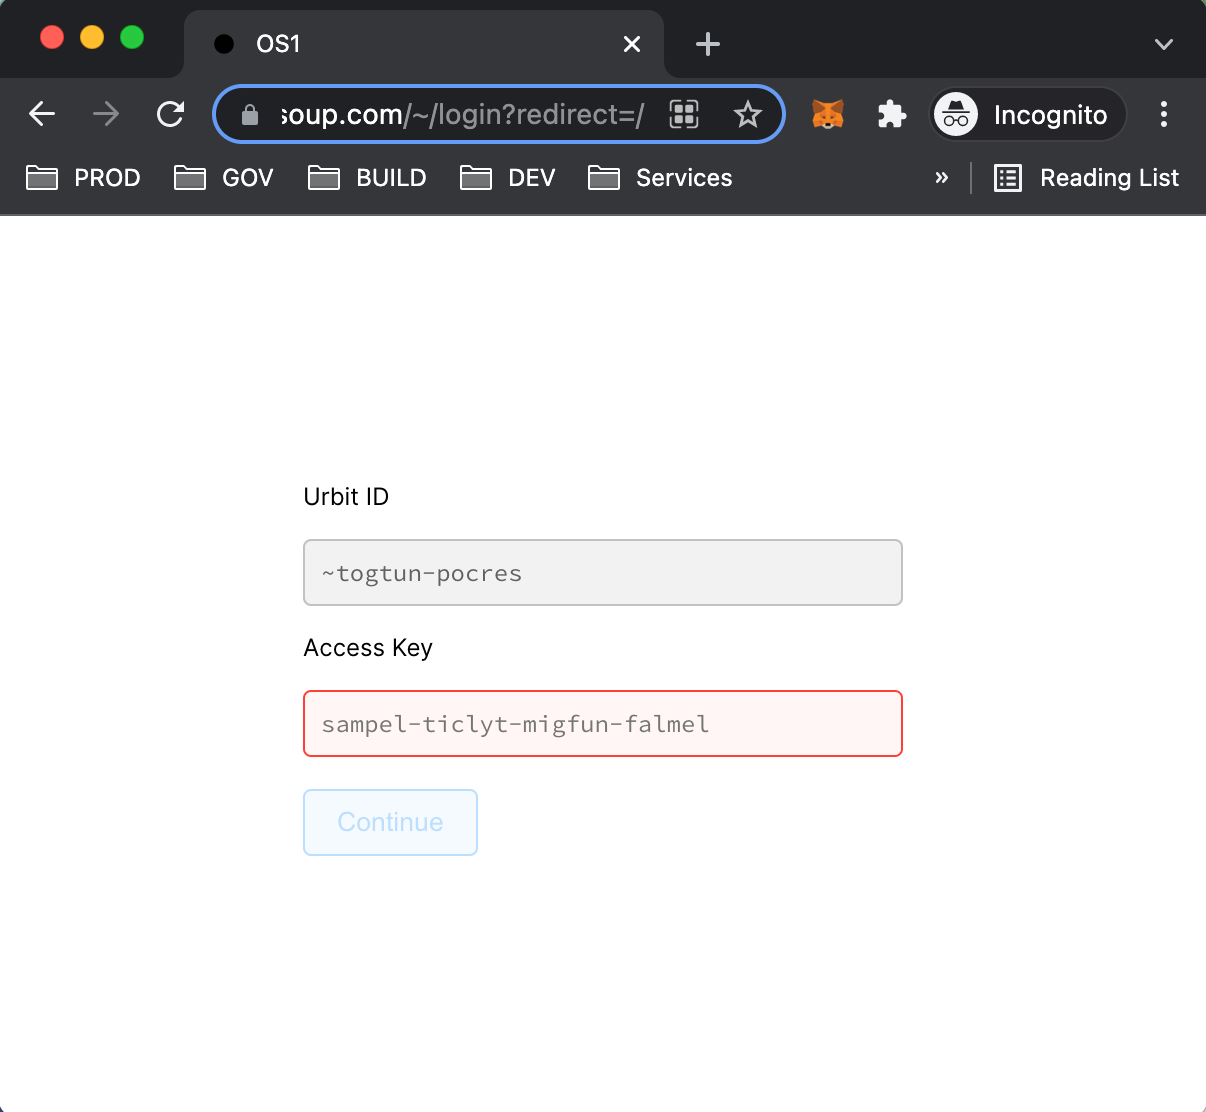
With the tunnel running, visit your domain and see if everything is working. You should see your Landscape login screen. 🎉
You should now be able to access Urbit, externally, without VPN, and with HTTPS.
Creating cloudflared.service
We are basically done but if you exit out of the command above, your tunnel also closes. To have your tunnel run in the background and survive reboots, we should create a service for our cloudflared tunnel so that whenever our server starts, our tunnel also starts in the background.
sudo cloudflared --config config.yaml service install
sudo systemctl start cloudflared
sudo systemctl status cloudflared
sudo systemctl enable cloudflaredHope you found this useful as we sure did. If you have any questions or are interested in receiving a planet, you can contact us on our Urbit group InterestingSoup: ~togtun-pocres/interestingsoup , DM me: ~togtun-pocres , or email [email protected] .

![[n00b guide] Flashing Flipper Zero with RogueMaster CFW](/content/images/size/w720/2022/07/rogue.png)

Comments ()