Using Aqara Magic Cube with Pushcut | Home Assistant and Node-RED
In this guide I will show you guys how I am using the Aqara magic cube and Pushcut to control my smart home. My house runs on Homekit so majority of my scenes are already configured in the Home app. The benefits of this is that I do not need to re-pair my Homekit accessories to Home Assistant, I can invoke any HomeKit accessory with a simple cURL request, and I get to use Shortcuts App's simple UI/UX to create iOS automations on the fly.
Requirements:
- Zigbee USB Gateway
- Aqara Magic Cube
- Home Assistant
- Node-RED
- deConz Add-on
- Pushcut iOS App, w/ Automation Server purchase.
1) Install or launch deConz add-on on Home Assistant
Attach Zigbee USB Gateway to your system that is running HomeAssistant. (I am running Home Assistant on a Raspberry Pi 4 with a ConBee II Universal Zigbee USB Gateway.
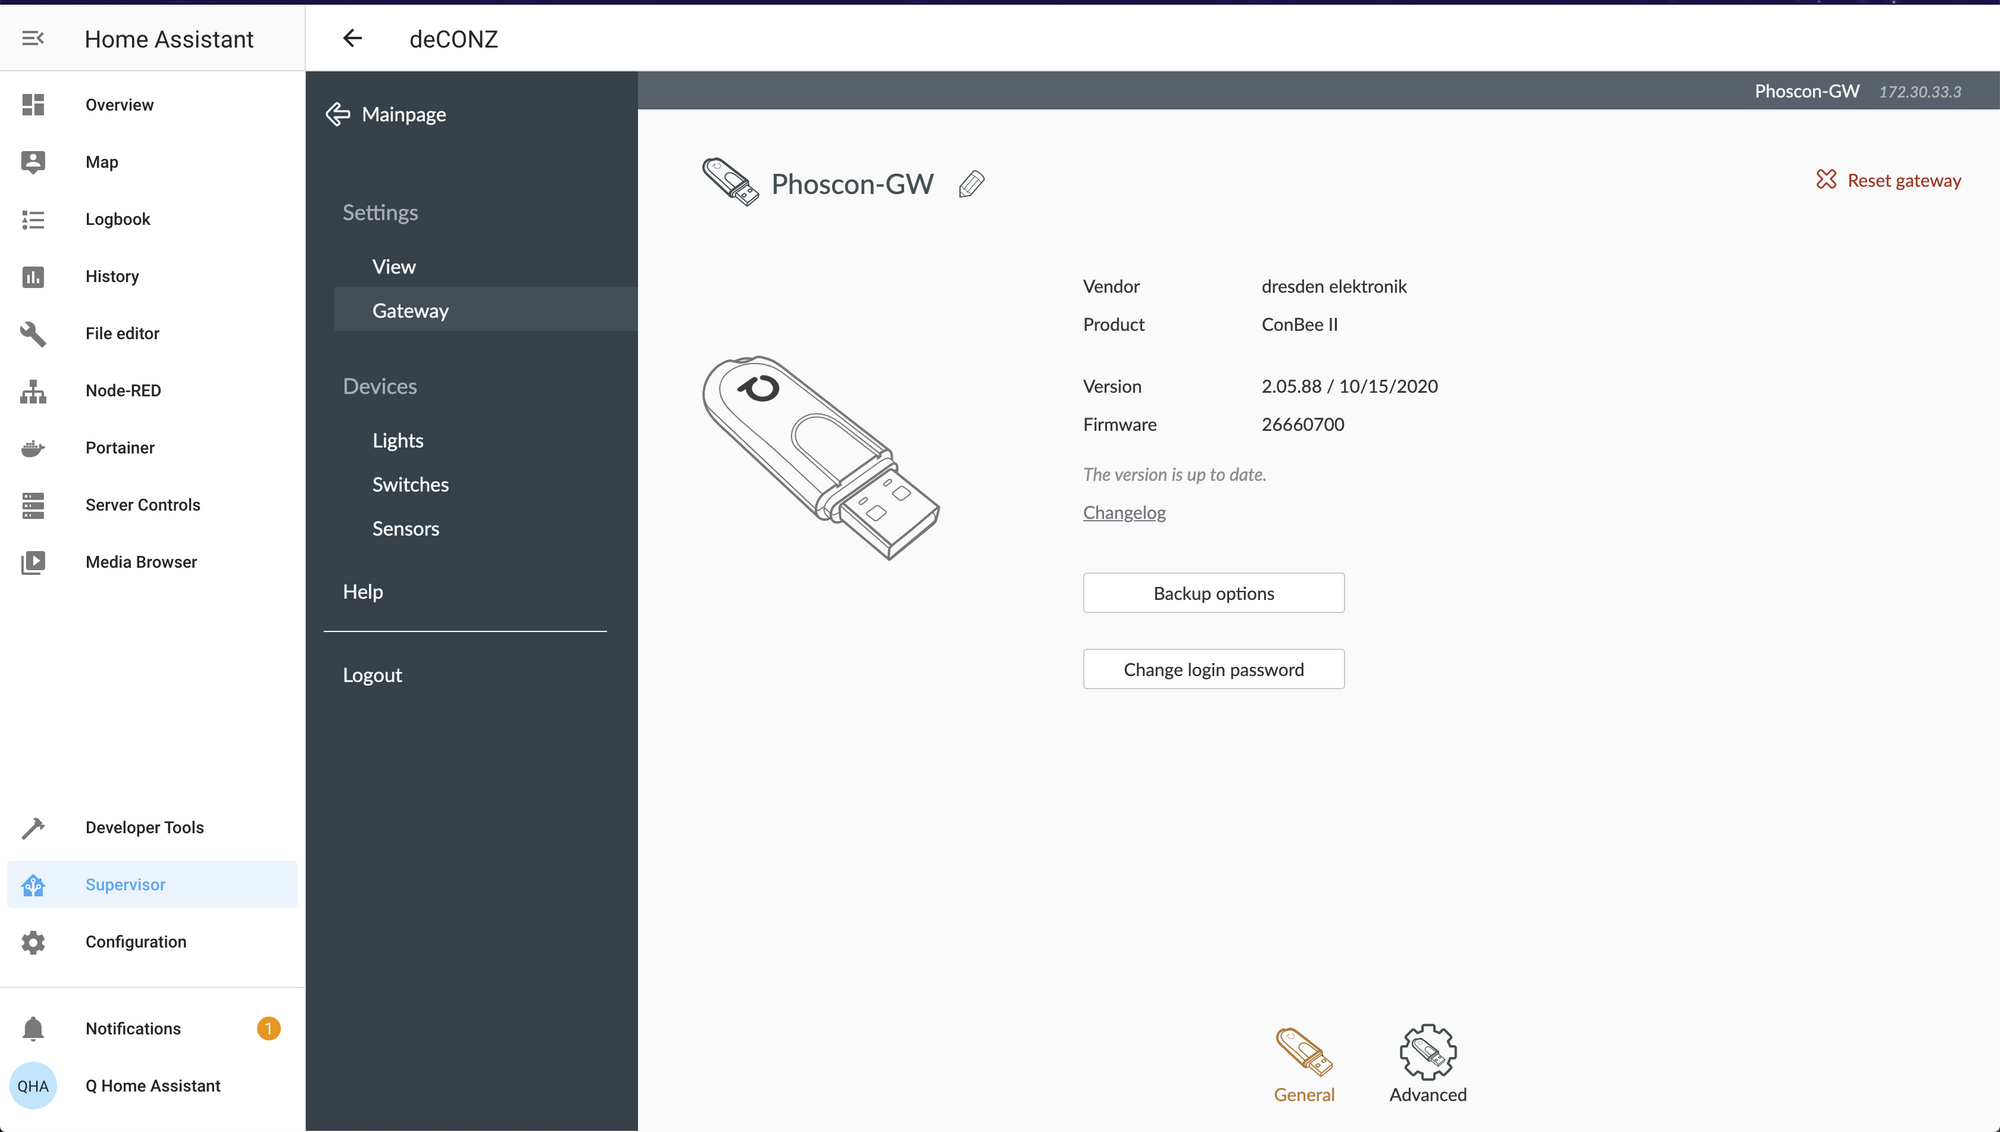
2) After deConz is launched, click the Phoscon button, and create an account.

3) Once logged in to Phoscon, click the menu bar icon on the top left, select 'Gateway', and ensure your Zigbee gateway is connected and configured.
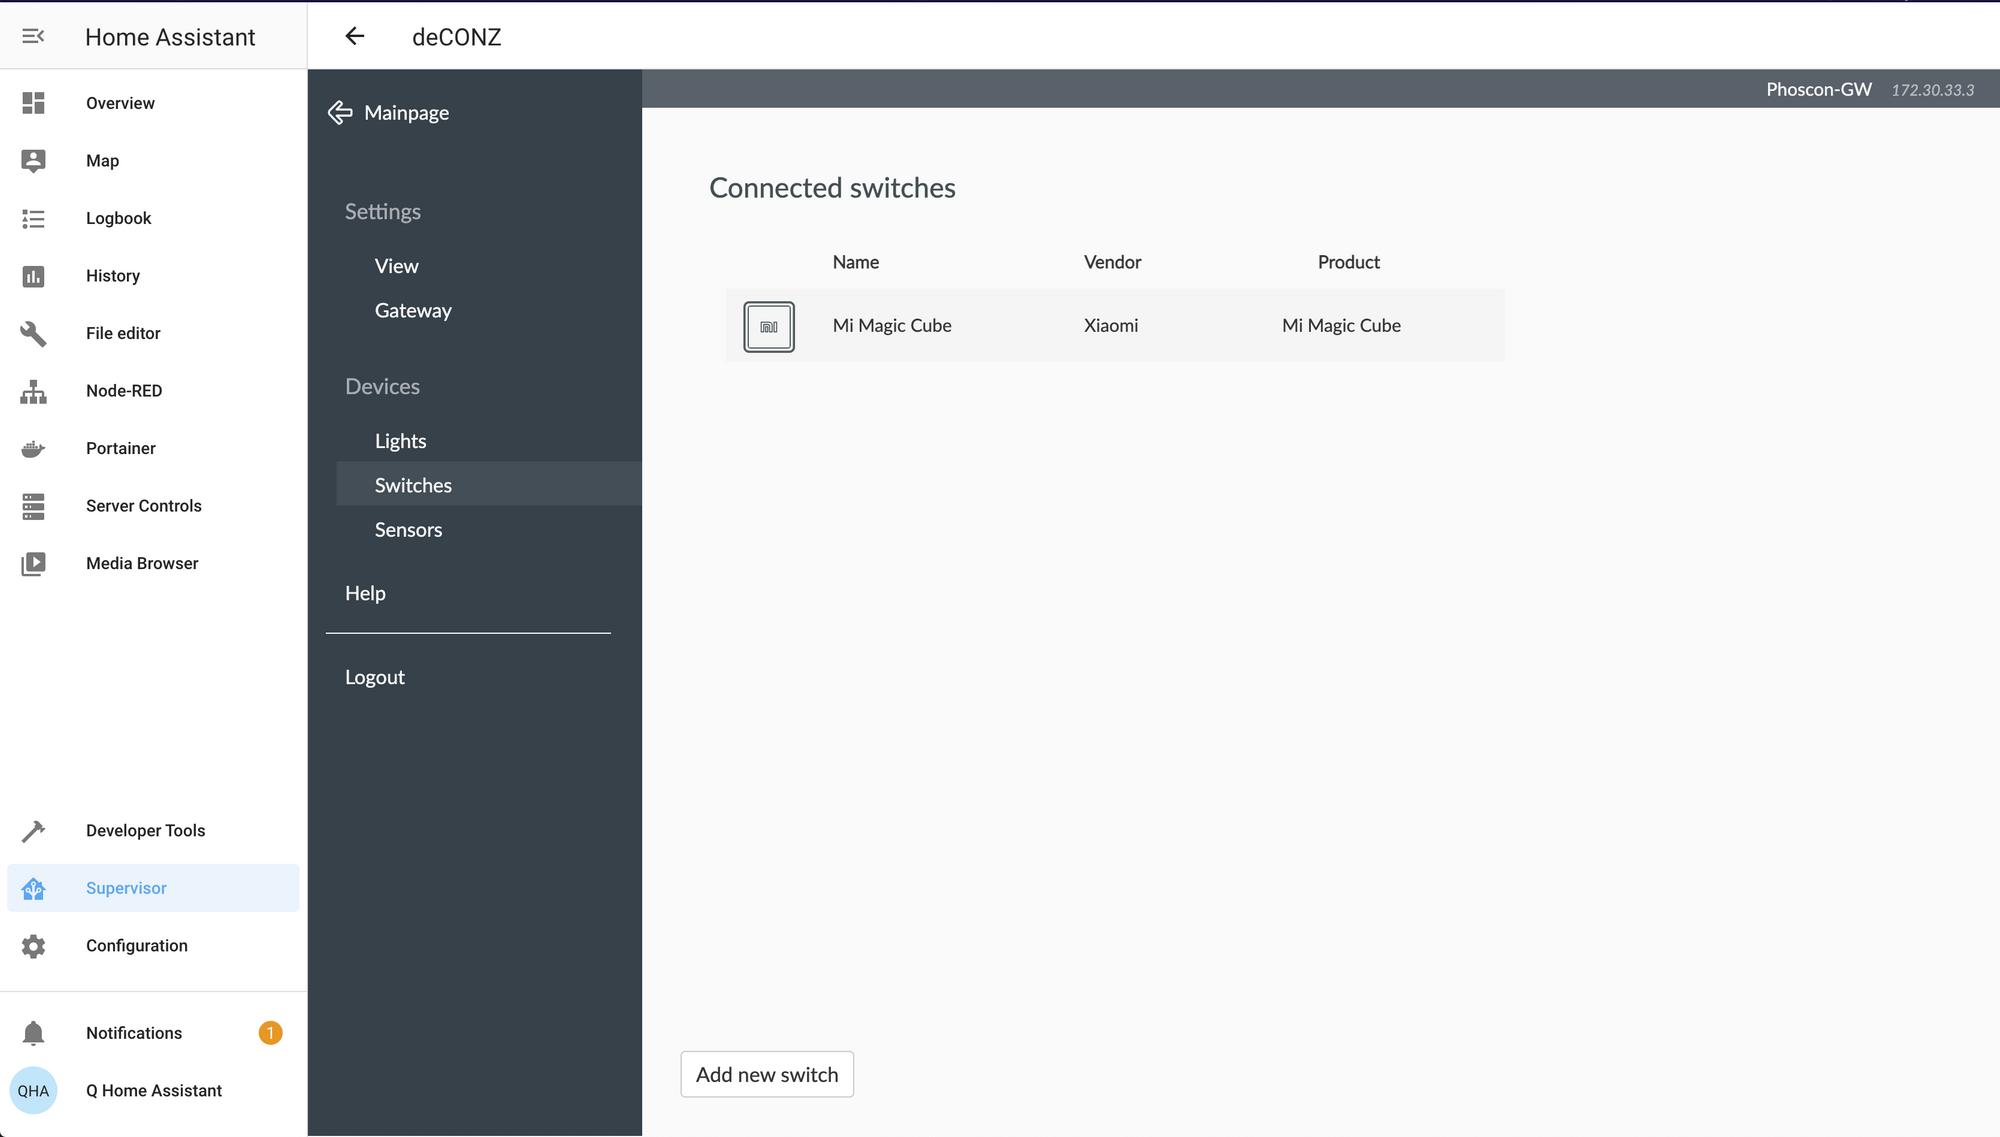
4) Click the menu bar icon on the top left, select 'Switches' and connect your Aqara magic cube to your Zigbee Gateway.
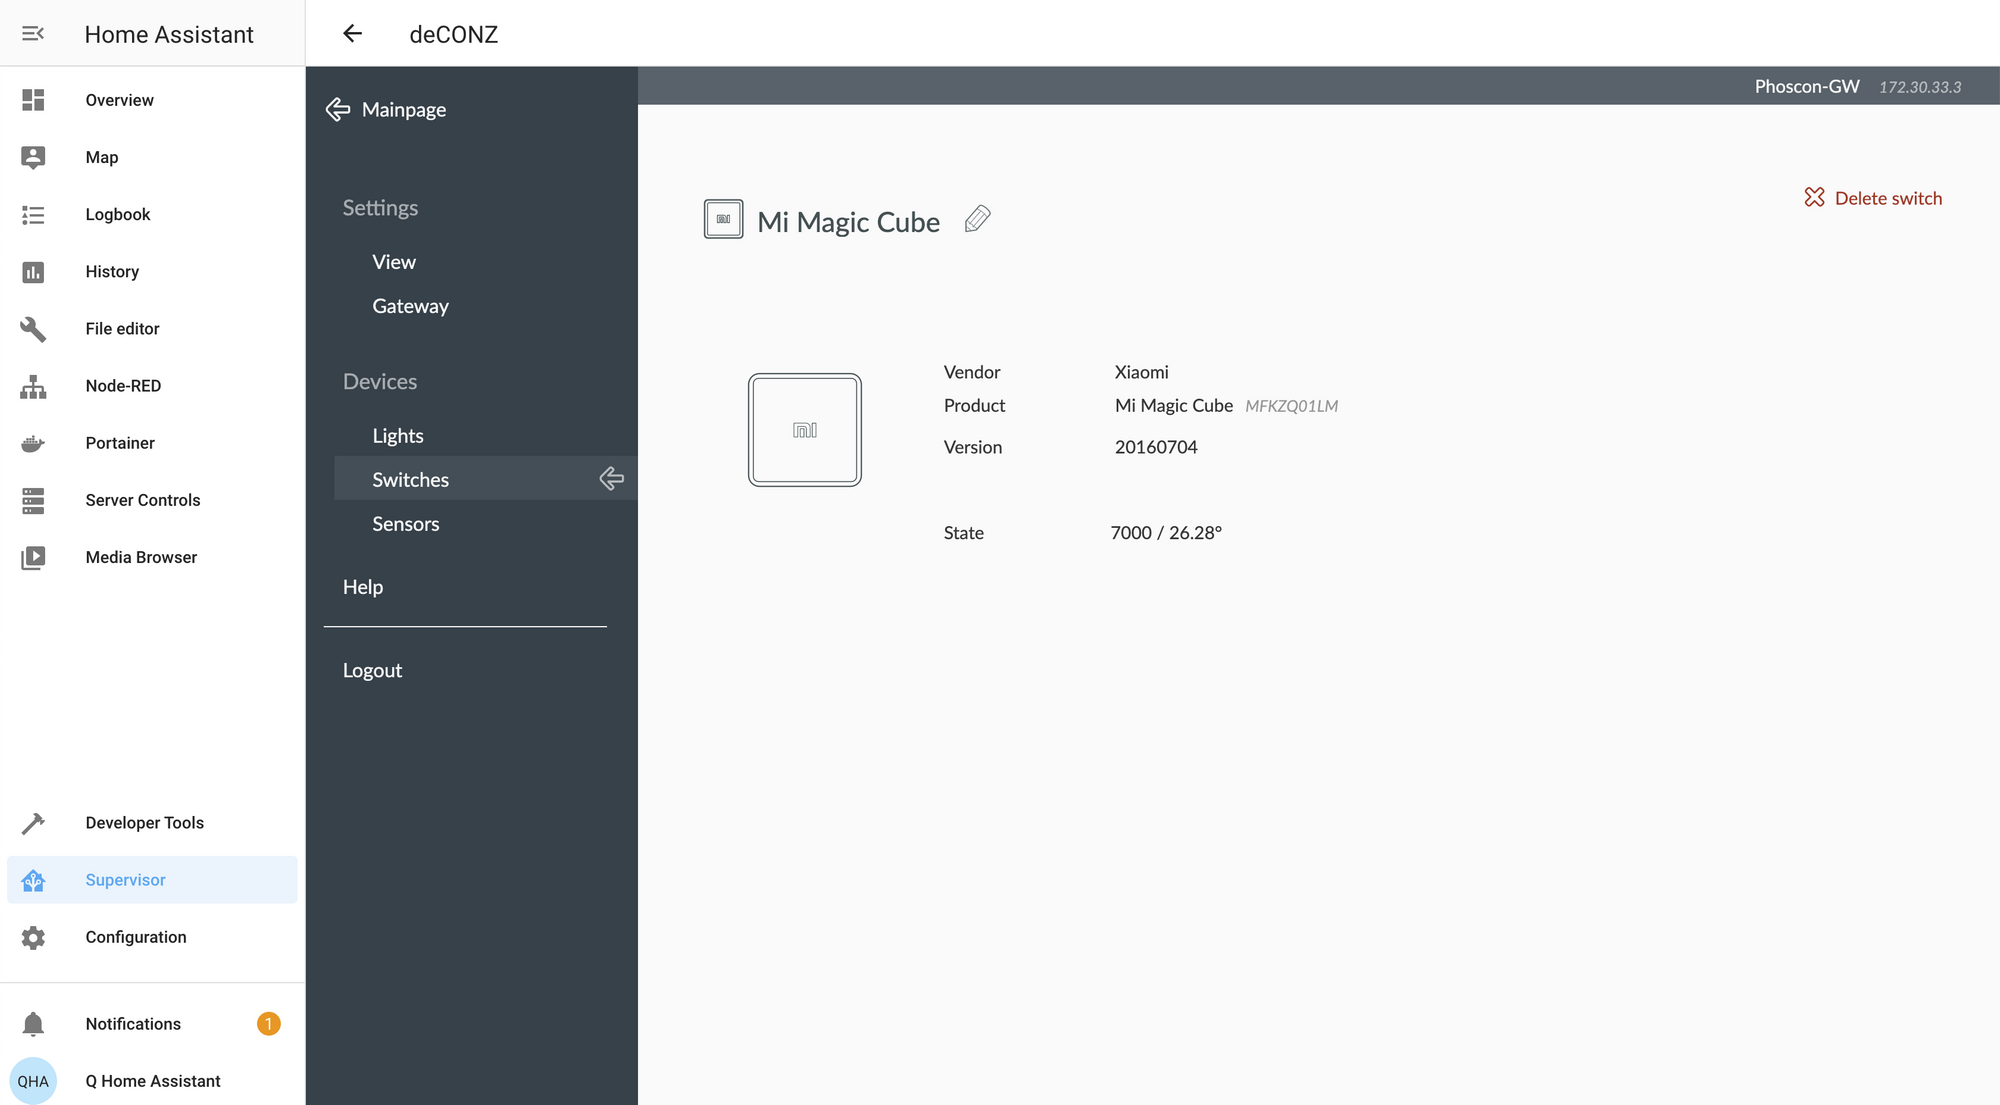
5) Click the Aqara magic cube in the switches menu and ensure you are receiving the commands from the cube by seeing the 'state' value change.
6) Switch back to Home Assistant, go to Developer Tools > Events, and at the bottom in 'Listen to events' subscribe to the 'deconz_event'.
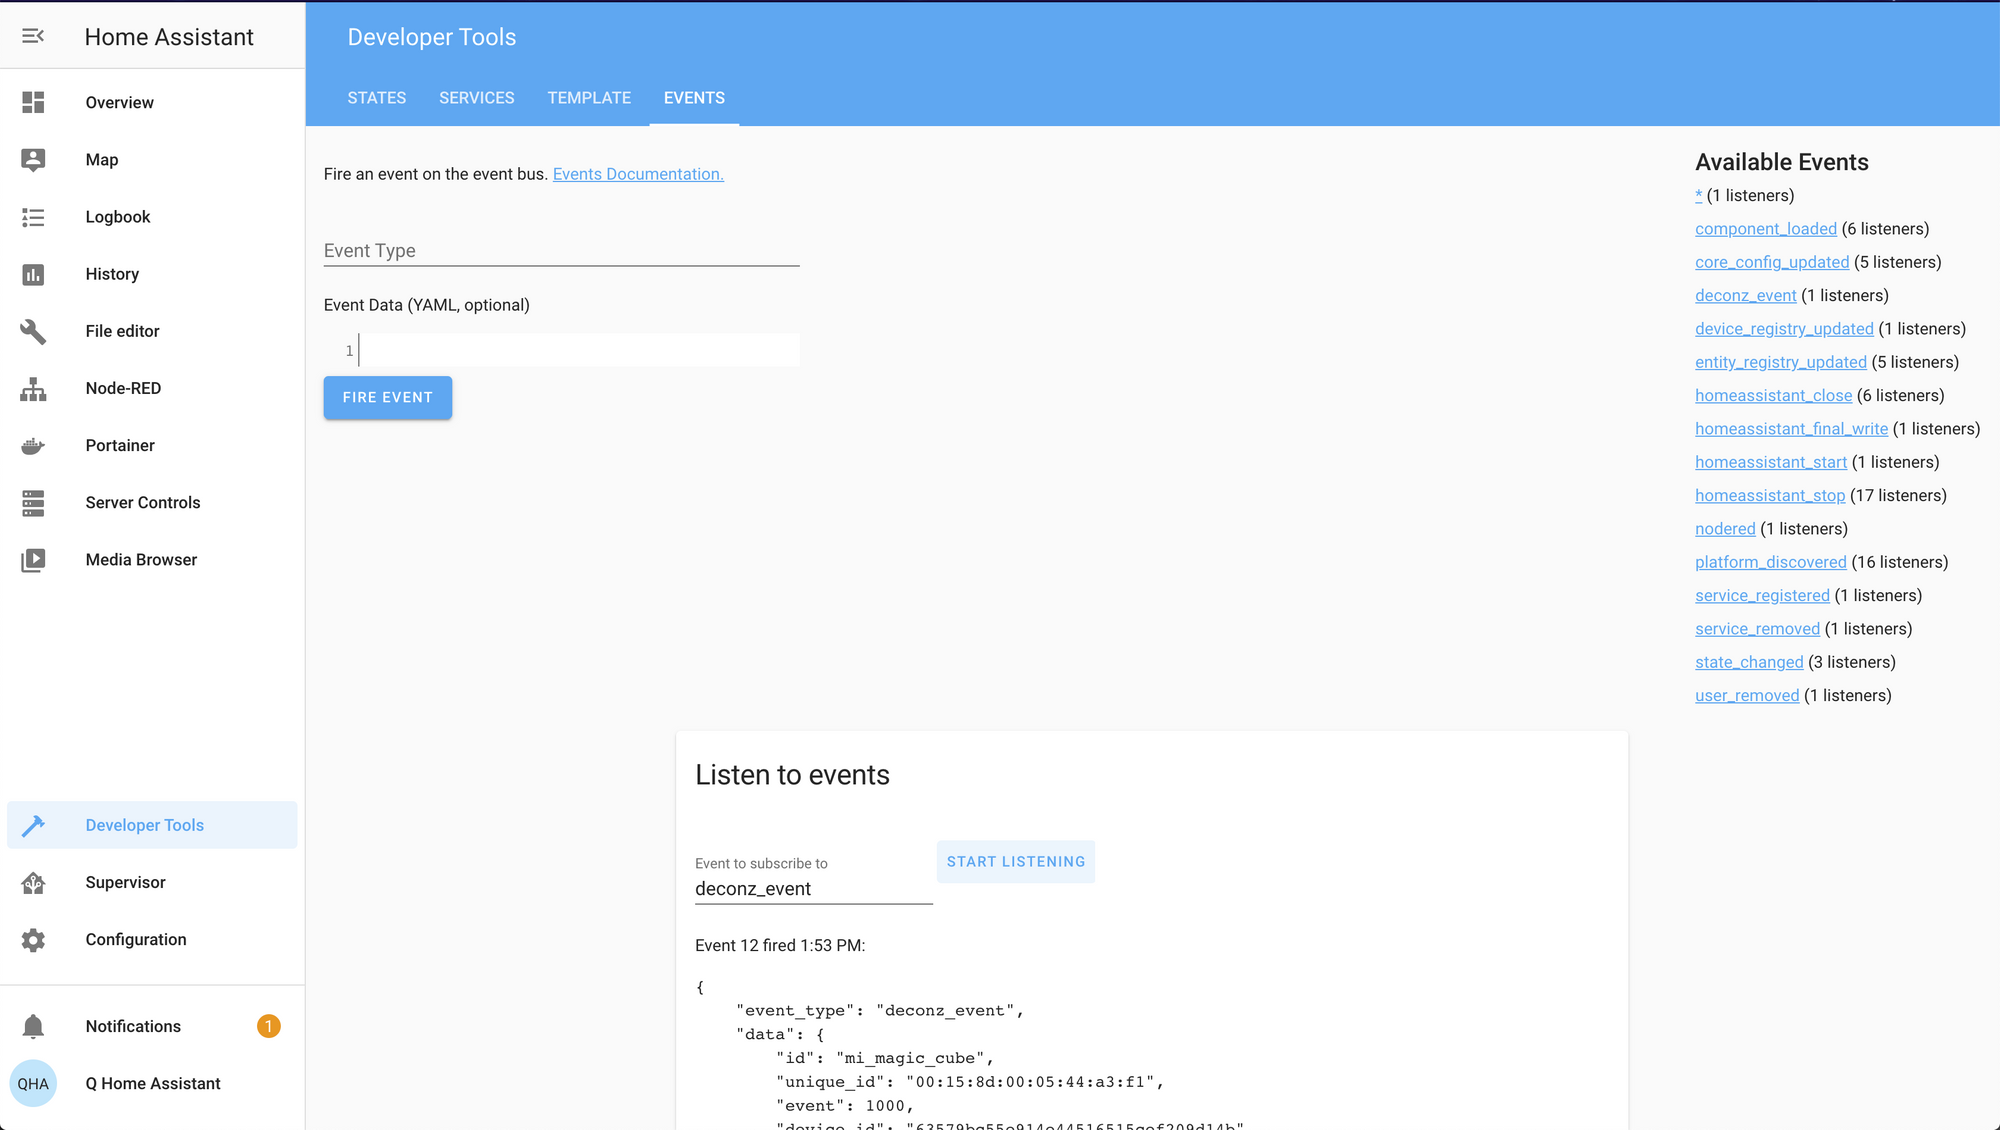
This is the last verification we need to ensure that our Aqara magic cube is for sure communicating all commands to Home Assistant. Twist, flip, push, double tap, shake, and throw the cube into the air and see all commands being received in Home Assistant as 'deconz_event'.
7) Install or launch Node-RED add-on in Home Assistant.
8) Create a new flow and drag the events: all node to your flow. Select the node to edit. Name: what you prefer, mines 'Cube', Server: Home Assistant, Event Type: deconz_event. Select the box, 'Output only after Home Assistant is running'.
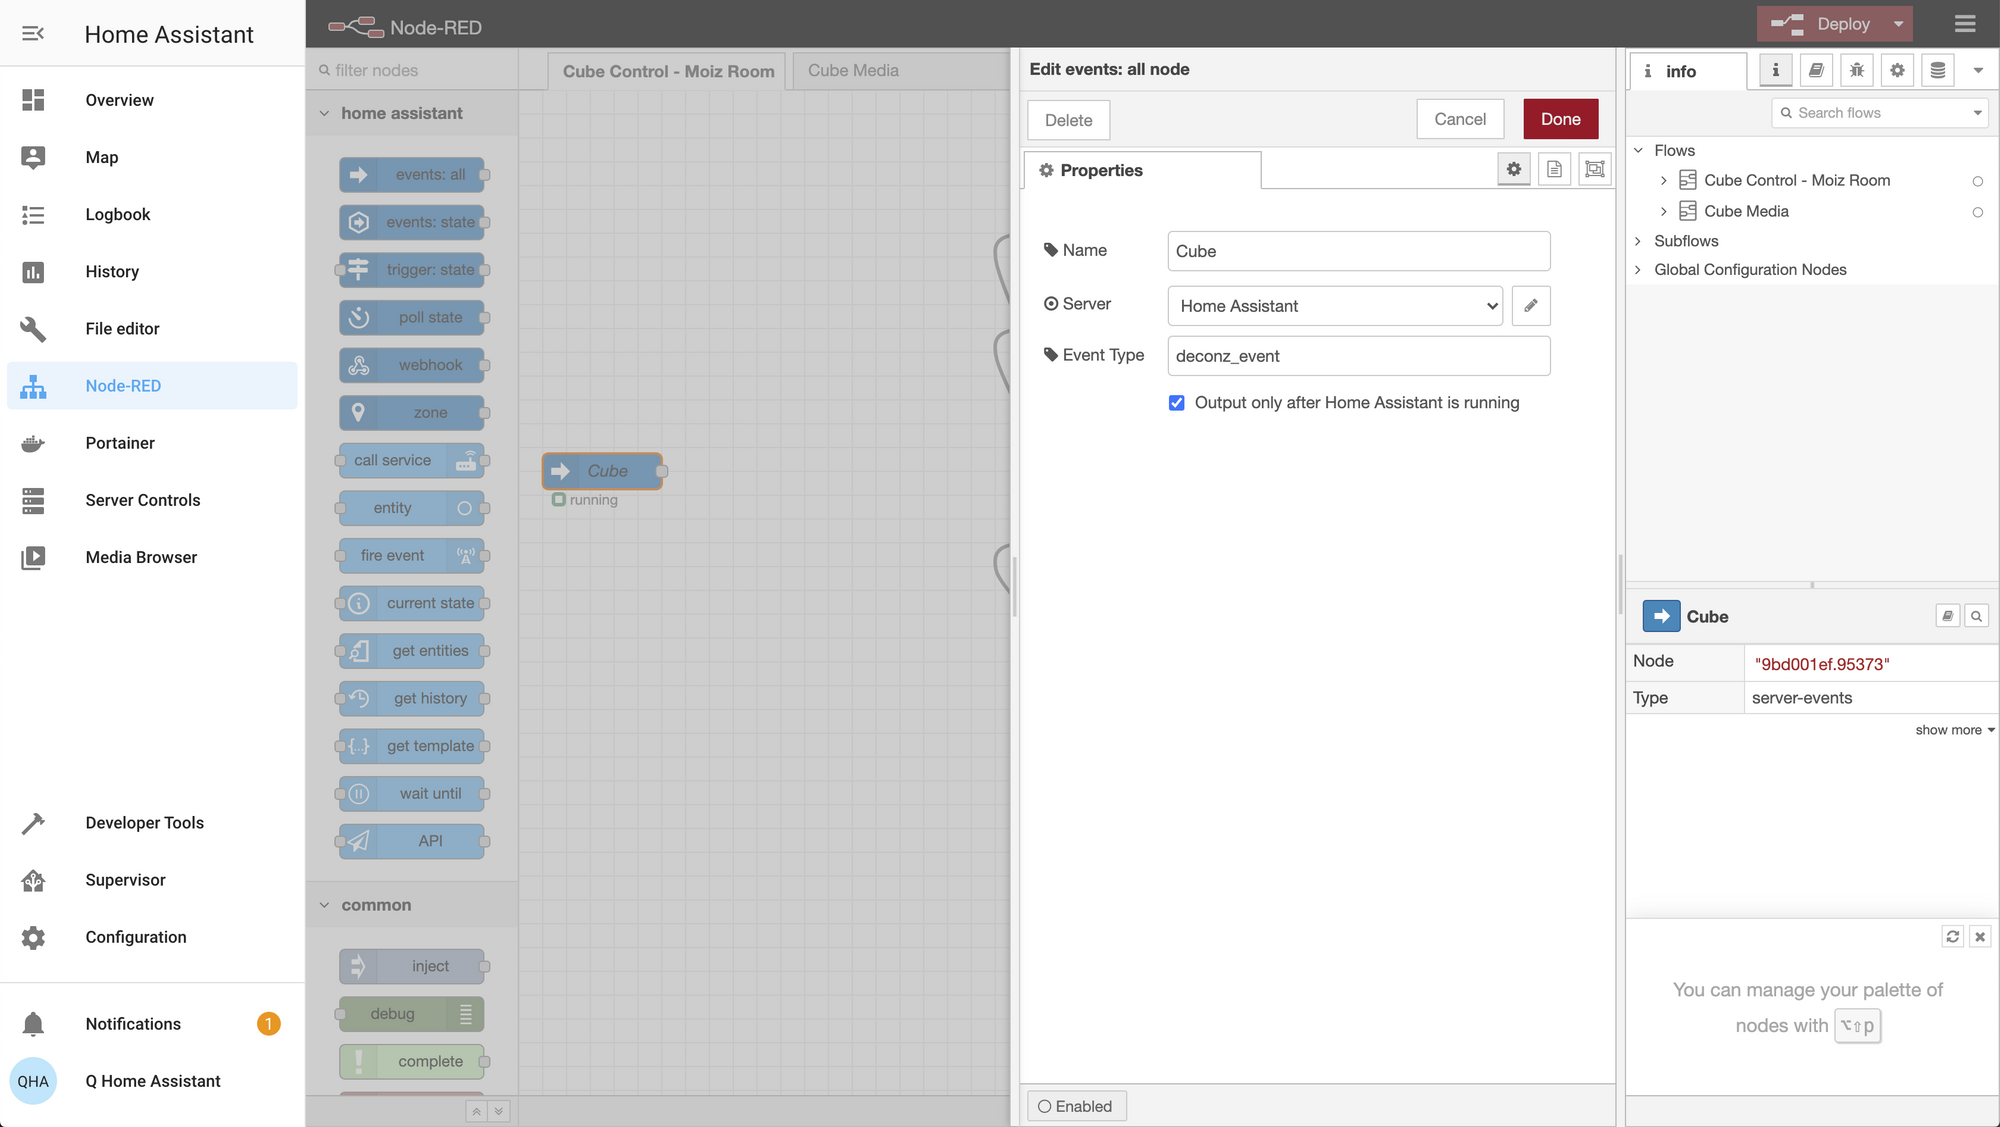
This node will be the listening to the 'deconz_event' we were verifying in step 7.
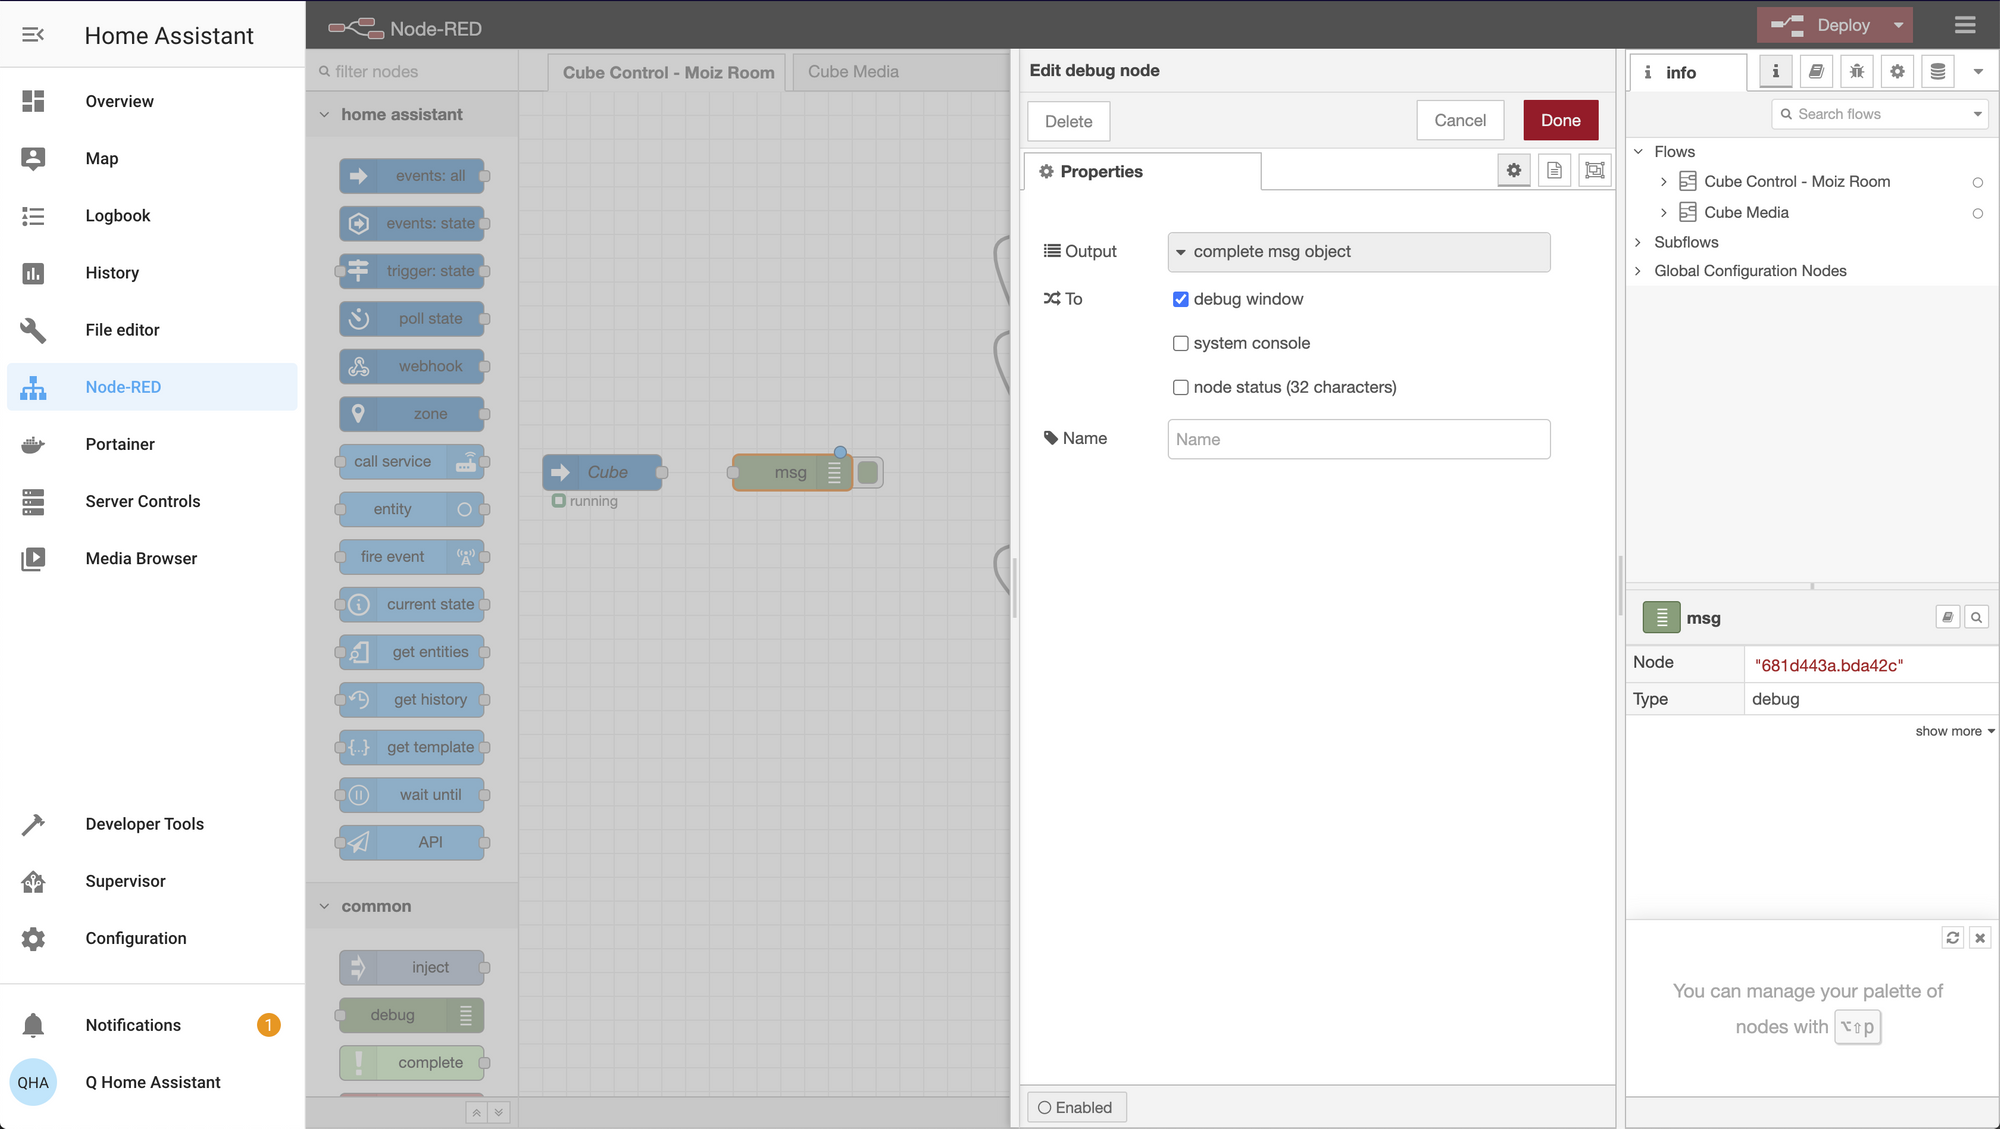
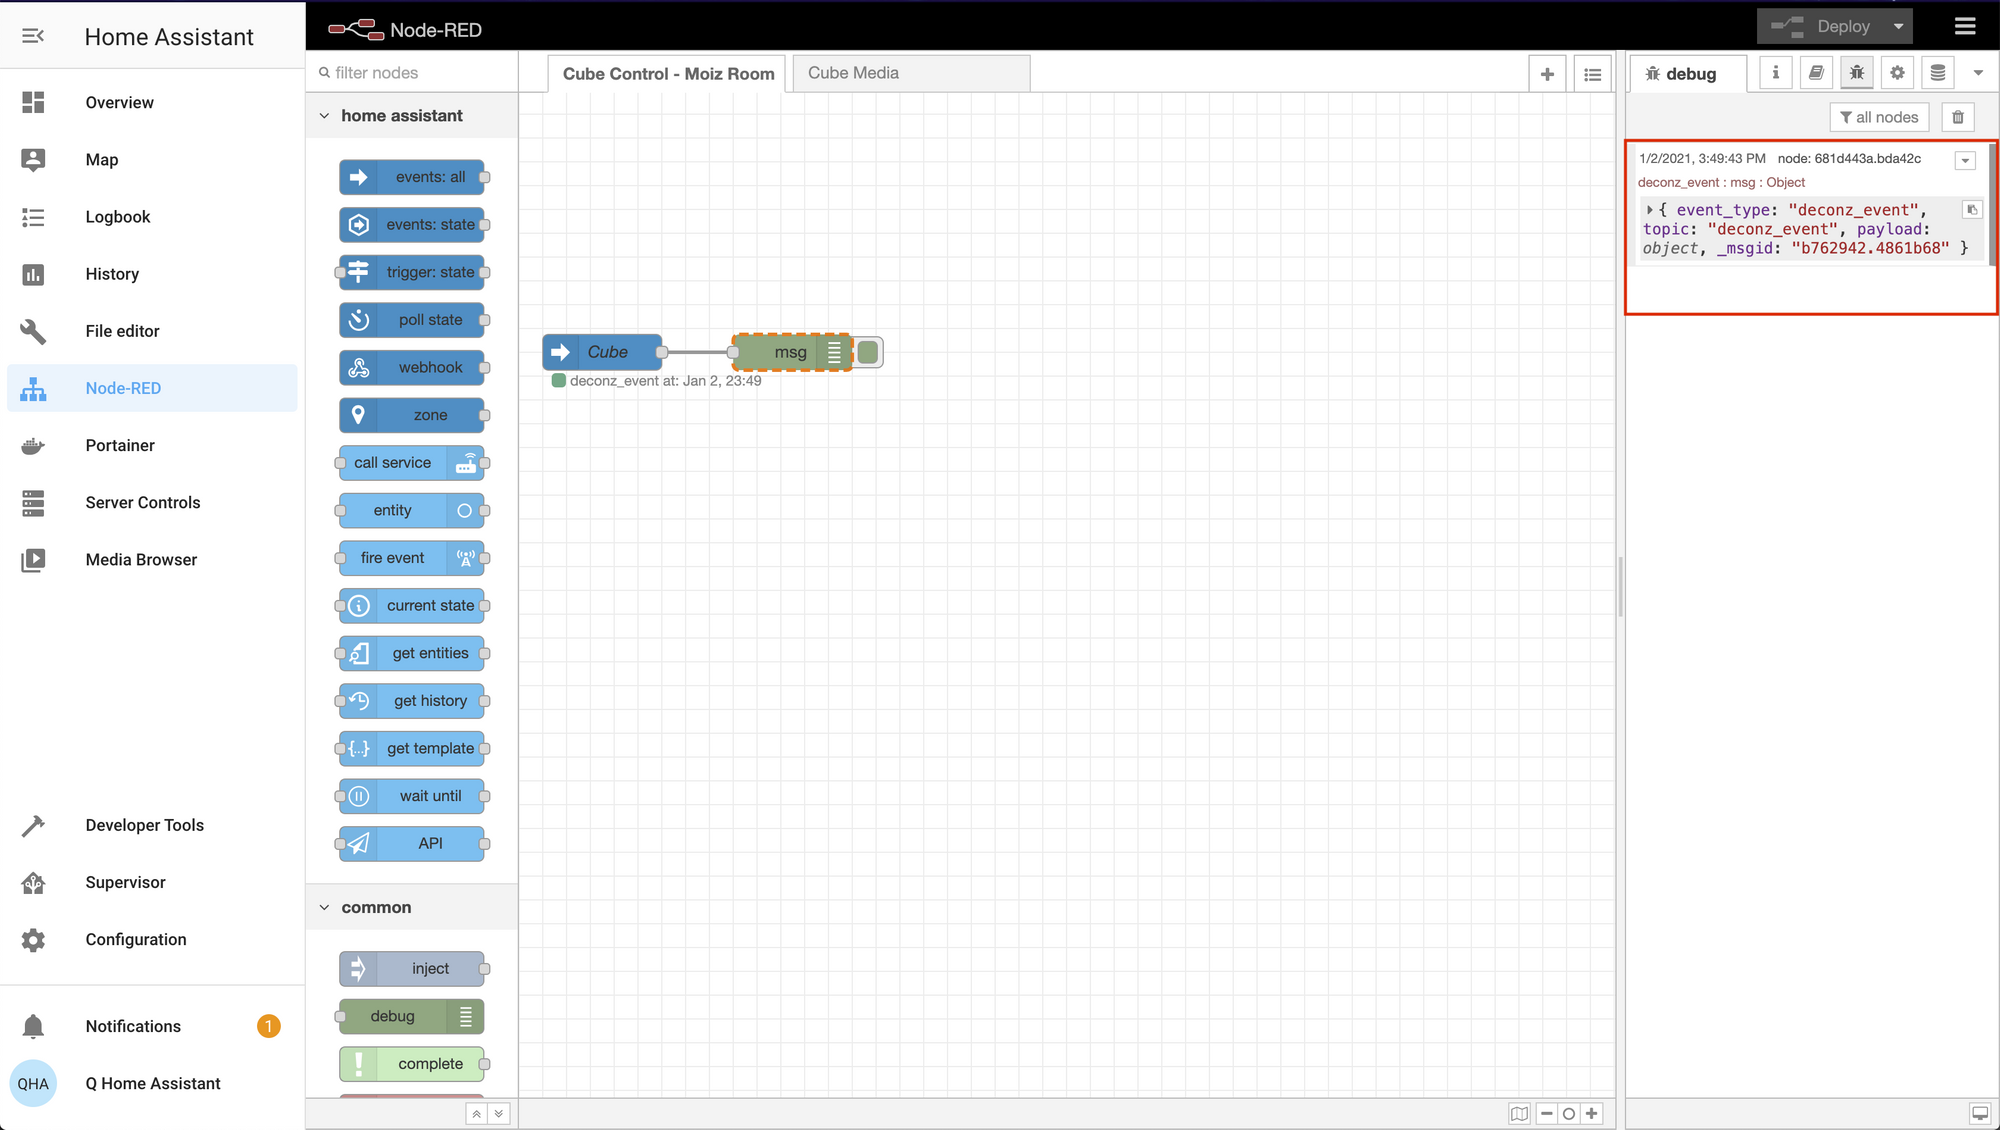
9) Now let's add a debug node to our flow to ensure we are successfully receiving the 'deconz_event' in Node-REd. Click the node to edit and change Output to 'complete msg output'. Check 'debug window' option.
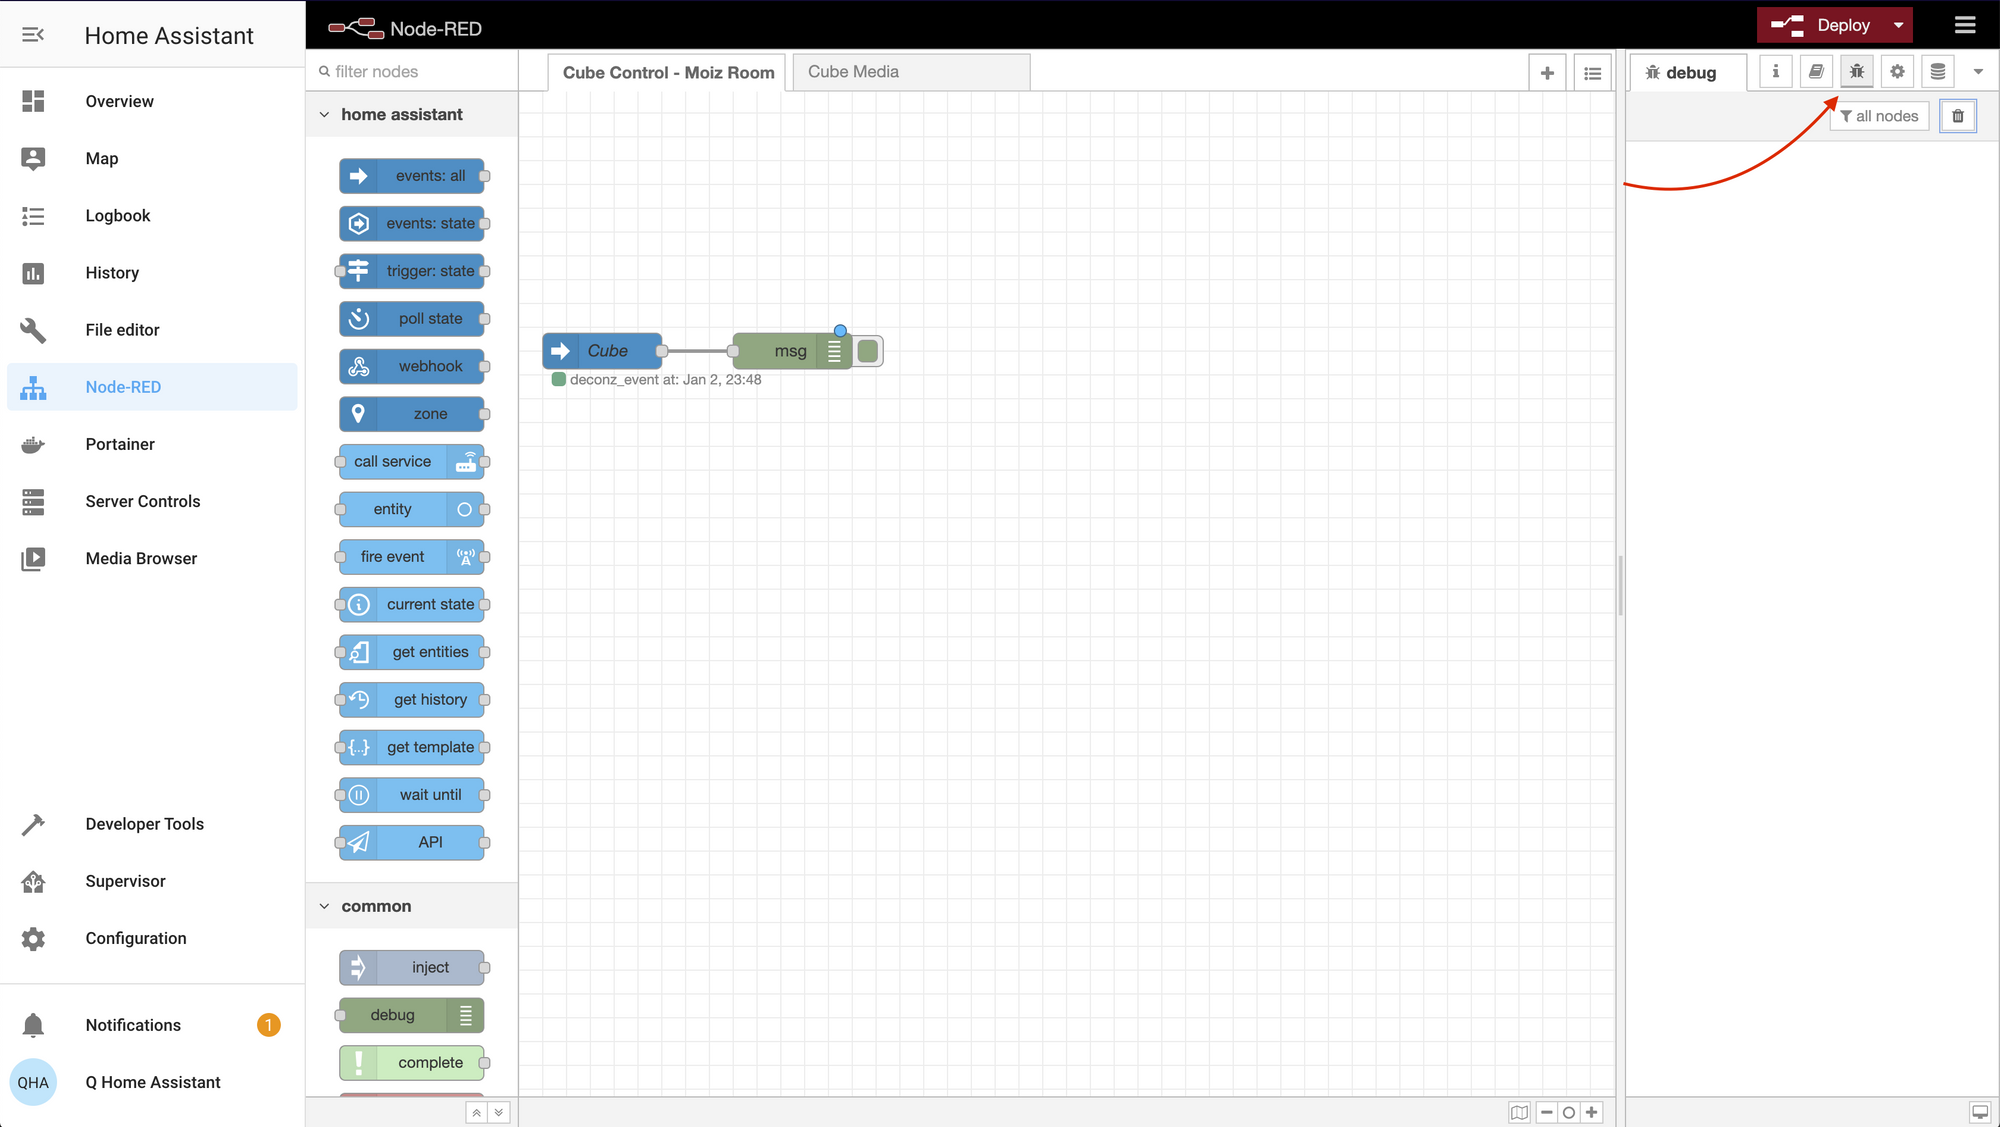
Now link the debug node to your events: all node and click deploy on the top right. Click the debug icon above the window pane to the right and test to see if your Aqara magic cube commands are populating in the debug logs. Twist, flip, push, double tap, shake, or throw the cube into the air. If you see logs populating then you are green! Now we can invoke any Home Assistant entity or make a Pushcut cURL call.
Let's identify a command from the Aqara magic cube and tie it an entity so we can control it. You can clear your debug log if you'd like.
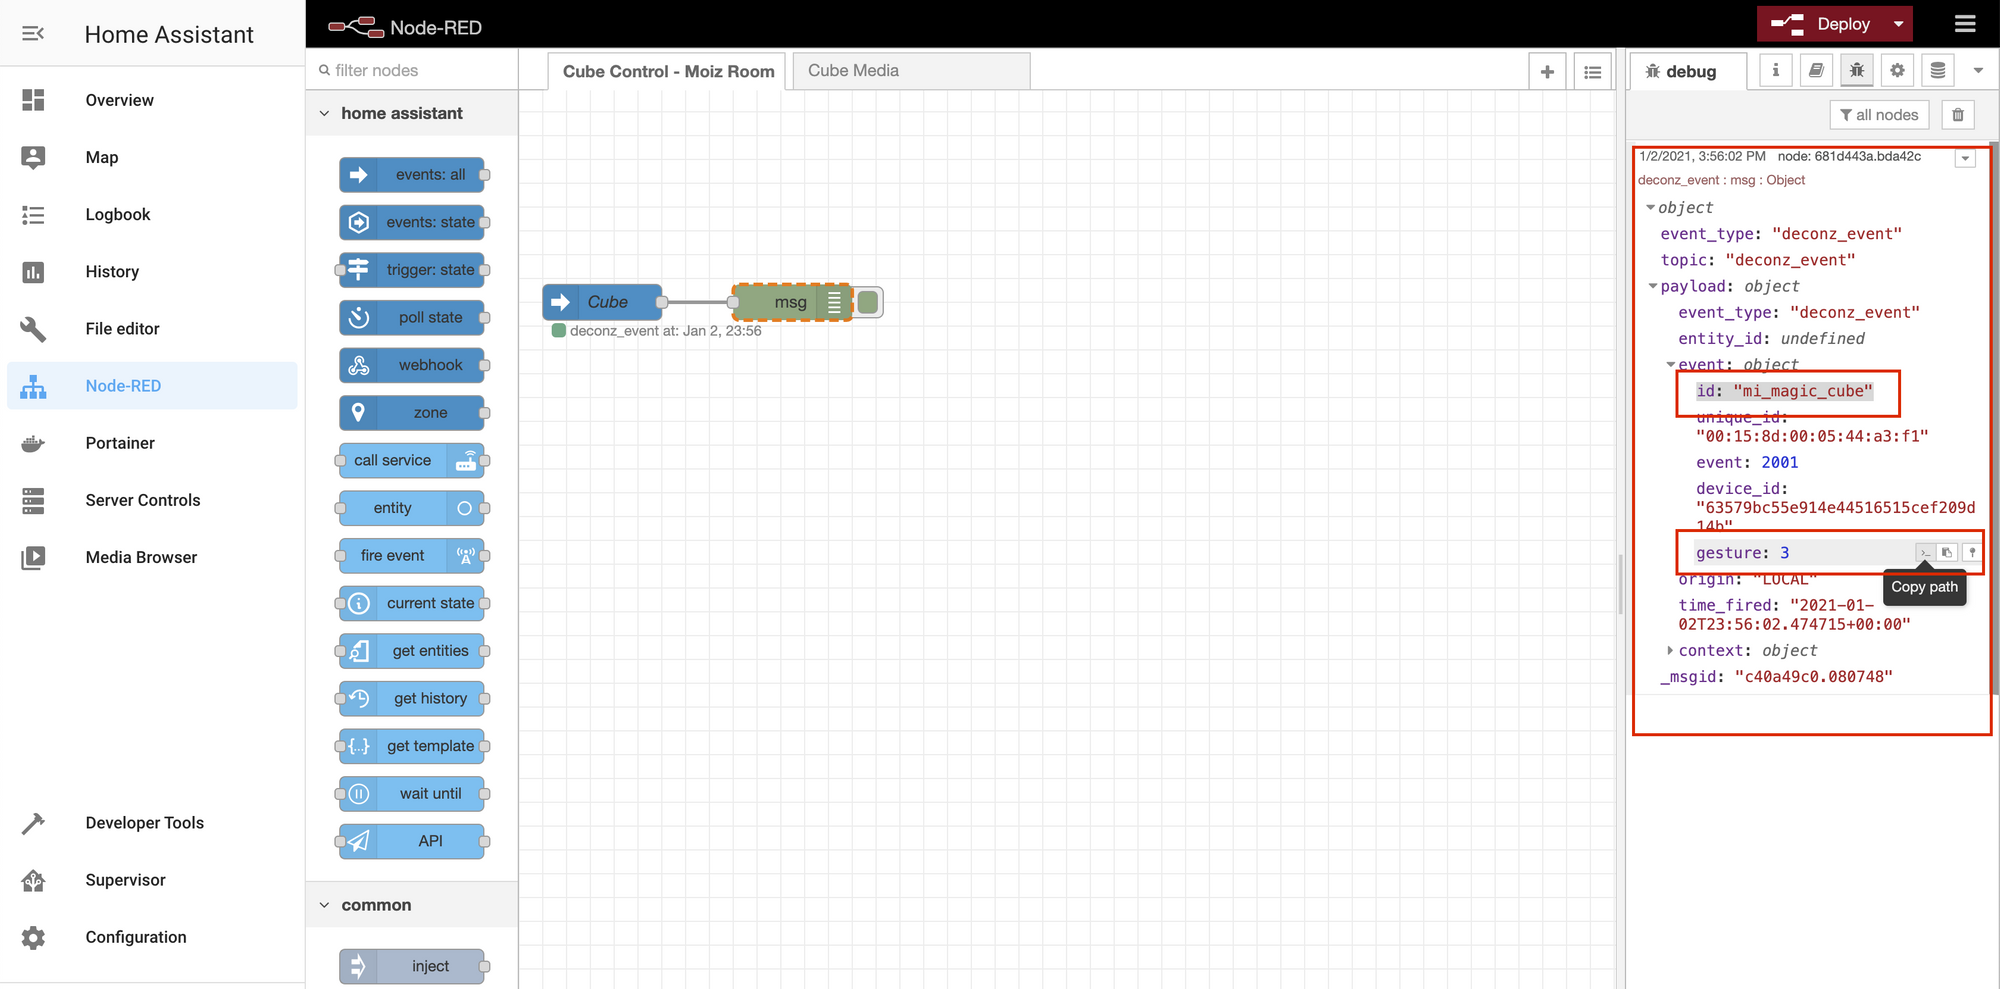
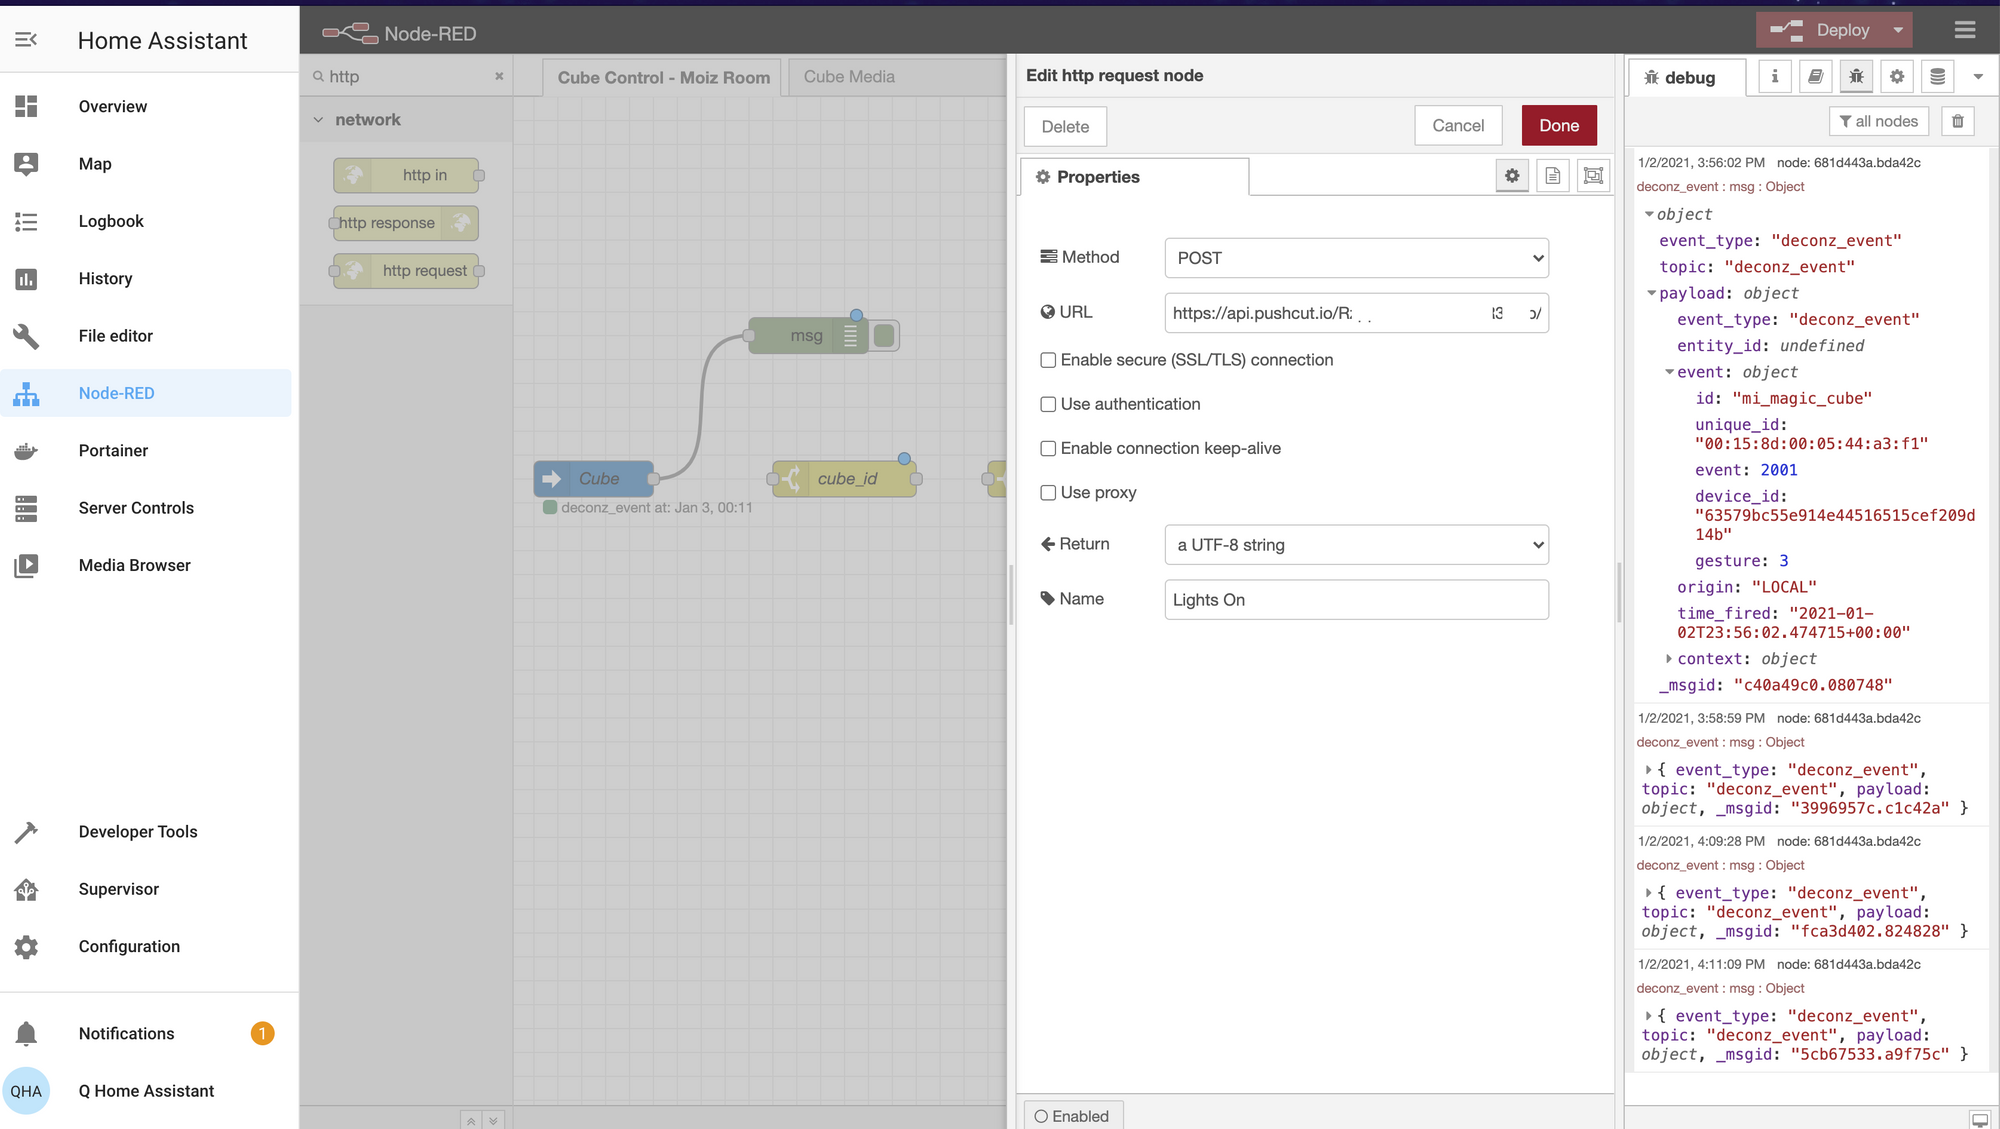
10) Now move your Aqara magic cube, for this example we will flip it 90 degrees to any side with the 'Aqara' logo side facing up. Your debug log should out put an event.
Click the event > payload > event > and note down the event id and gesture . In my case id = mi_magic_cube and gesture = 3, which is the 90 degree flip command.
11) Add a switch node to your flow, click it to edit. Set Name: whatever you prefer, Property: paste the path to event ID, and for rule: mi_magic_cube.
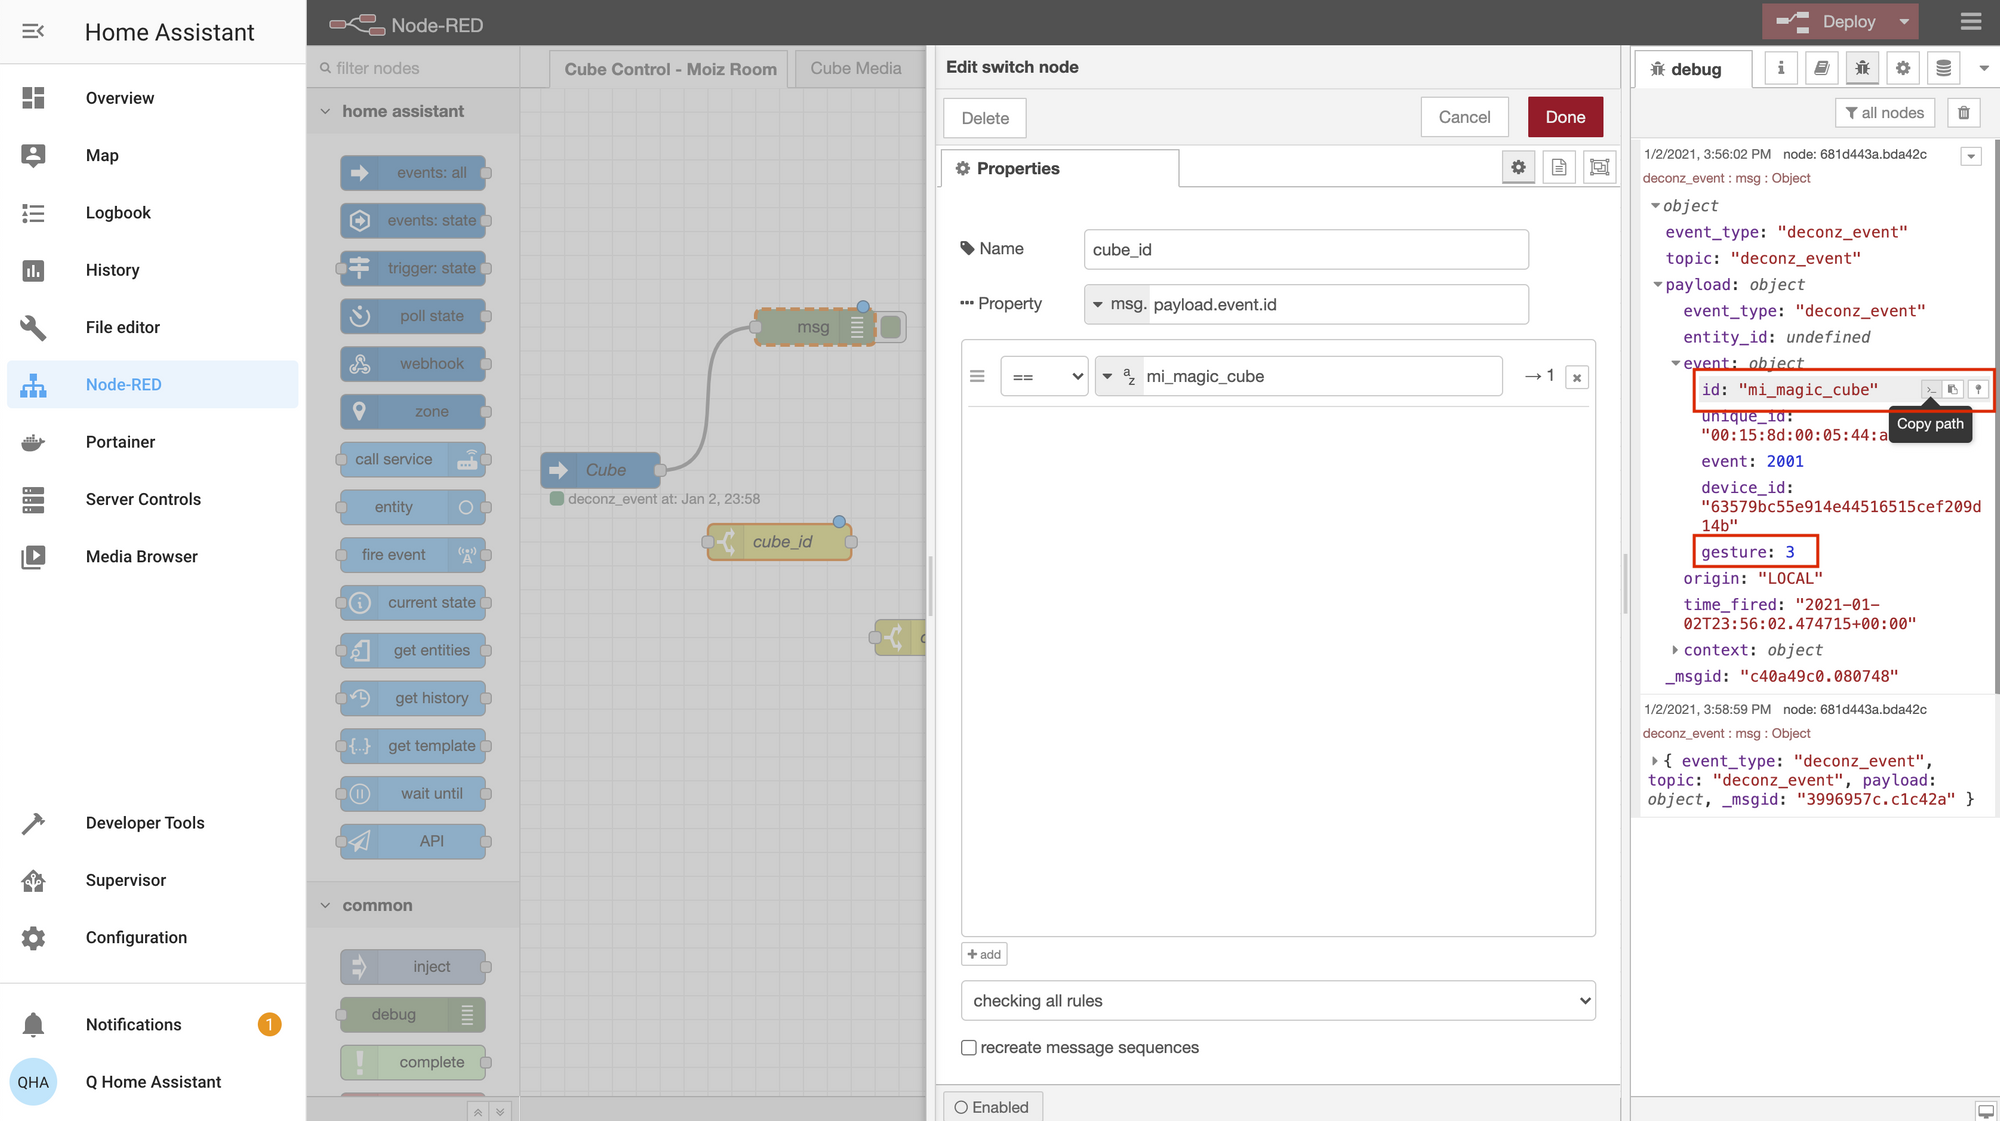
Here we are creating a switch to trigger once any event from Magic Cube is detected.
12) Now add another switch node and click it to edit. Set Name: whatever you prefer, Property: paste the path to gesture ID, rule: set as number and input gesture ID that you noted down in the step 10.
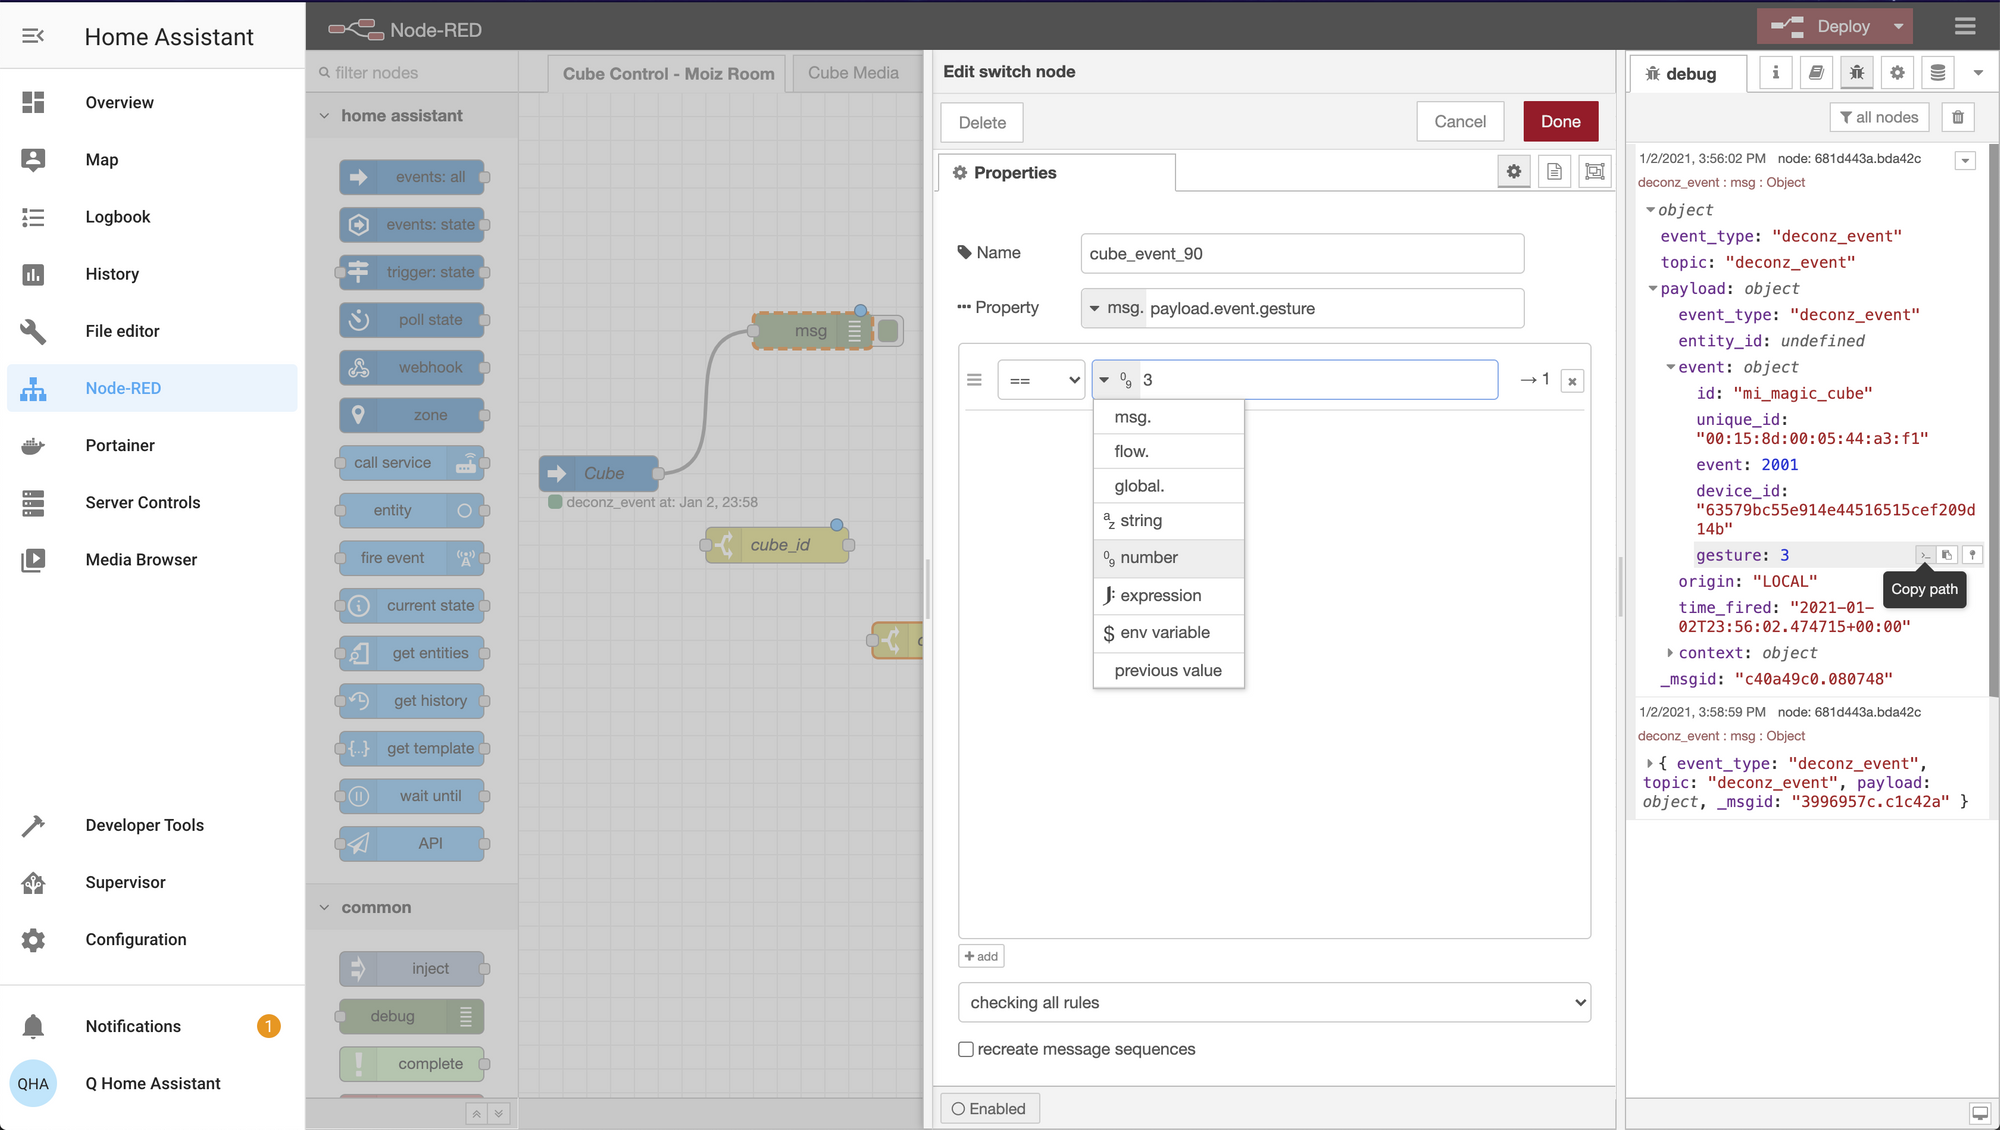
With this switch we are filtering out the specific command from Aqara magic cube that we want to trigger our entity. In this case, a 90 degree flip.
Lastly, let's tie the entity we want to invoke with the Aqara cube command.
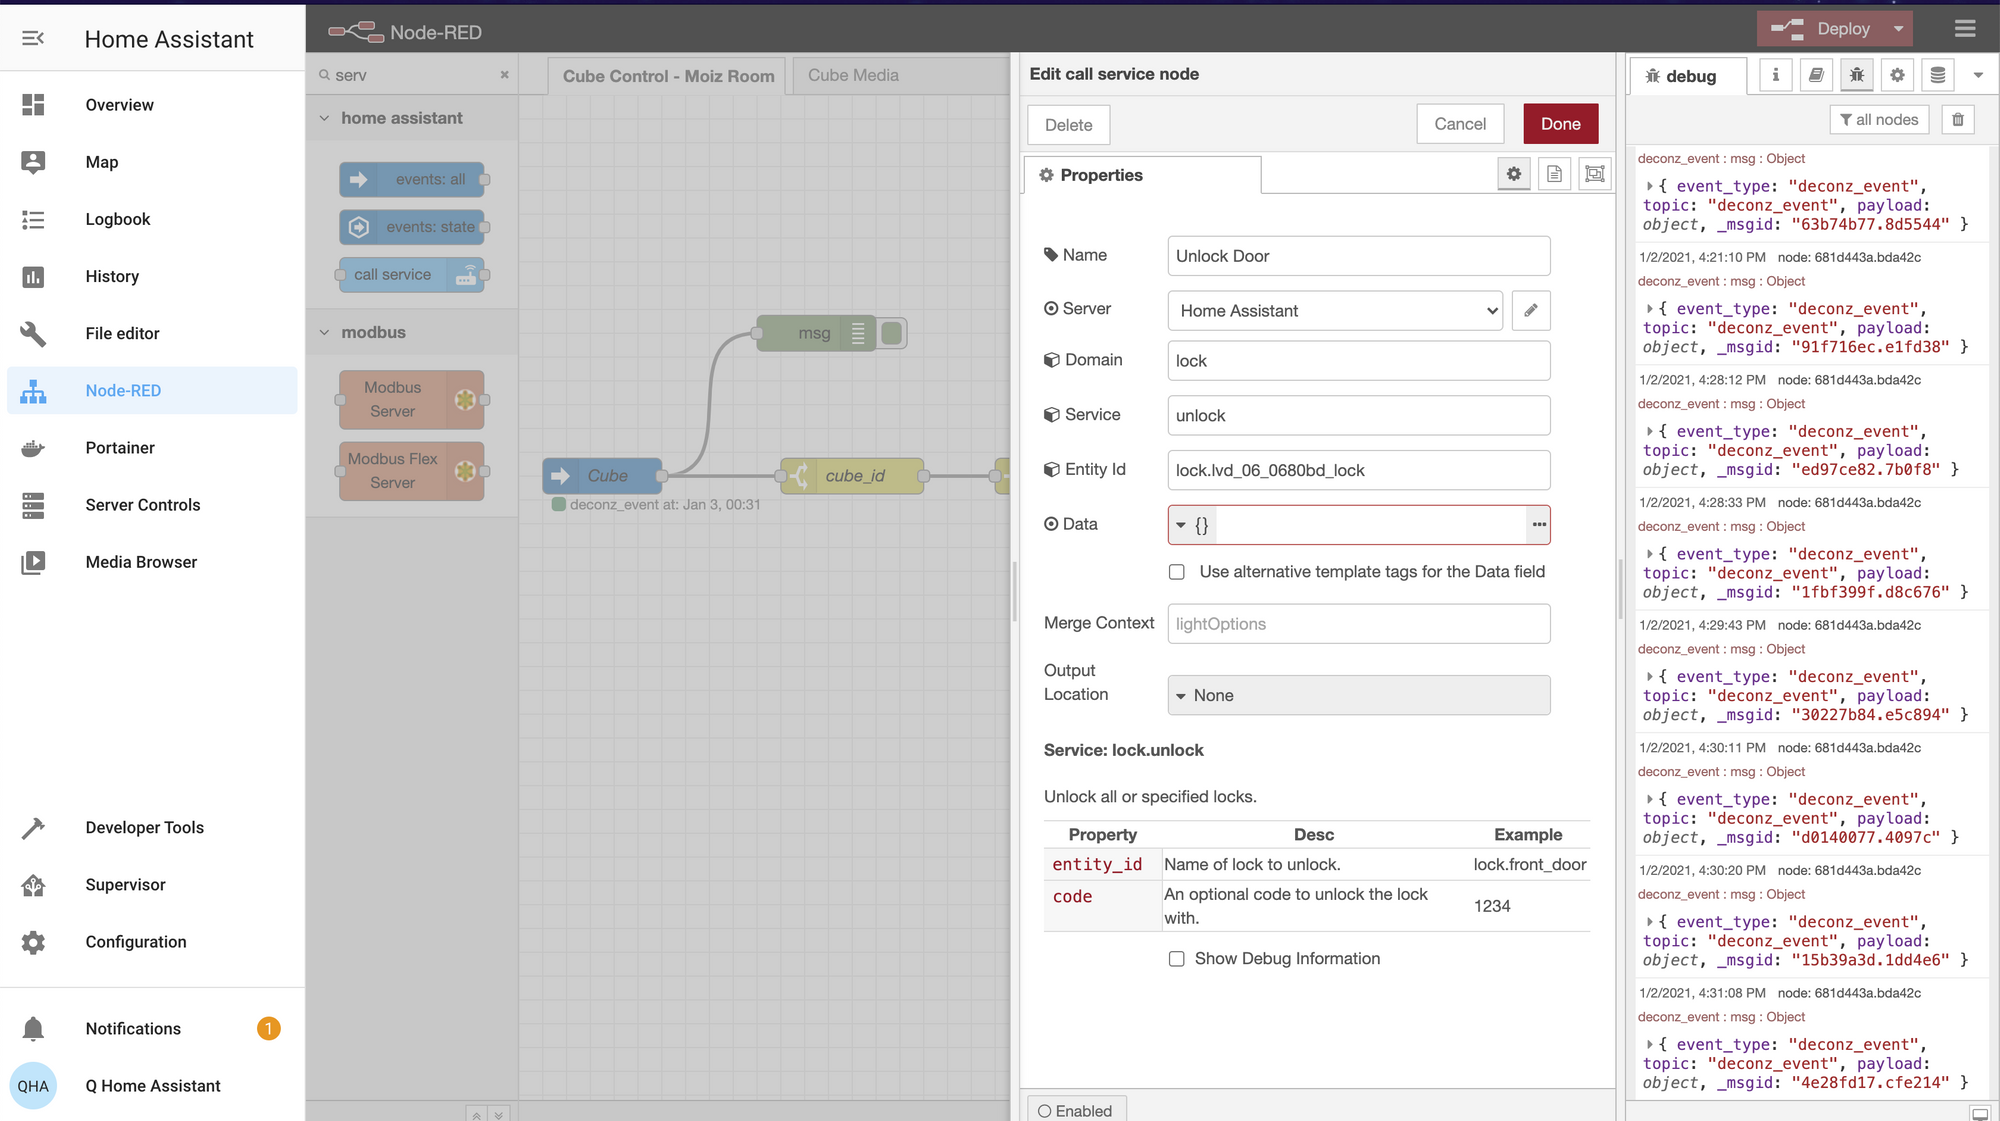
14a) To control Home Assistant entity:
Add a call service node to your flow. Click and edit. Set Name: to what you prefer, Server: Home Assistant, Domain: the type of device you want to control (in my case its my room lock, so I set it to lock), Service: what you want the device to do (in my case I want to unlock my room door, so I set it to unlock), and Entity ID: click and specify the Home Assistant device you want to control.
14b) To control Homekit Scene via Pushcut cURL request.
Add a http request node to your flow. Click and edit. Set method: POST, URL: paste your Request URL from the Pushcut app.
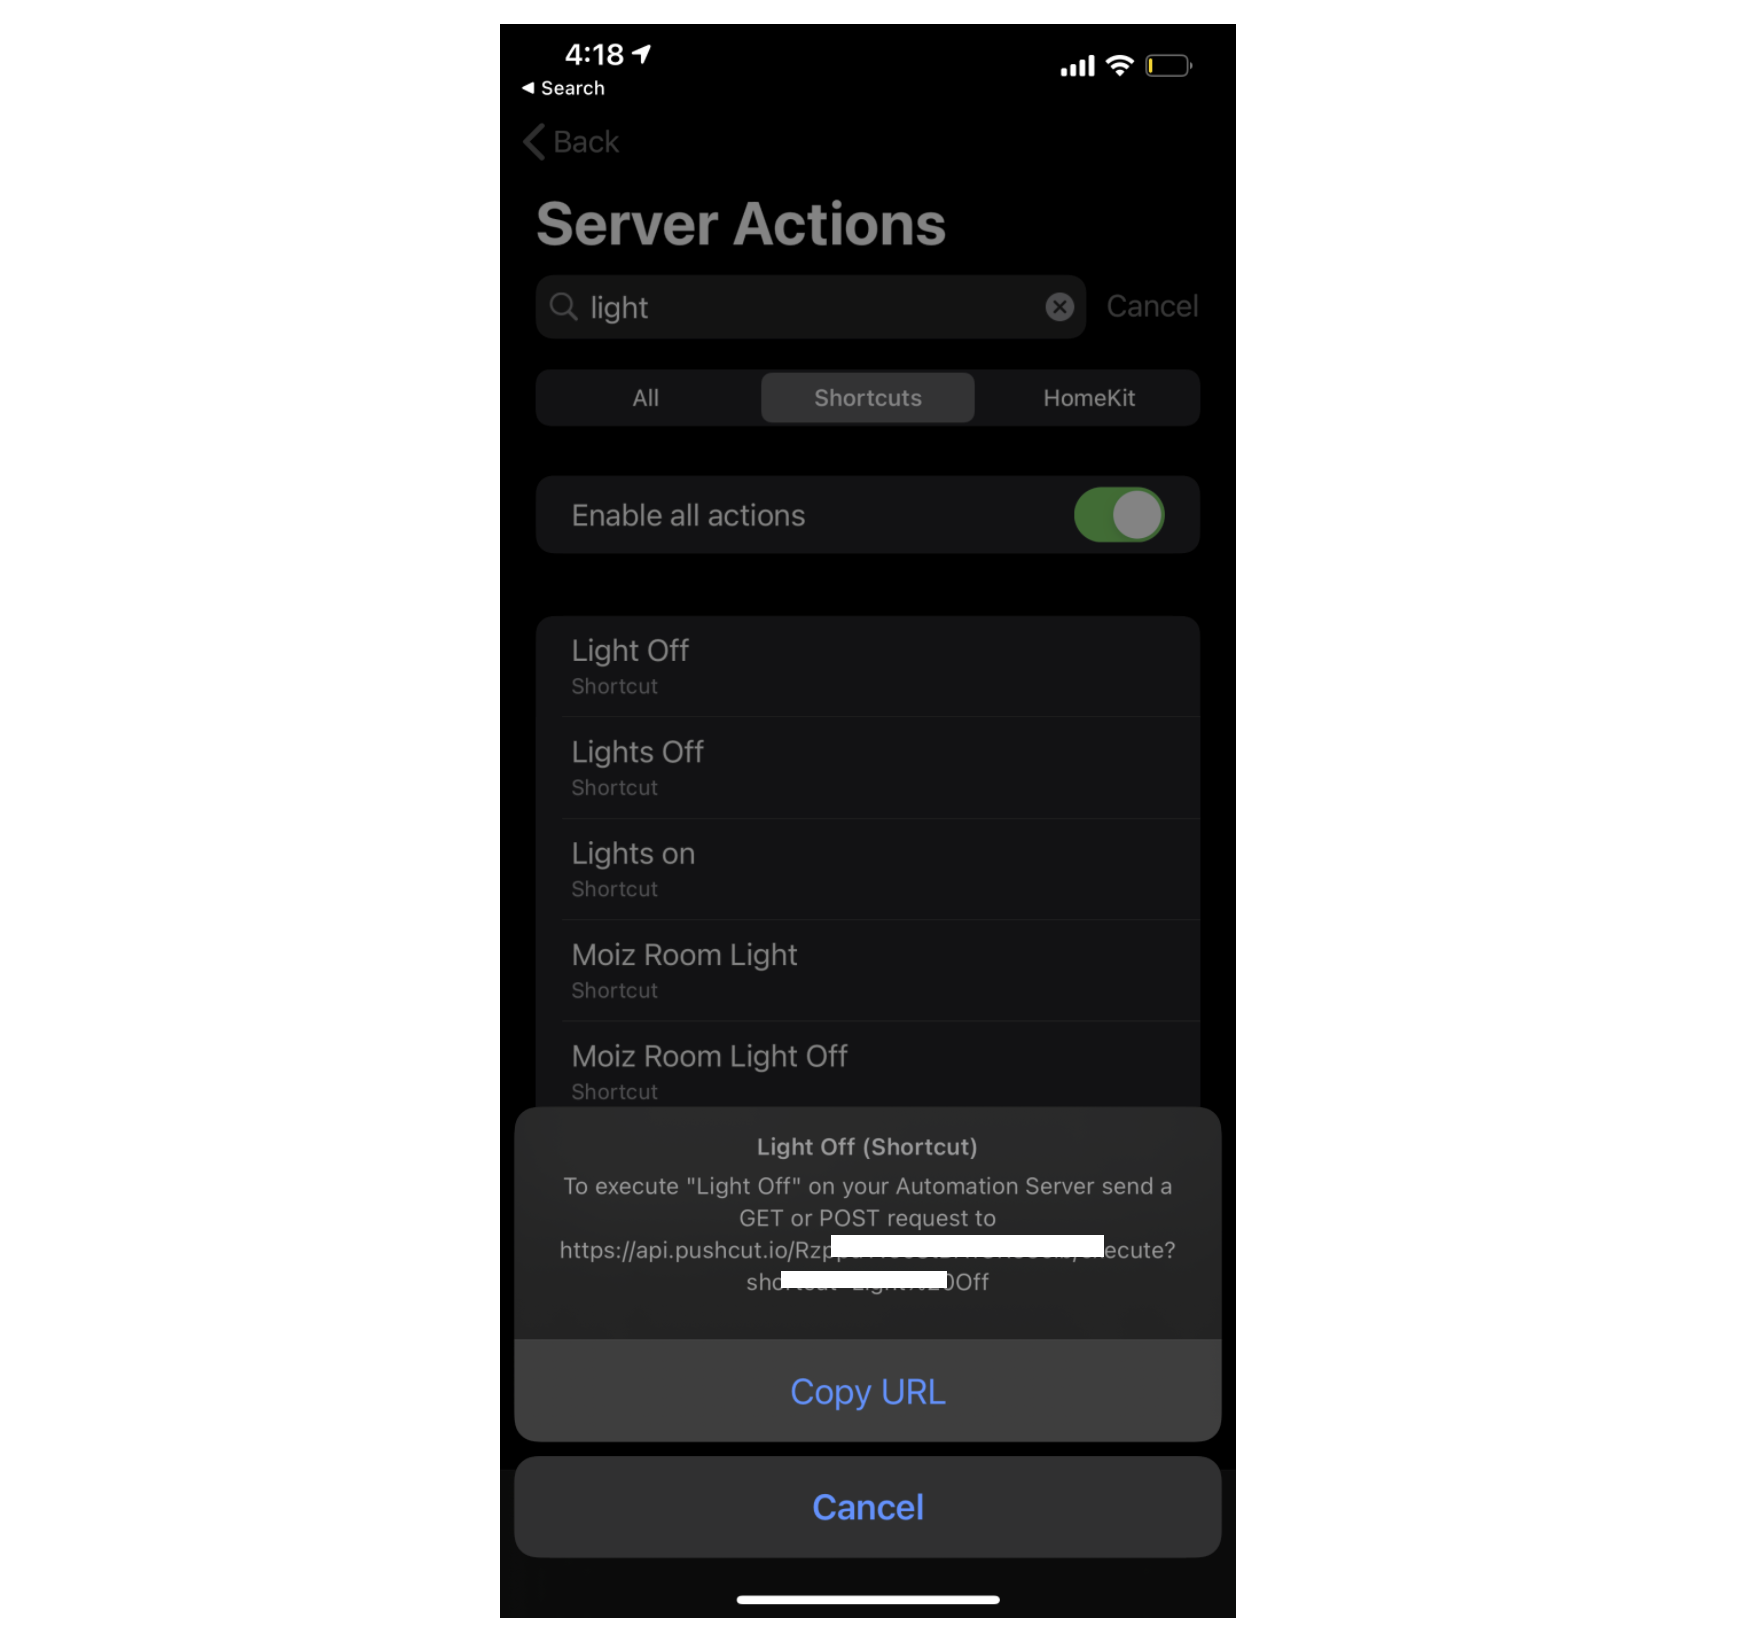
To get Request URL, you need to have purchased 'Automation Server' feature in Pushcut app and running on a dedicated iOS device. I have a spare iPad running the automation server. Open Pushcut app > Automation Server > Server Actions (All Actions) > Shortcut or HomeKit > select your shortcut or scene > copy URL.
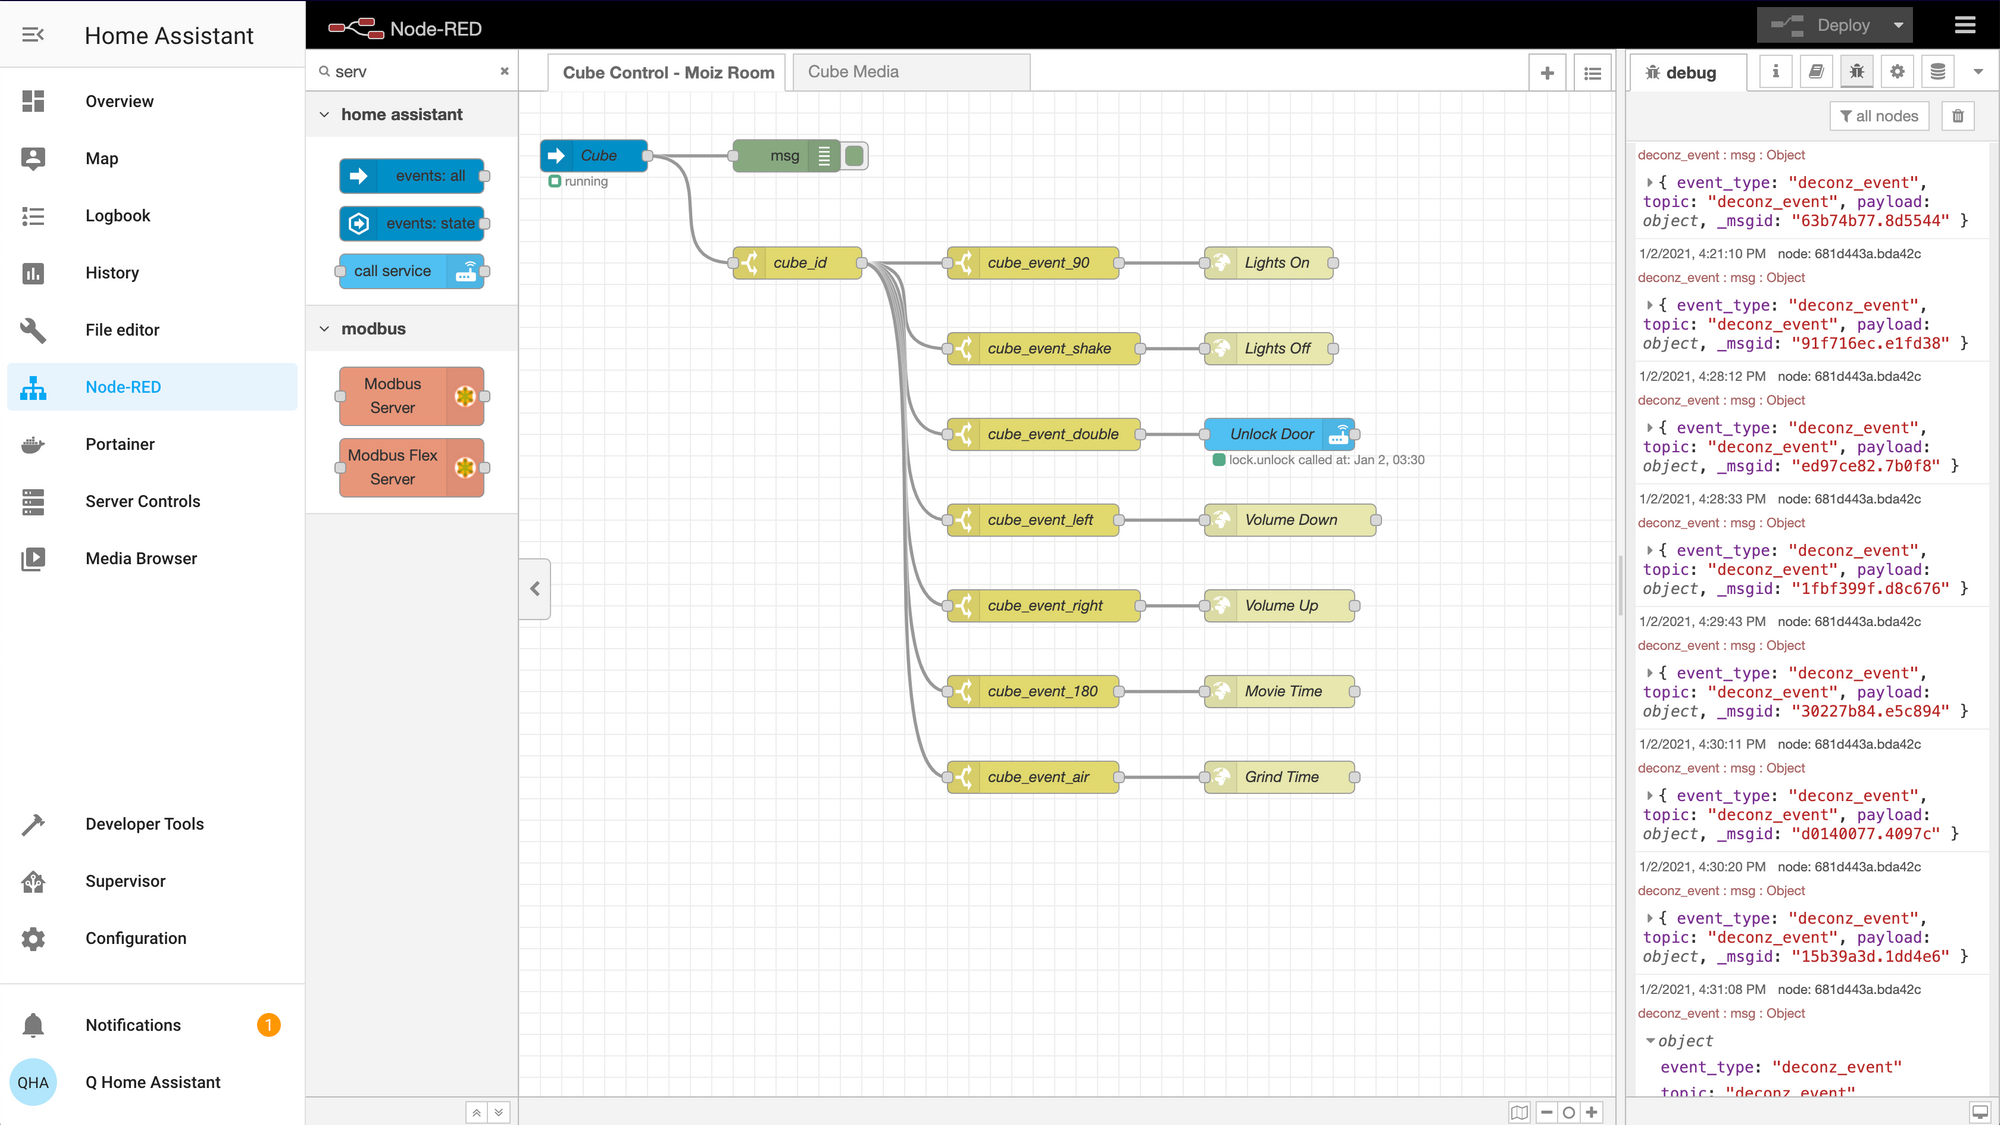
15) Connect all your nodes together as shown below and click deploy again. We are ready to invoke our entity or scene with a Aqara cube command.
Go ahead, flip that cube! Node-RED should pick up the command, send a POST request to the URL, and trigger your iOS scene or Home Assistant entity.
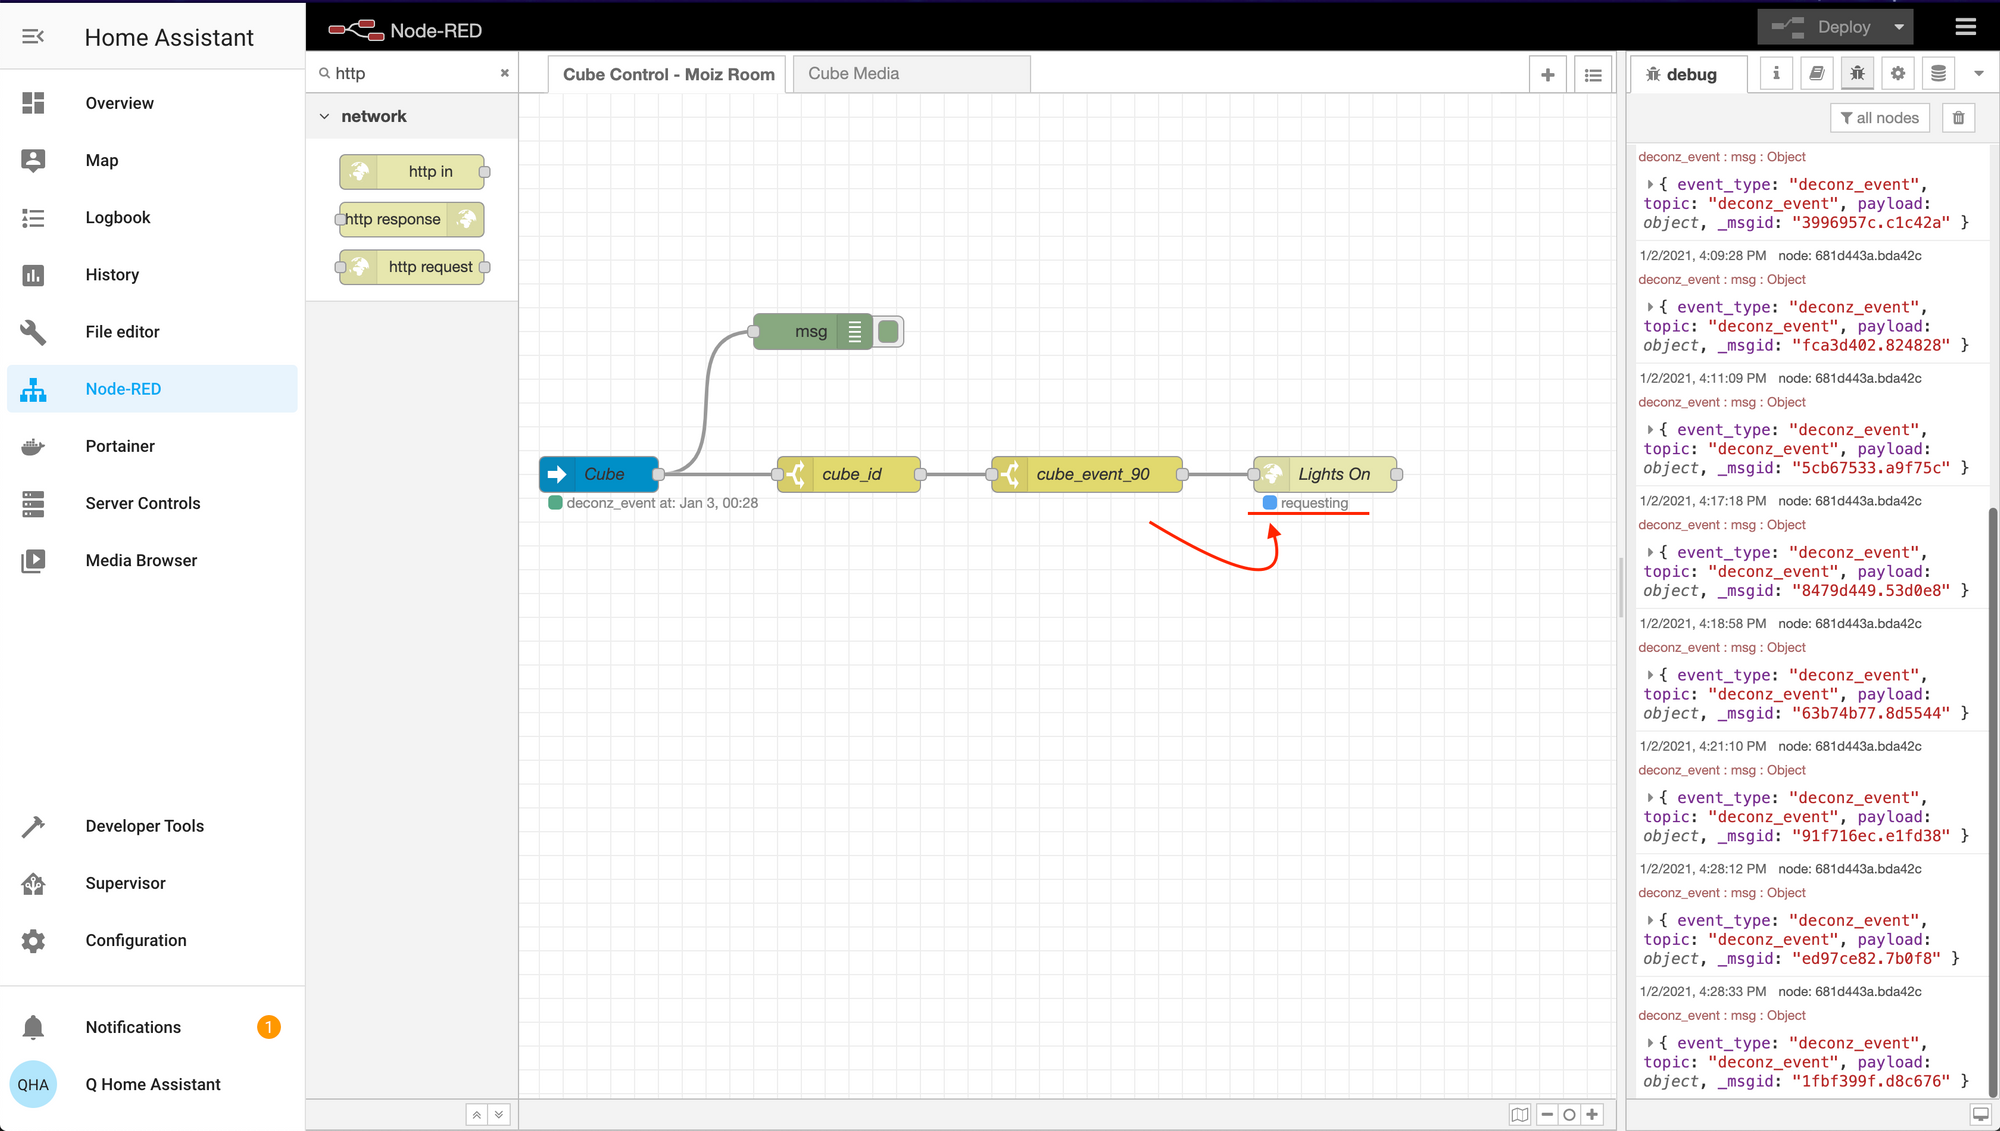
Below is my current flow to get the most out of my Aqara cube. Using Pushcut enables me to even turn up or lower my Airplay speakers with a simple Shortcut I have setup on my iOS device.