Datohome Smart Door Lock L-B400 - Home Assistant Integration
I recently purchased a Datohome smart lock model L-B400 for my room's door. The initial setup was a breeze through the Datohome App. I was able to set my passcode, add fingerprints, and nfc cards to unlock my door lock. All was good except the fact I hated opening the Datohome app just to unlock my door's lock. Getting up and physically opening the door seemed to be far more efficient compared to the hassle of unlocking it through the app.
I set out on a research endeavor to integrate Datohome to Home Assistant so I can then add that device to my Home App. Unfortunately, I was not able to find a straight forward guide or Home Assistant integration specifically for Datohome. Thankfully, my research endeavor did not go waste as I was able to find alternative guides which led me to creating this guide, specific for Datohome users. With that, lets begin!
Prerequisites:
- Dato Home Smart Door Lock (Confirmed working with L-B3400)
- Dato Home G2 Gateway
- Home Assistant (setup with HomeKit Bridge)
- Datohome App Account
- Advanced REST Client
Rundown:
- Add Locks and Gateways to DatoHome App
- Login to a TTLock Open Platform account
- Create App (wait for review)
- Generate Access and Refresh Token
- Create a new user in Home Assistant
- Install and configure 'Mosquitto broker' on Home Assistant
- Install and configure 'TTLock2MQTT' on Home Assistant
- Enjoy controlling Datohome Lock with Home Assistant/HomeKit
Instructions:
1) Download DatoHome App, Sign In/Signup, and add locks and gateways to app. Ensure everything is functional in the app.
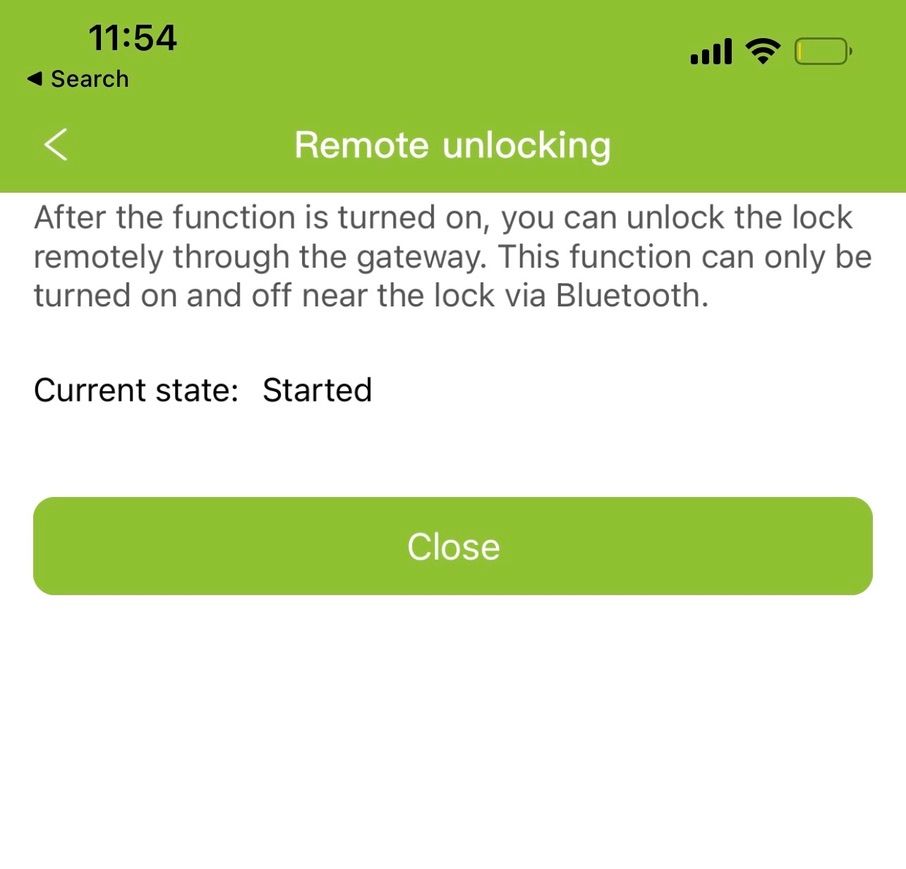
2) Start 'Remote Unlocking' for Smart Lock in Lock Setting
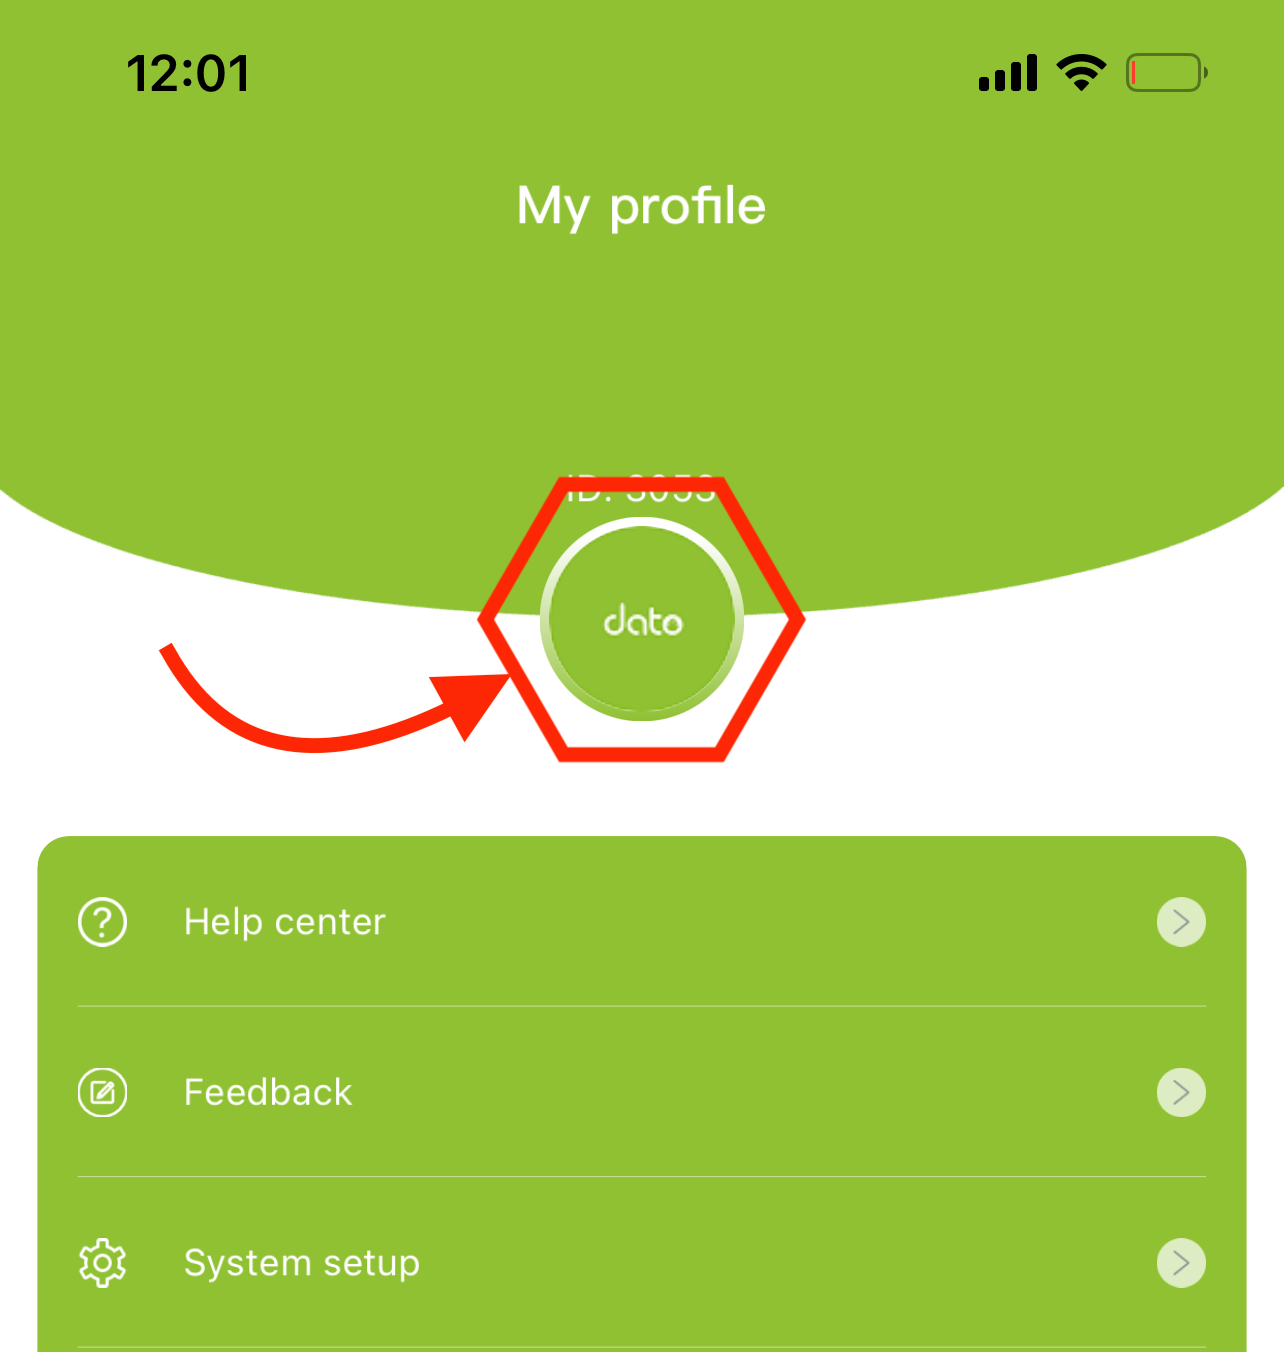
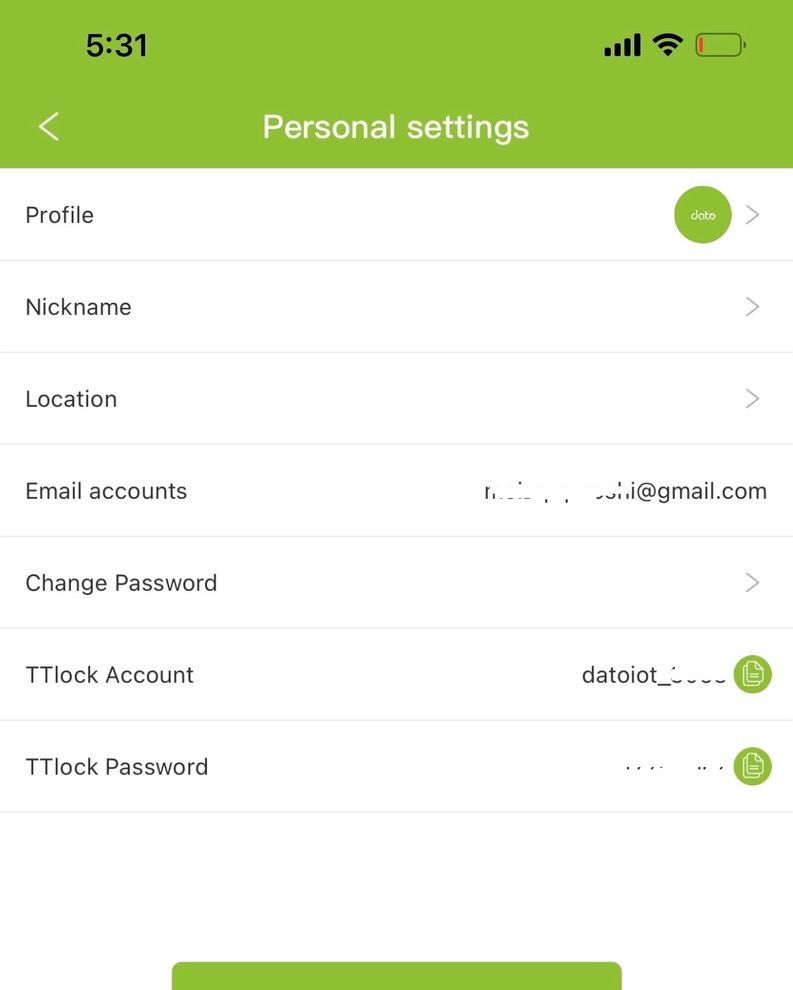
3) In DatoHome app go to 'My Profile' on bottom right, touch the Dato logo up top, and now you should be on the 'Personal Settings' page. Note down the TTLock Account and TTLock Password, we will be using this in the next step. This is your TTLock Open Platform account information tied to your DatoHome app account.
4) Login to TTLock Open Platform with account information retrieved from the previous step.
5) Once logged in, verify your identity by providing ID card photo and name.
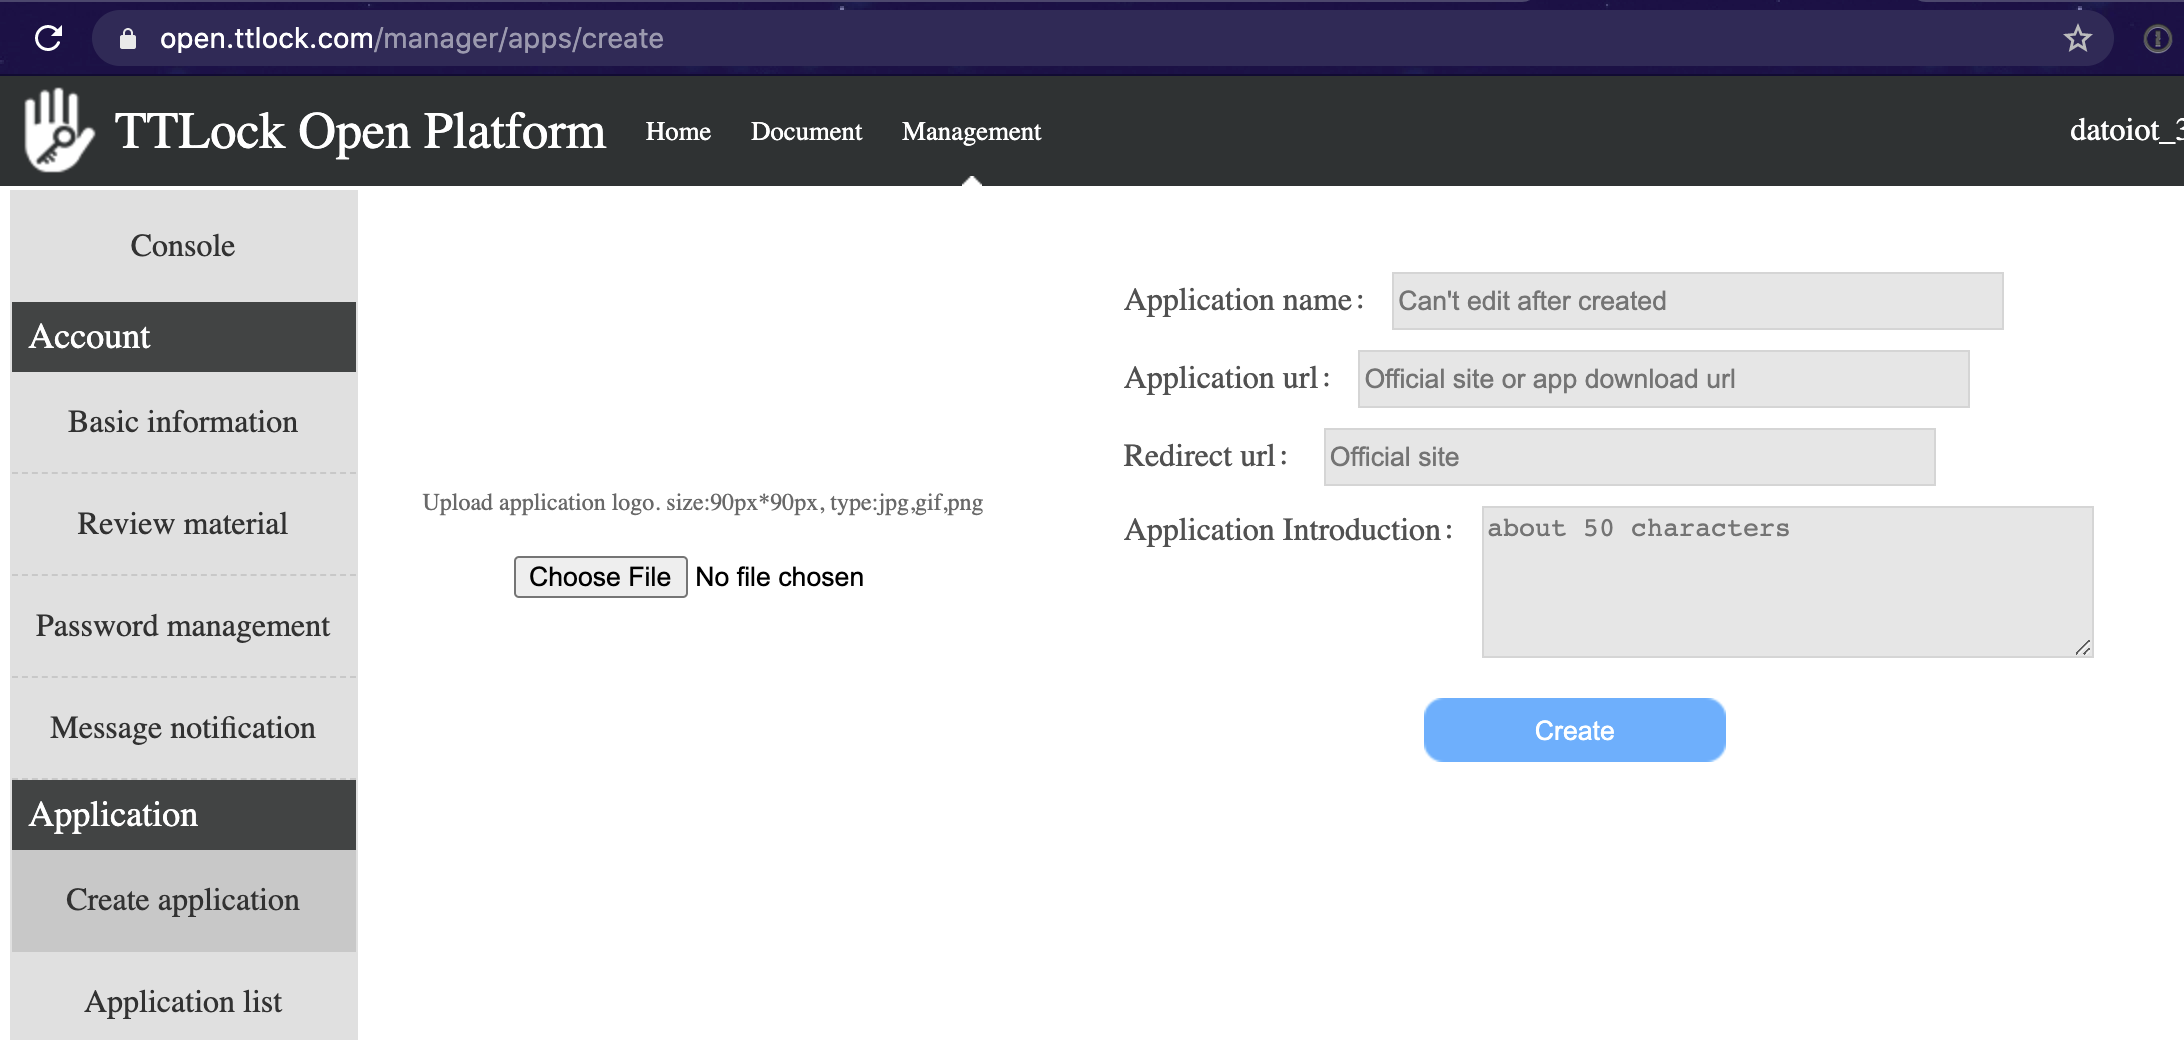
6) Now go to main console, and create an application. Set Application Name, URL, Redirect URL, and Introduction to whatever you desire. The URLs needs to be legit, in my case I set it as `interestingsoup.com` for both. Alternatively, you can set your Home Assistant's URL if it set a public one. Note down the URL, it will be used later down this guide.
7) Hit create and wait. I personally waited couple days and logged into TTLock Open Platform to see the app was reviewed!
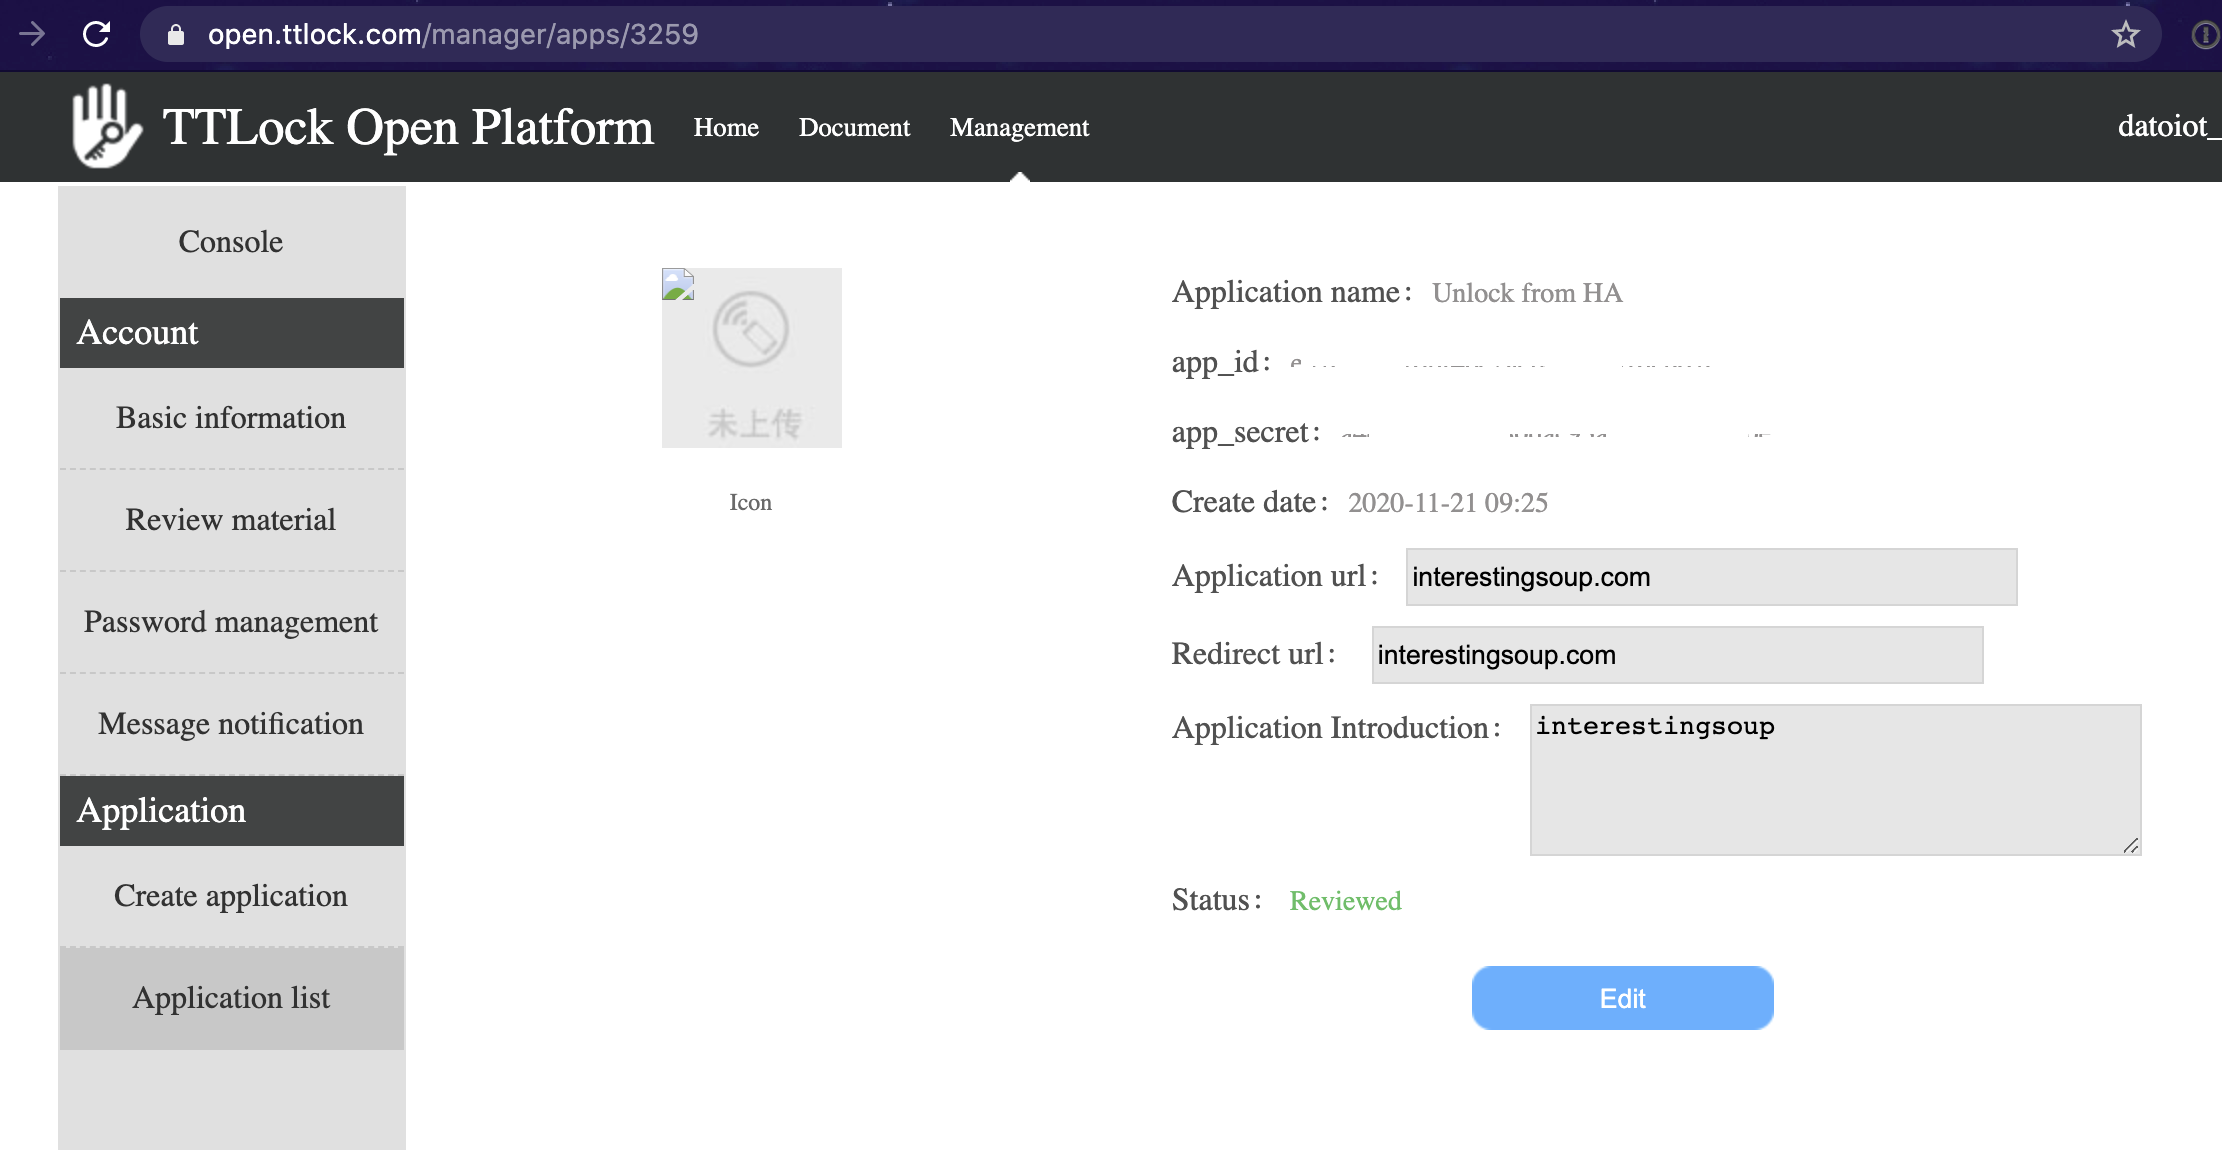
8) Note down the app_id and app_secret, we will be using this in the next step.
9) Now we need to generate an Access and Refresh token. Download, Install and Run Advanced REST Client Chrome Extension
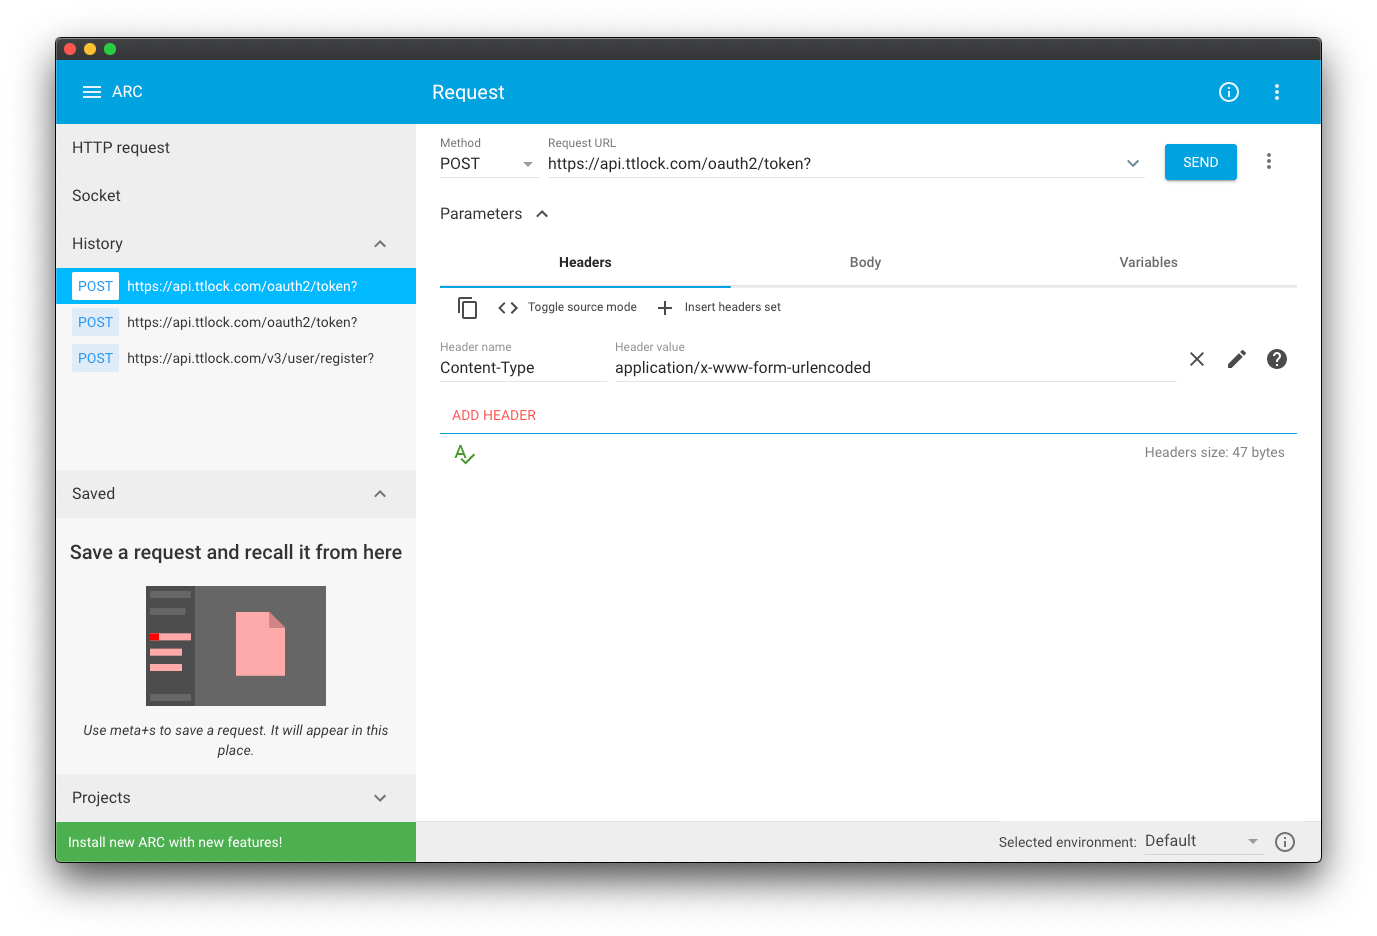
10) In Advanced REST Client set the following:
Request:
- Method: POST
- Request URL: https://api.ttlock.com/oauth2/token?
Headers:
- Header name: Content-Type
- application/x-www-form-urlencoded
Body:
- Body Content Type: application/x-www-form-urlencoded
- Editor view: Raw input
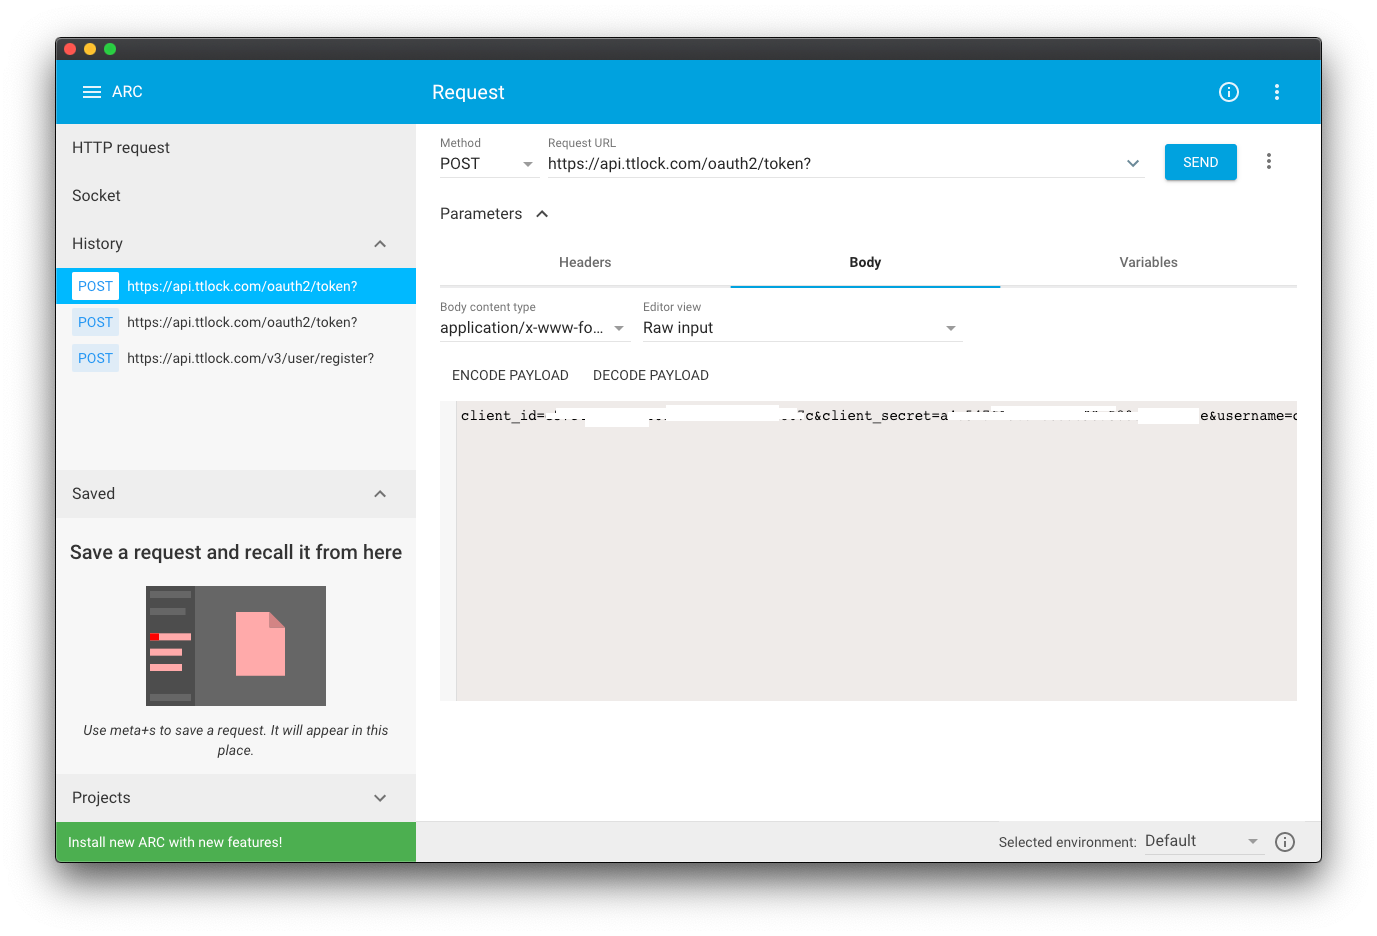
11) Paste the following string in the body form
client_id={app_id}&client_secret={app_secret}&username={TTLock Account}&password={TTLock Password}&grant_type=password&redirect_uri={URL}Replacing:
{app_id}, {app_secret} with what you noted down in step 8
{TTLock Account} and {TTLock Password}* with what you noted down in step 3
*Note: the {TTLock Password} needs to be in MD5 hash format. You can go to md5online.org to generate the MD5 hash of your password.
{URL} with what we had noted down in step 6.
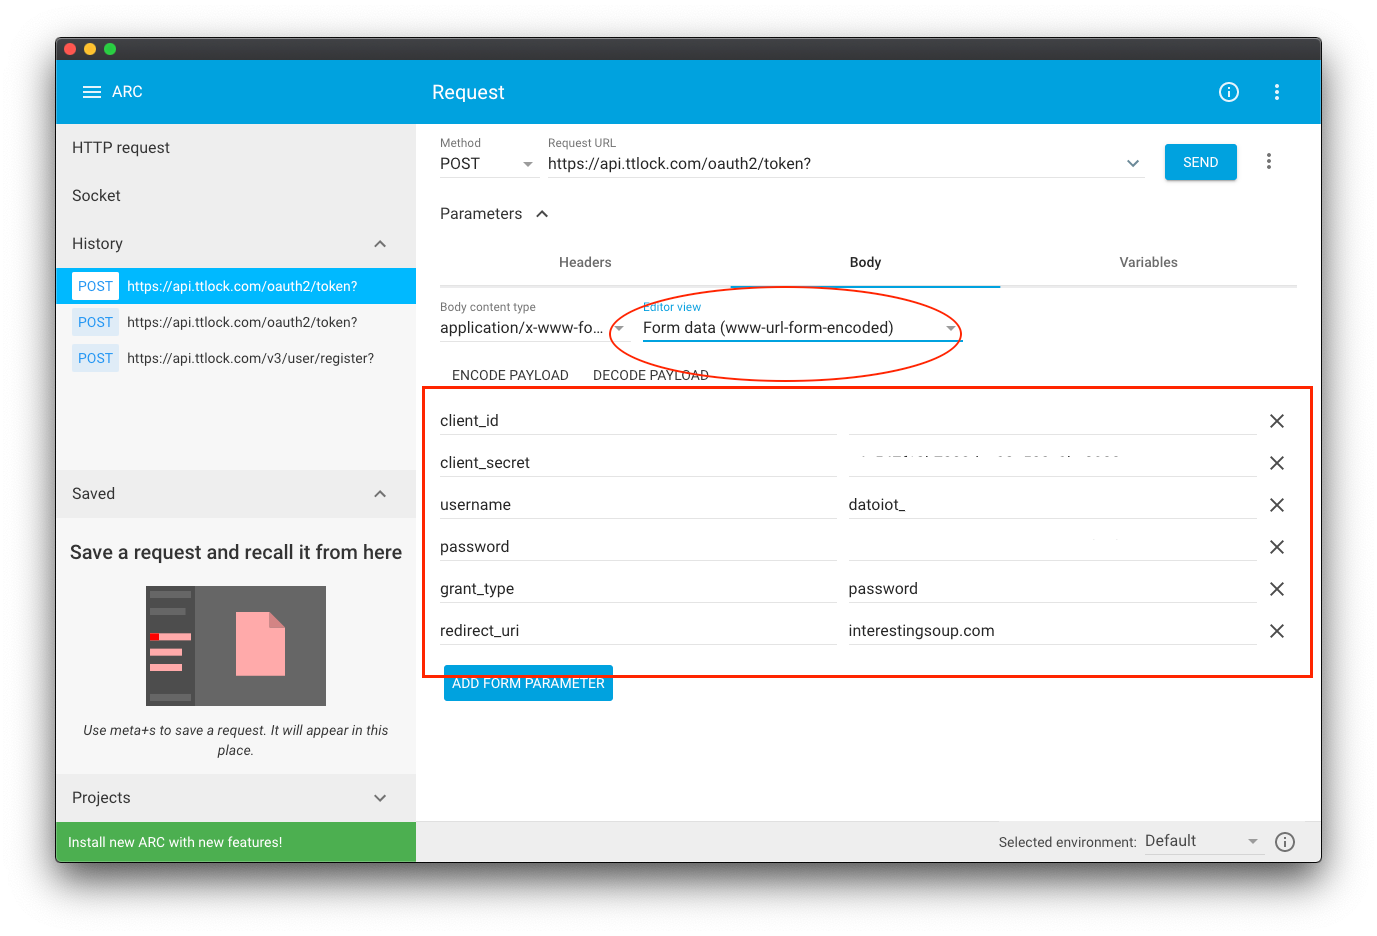
You can change 'Editor view' in the Body menu from 'Raw input' to 'Form data (www-url-form-encoded)' to see the string you entered in the body as a form. See the 3rd photo in the gallery above.
12) Hit that 'Send' and you should get a 200 OK and a response containing your access_token, refresh_token, and other values. Note down access_token as we will be using this and app_id from step 8 in a bit.
13) Now lets switch focus to Home Assistant. Before we begin tinkering with it fully we will need to create a new user in HA. Go to Configuration > Users > and click the '+' button the bottom right. Note down the newly created user as user and password as pass. This user and pass will be used later down in this guide.
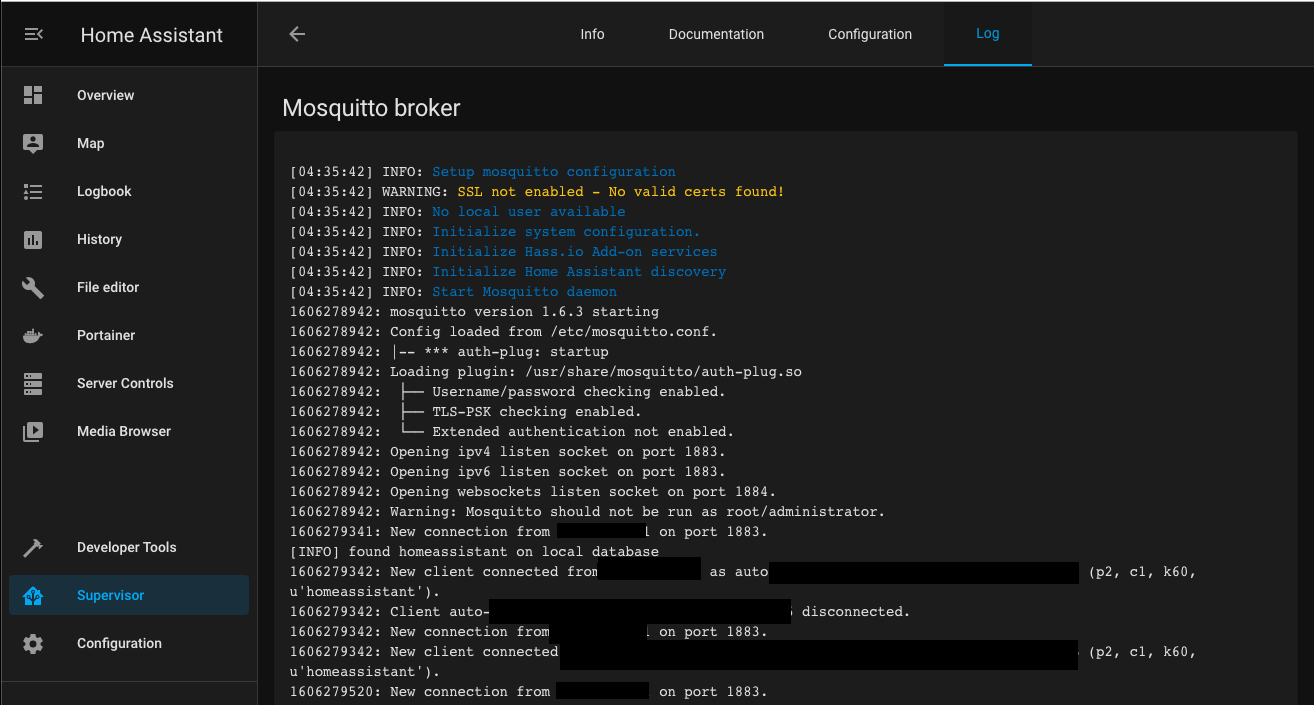
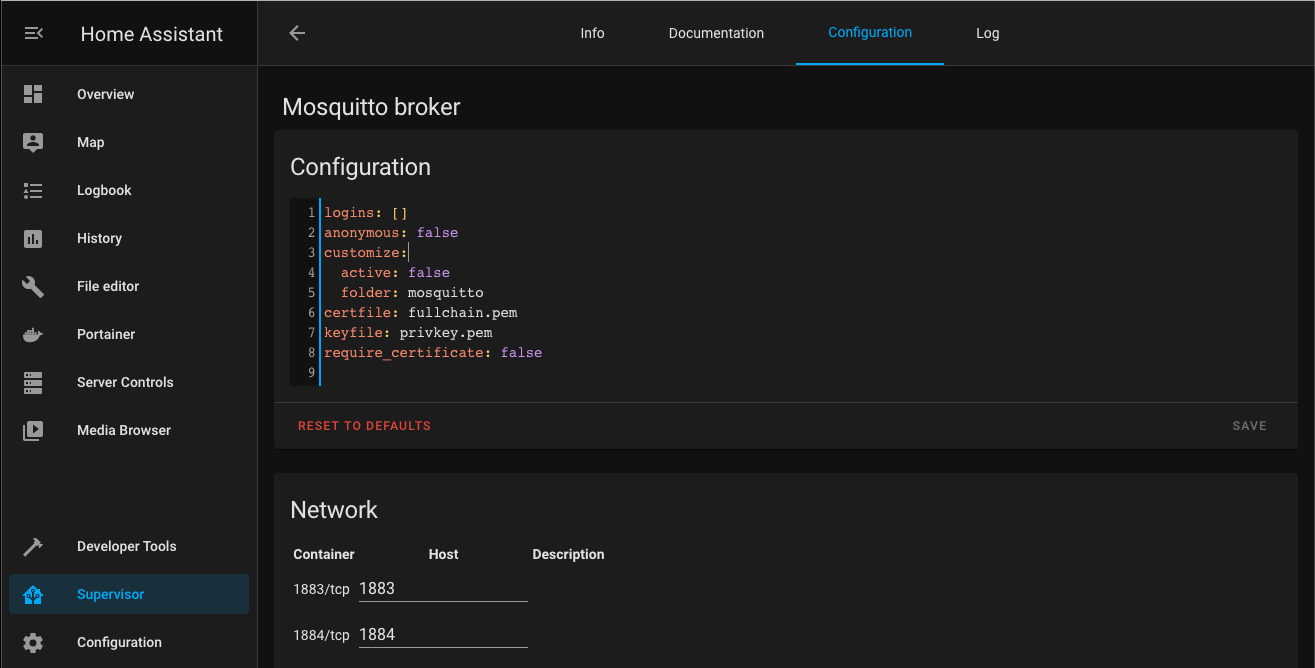
14) We need to install an add-on called 'Mosquitto broker'. Go to Supervisor > Add-on Store > search for and install 'Mosquitto broker'. Start 'Mosquitto broker' and click 'Log' up top. The log output should now spit out the broker IP as the connection is establishing. Note down this IP as the host, we will use this later down in the guide.
15) Next we need to install TTLock2MQTT. Go to Supervisor > Add-on Store > click the 3 dots on top right corner > repositories > add repository: https://github.com/tonyldo/tonyldo-hassio-addons > now search and install 'TTLock2MQTT'.
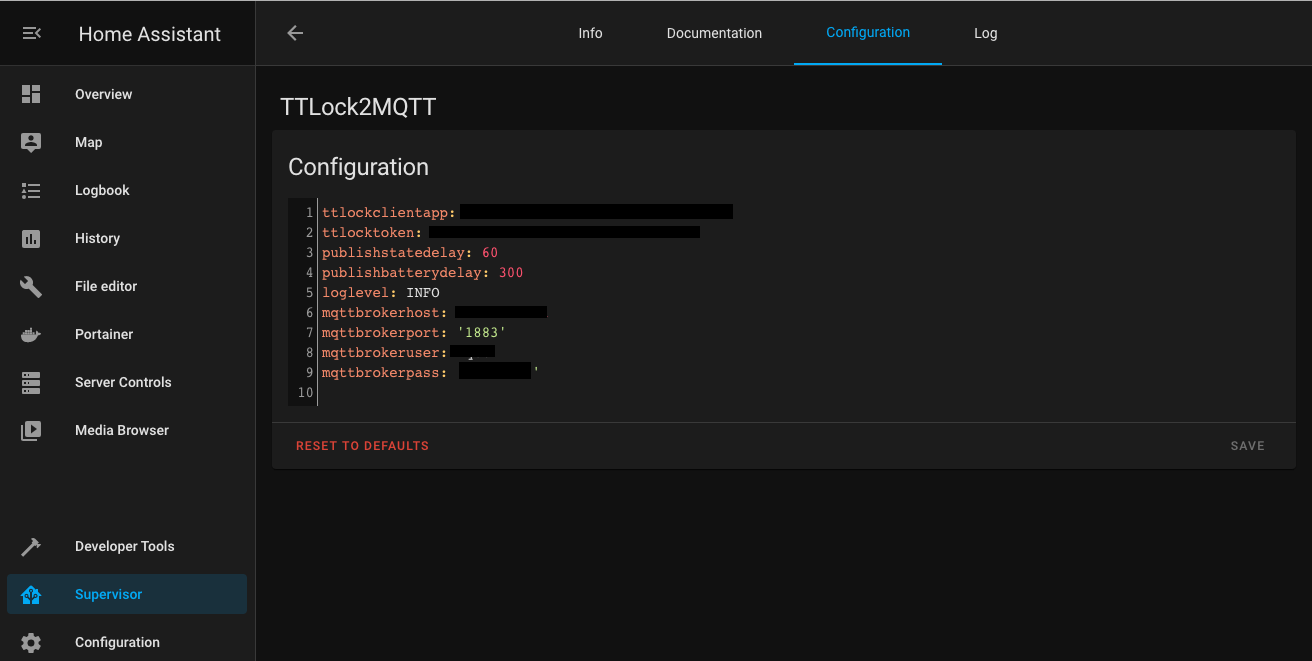
16) Once installed click Configuration up top and paste the following in your configuration
ttlockclientapp: {app_id}
ttlocktoken: {access_token}
publishstatedelay: 60
publishbatterydelay: 300
loglevel: INFO
mqttbrokerhost: {host}
mqttbrokerport: '1883'
mqttbrokeruser: {user}
mqttbrokerpass: {pass}
Replacing:
{app_id} with what you noted down in step 8
access_token with what you noted down in step 12
{user} and {pass} with what we had noted down in step 13
{host} with what we noted down in step 14
Save TTLock2MQTT configuration, start the addon, and click Log up top.
Refresh your logs and you should something along the lines of "[INFO] TTLOCK2MQTT ... 'connected OK!'" and no errors. If so, we are green.
17) Restart Home Assistant, as always.
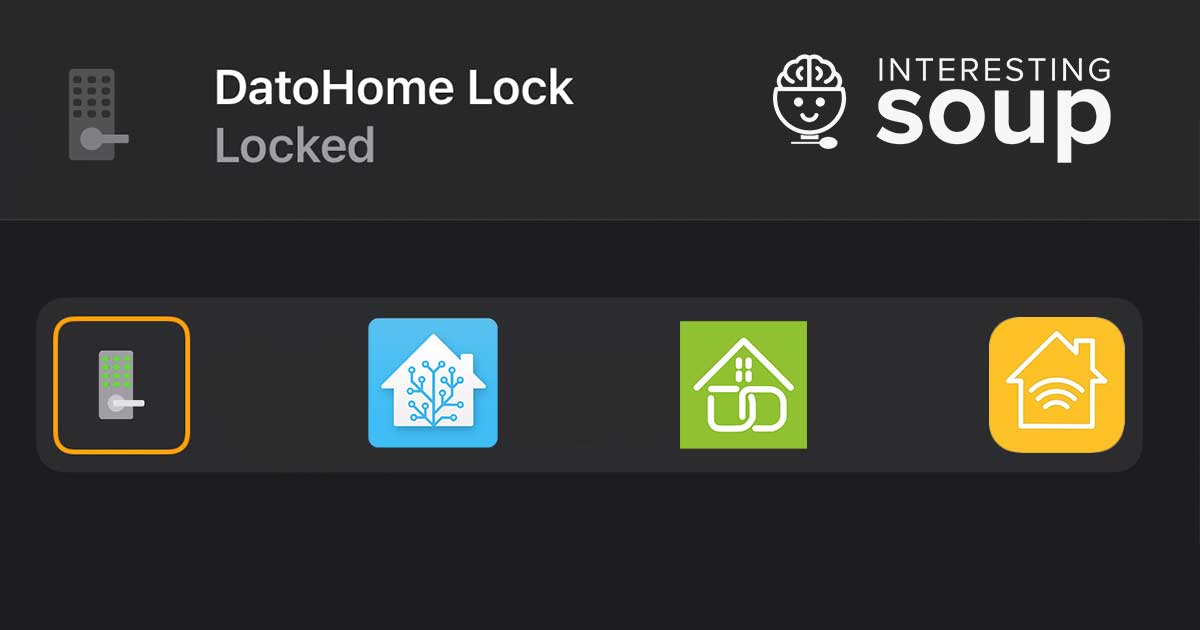
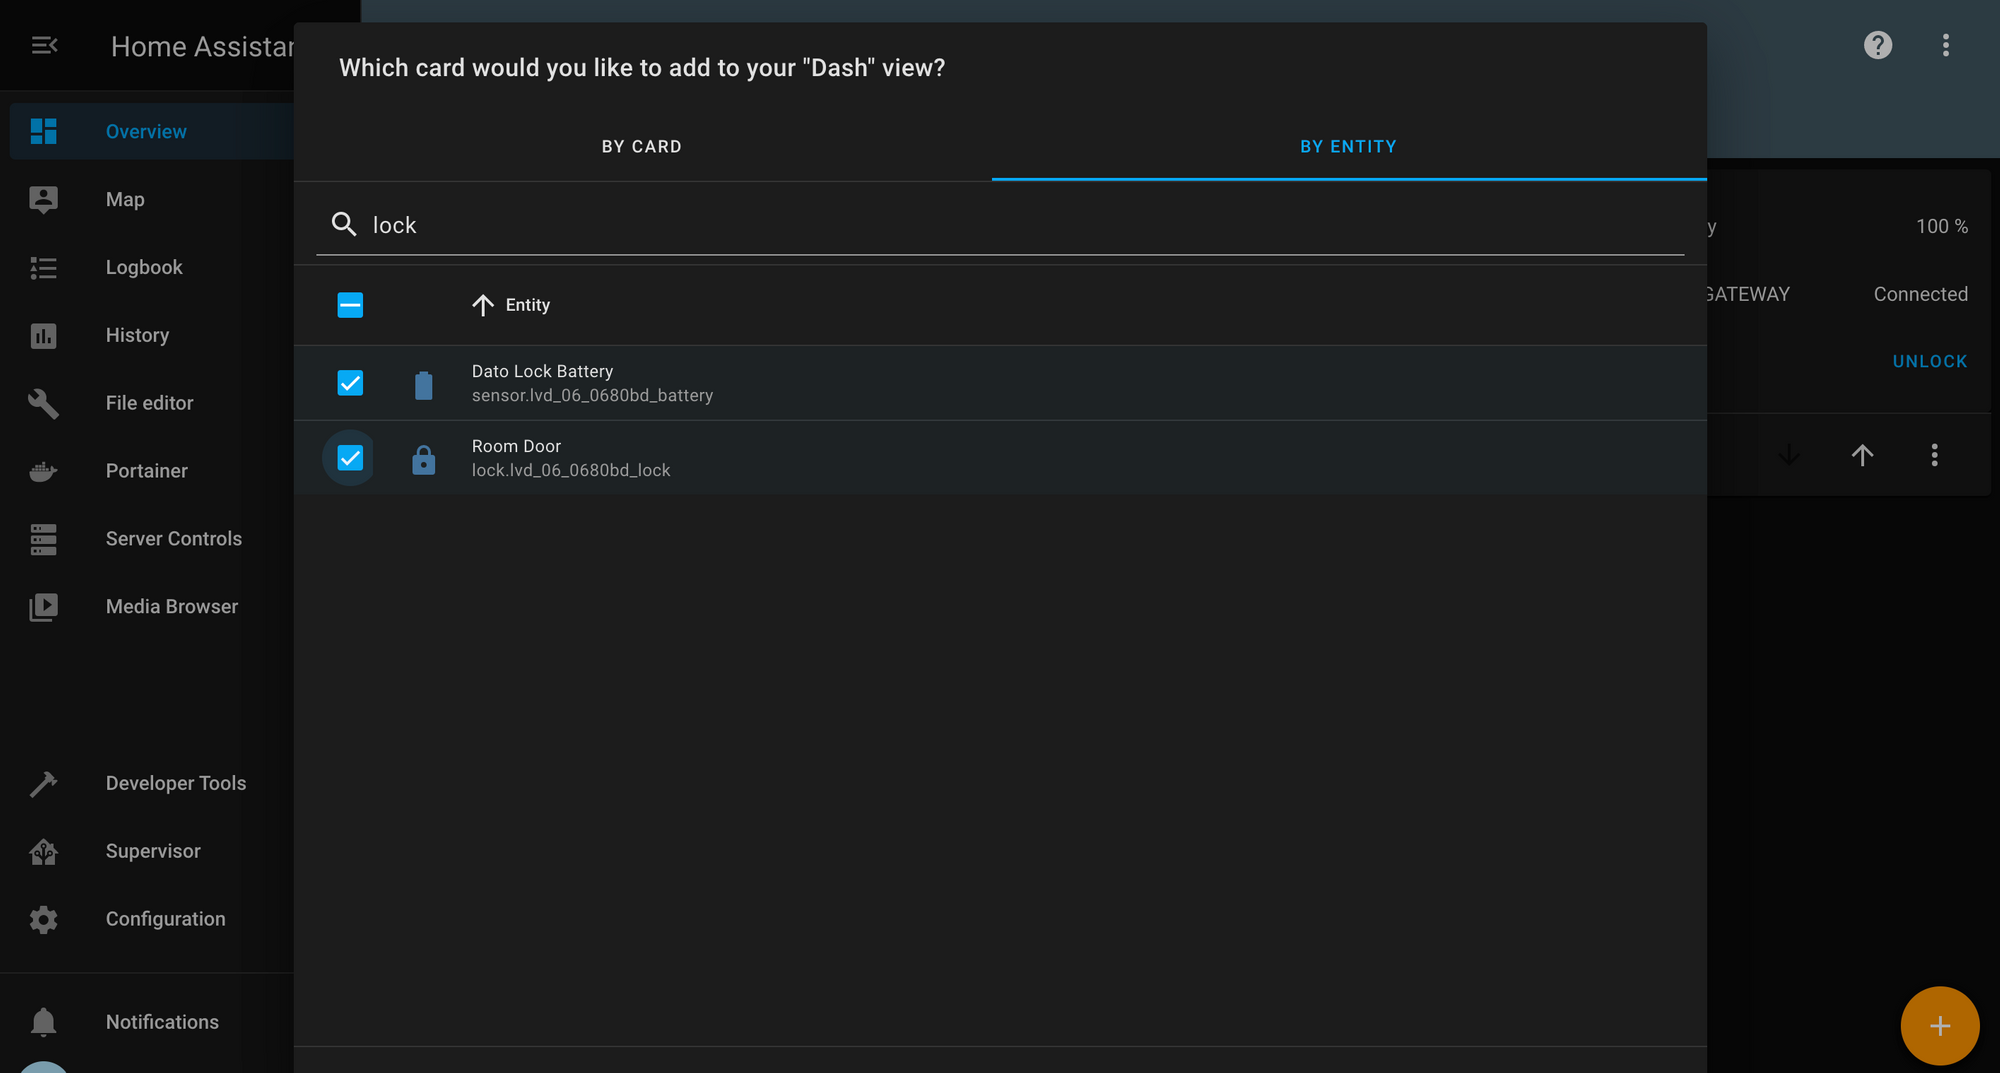
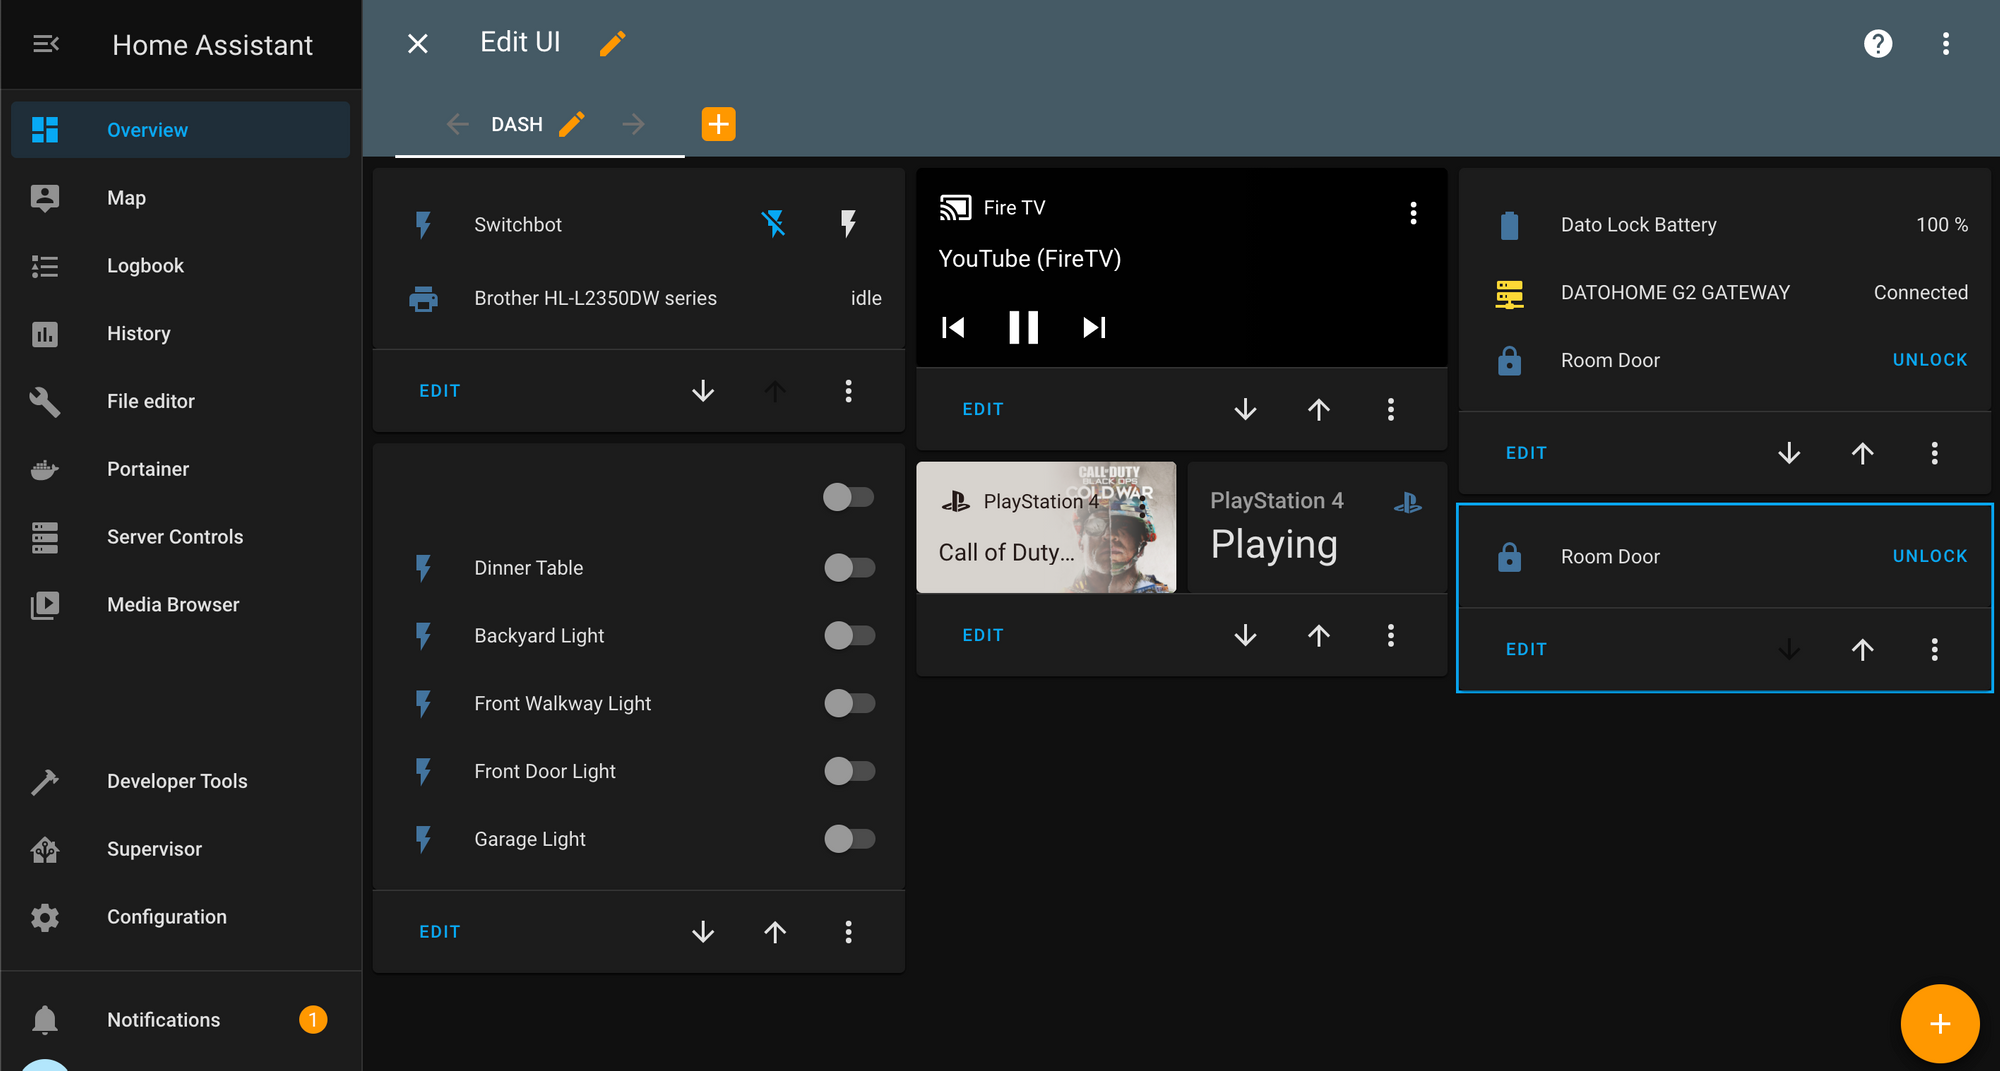
18) We should now be able to add the lock to our UI. Go to Overview (or your choice of dashboard) > click '+' on the bottom right > click 'By Entity' up top > search "lock". You should see your lock. Check all entities matching lock. Add to UI.
You should now see the lock's card on your UI and be able to lock and unlock it! Additionally you can customize your card more by adding the Gateway's status and lock battery. Check out our customized card in the second image above.
19) If you had HomeKit Bridge setup already, you should be seeing the lock in your Apple Home App. If not, no problem, we can easily setup 'HomeKit Bridge' by going to to configuration > clicking '+' on bottom right > search for 'HomeKit Bridge' and follow the instructions.
That's that! You have now successfully added your Datohome Smart Lock to HomeKit via Home Assistant!