Create a ChatGPT bot on Mattermost
OpenAI's ChatGPT is swarming the world! It's widespread usage and rapid adoption rates are a testament to its impact on the world of AI technology. As more people get a taste of ChatGPT, thanks to its research preview, they begin to ask how it can get integrated into everything they use. In our last post, we spoke of a handy wrapper to query ChatGPT research preview right from your terminal window without any APIs. That was super neat but it had it's limitations. We have a Mattermost instance running here at InterestingSoup, so we thought, why not integrate ChatGPT into Mattermost? So here it is, how to setup a ChatGPT bot on Mattermost!
Before we begin we would like to say none of this is possible without the developing efforts of Sebastian Müller from Yworks. You can learn more about why he decided to make this integration here.
Requirements:
Local Ubuntu Server with Docker installed
This service needs to be running at all times, so you will need to either run this on a local server as we are at interestingsoup or use something like DigitalOcean or Netlify.
Sebastian's Repo: yGuy/chatgpt-mattermost-bot
Setup:
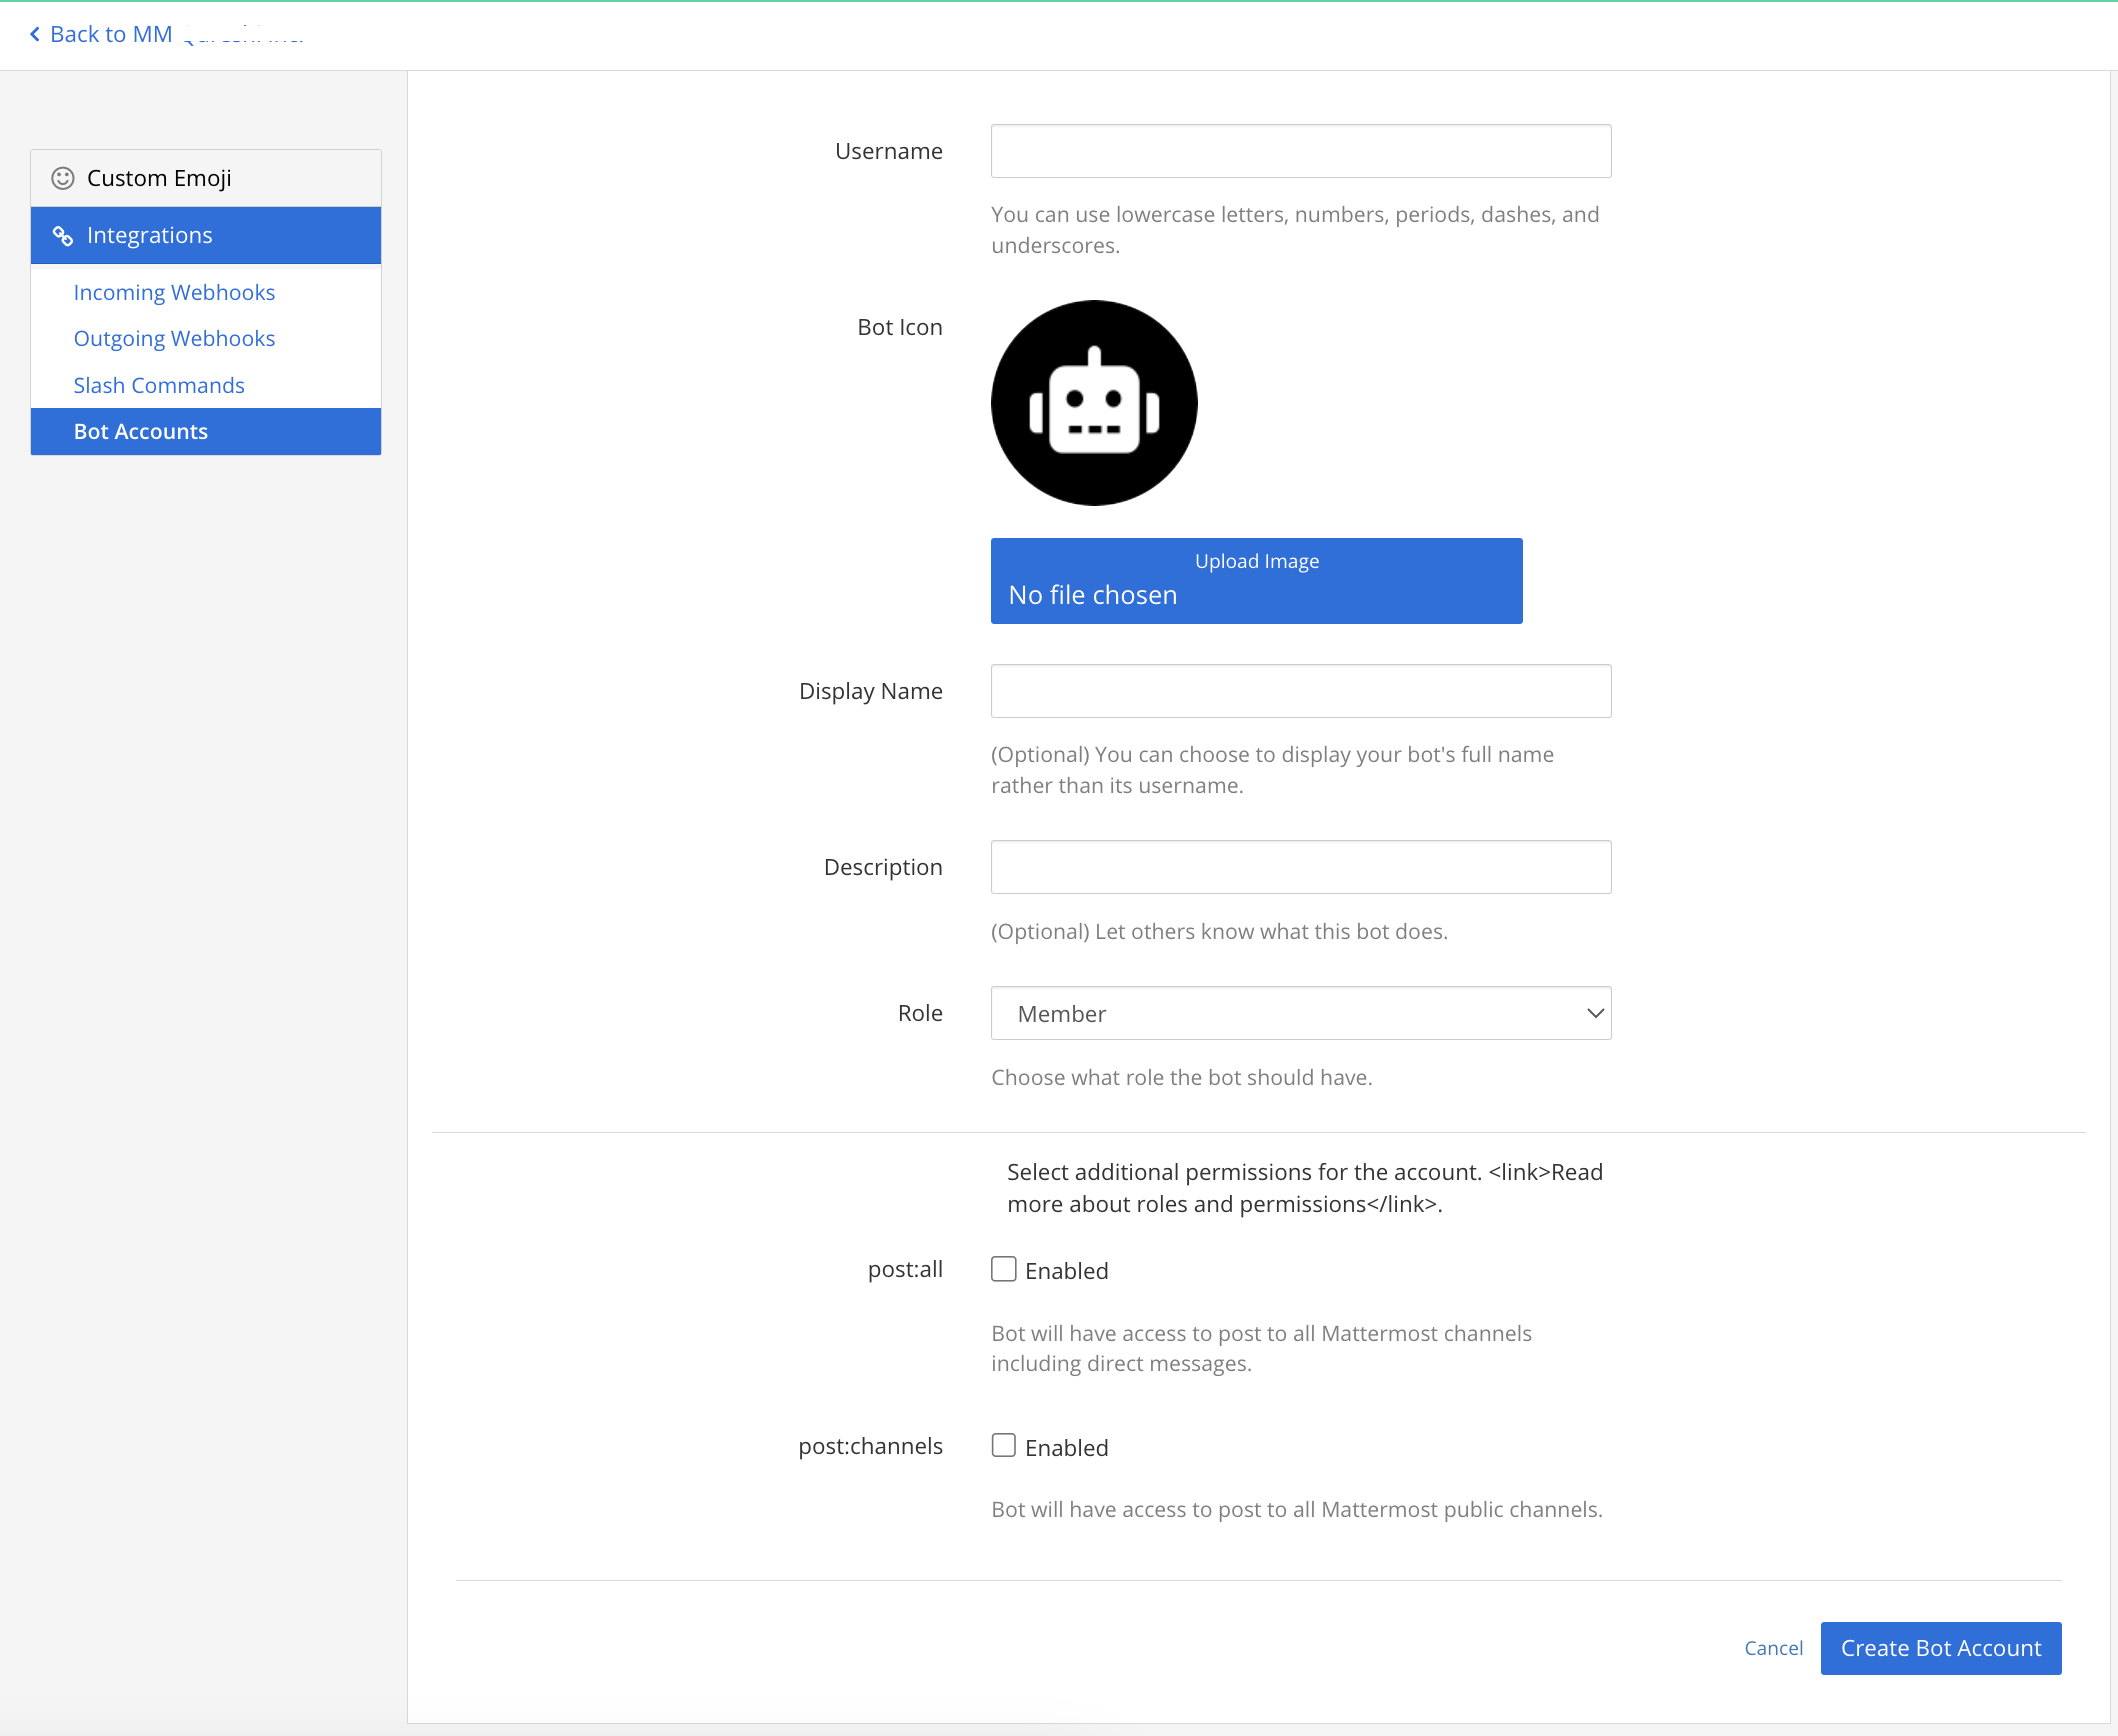
Create a Mattermost bot account
- Login as Mattermost admin
- Go to Menu on top left > Integrations > Bot Accounts > Add Bot Account
- Set all required fields and click create bot.
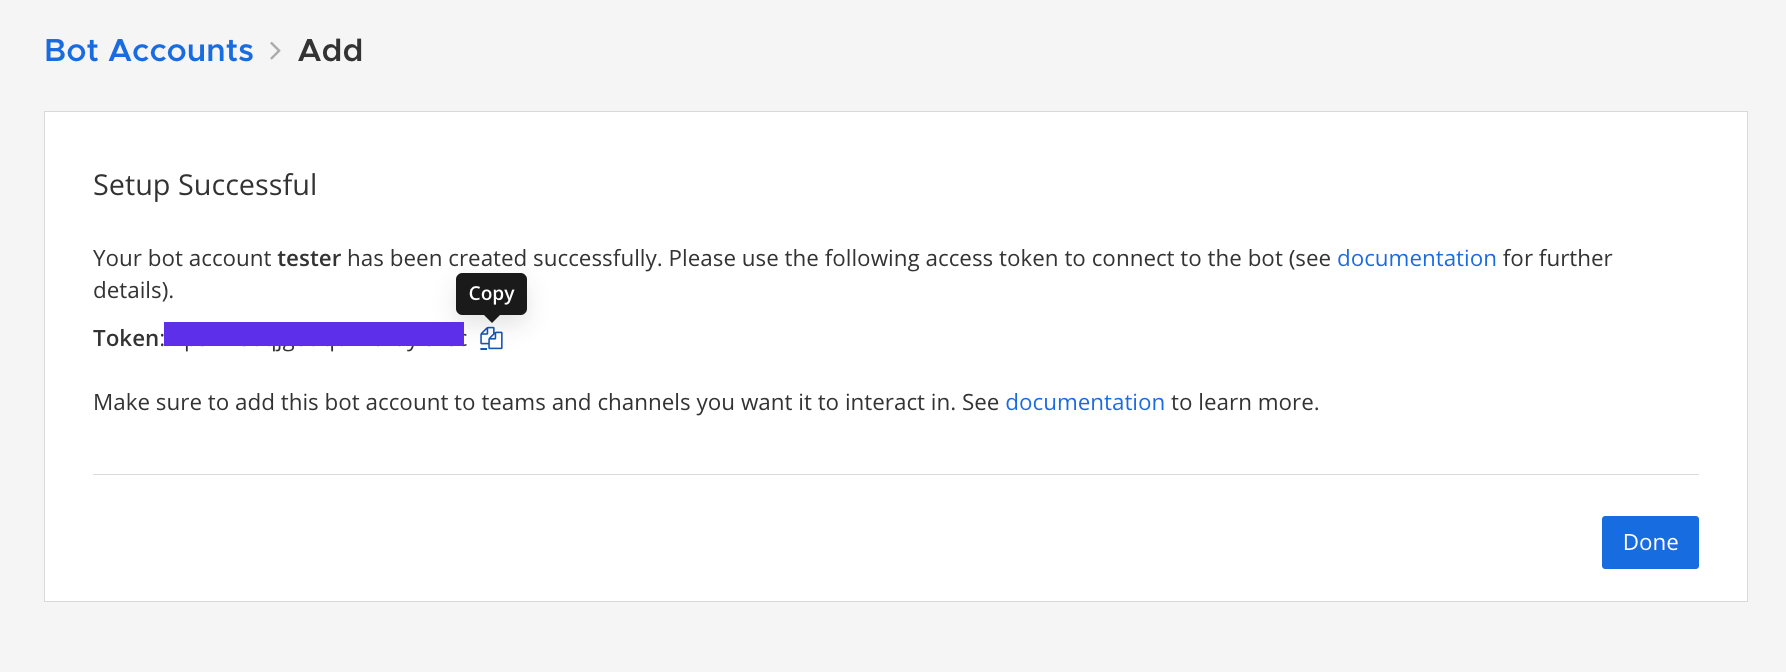
- Save the token thats generated at the end as Mattermost Access Token and store it safely as we will use it later on in the guide.
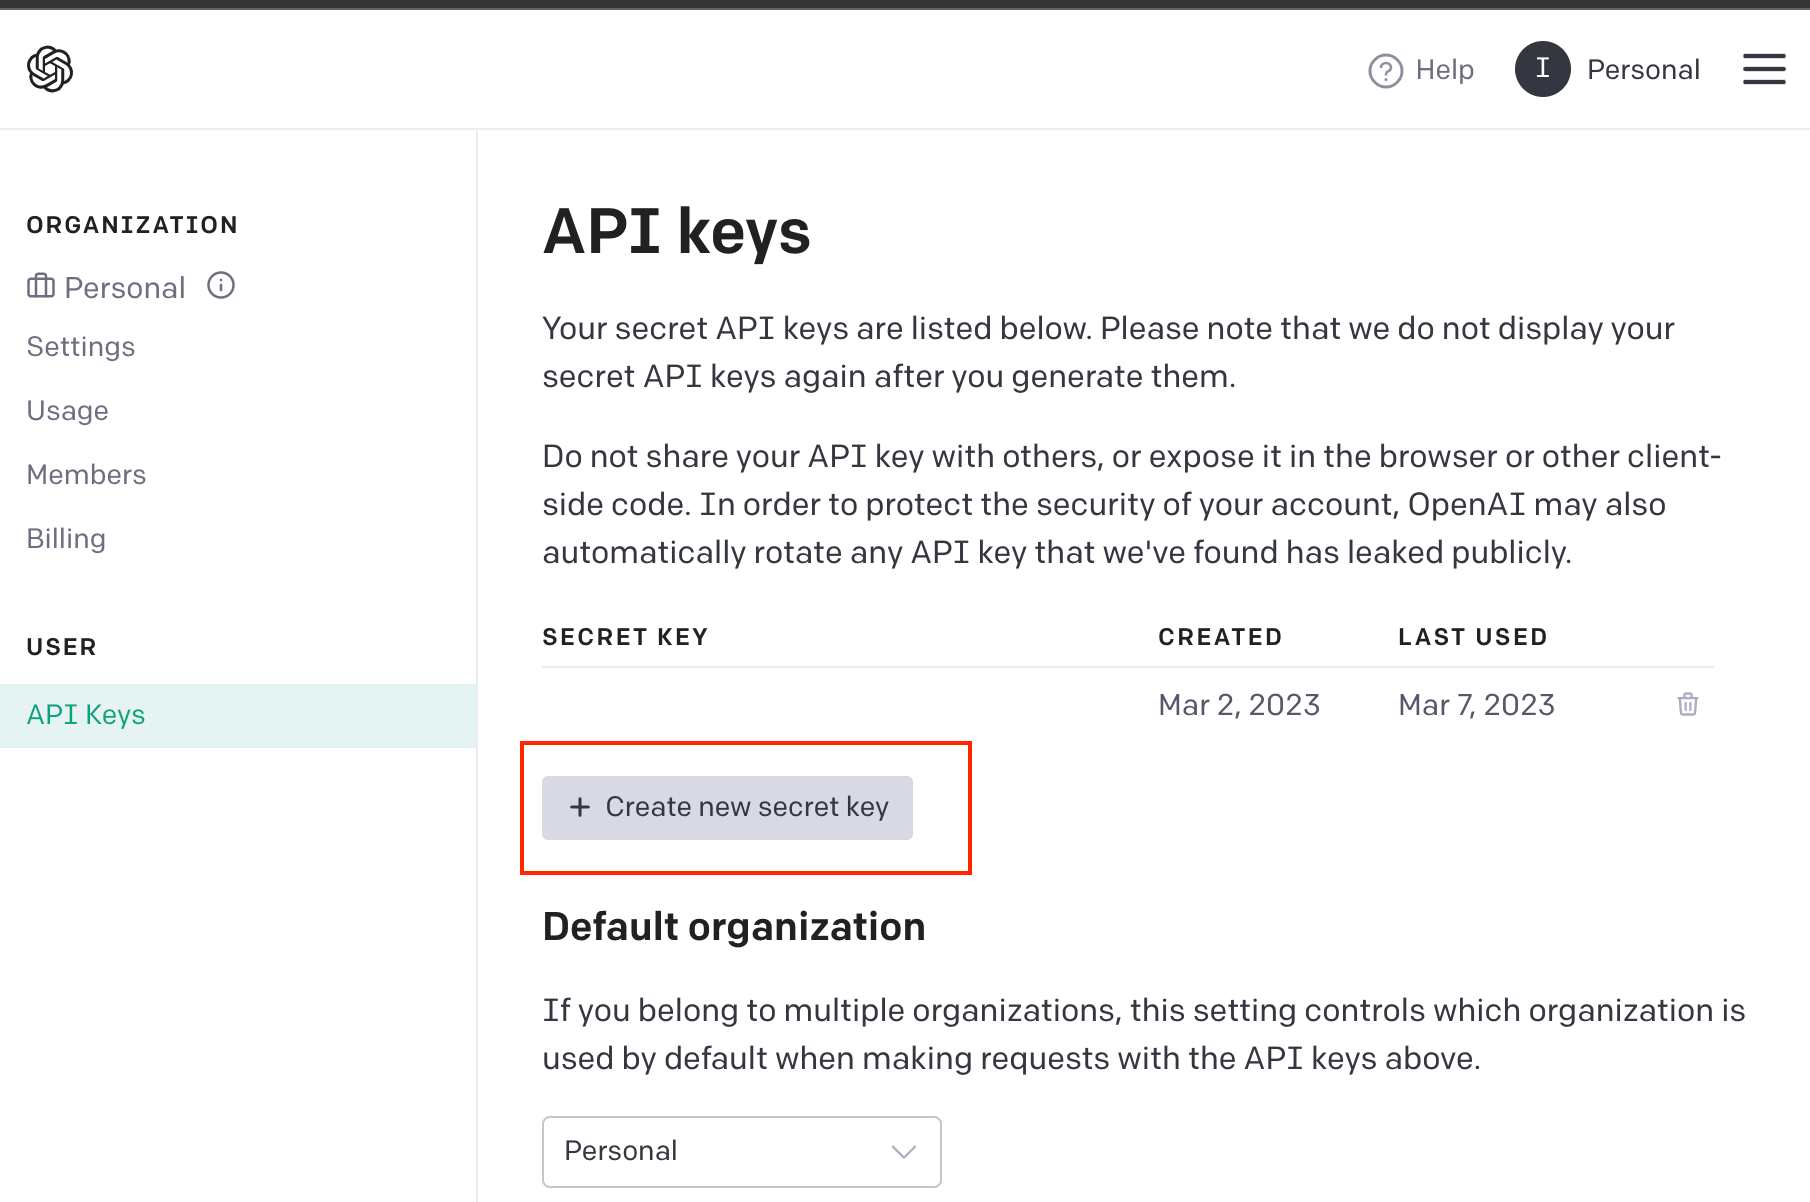
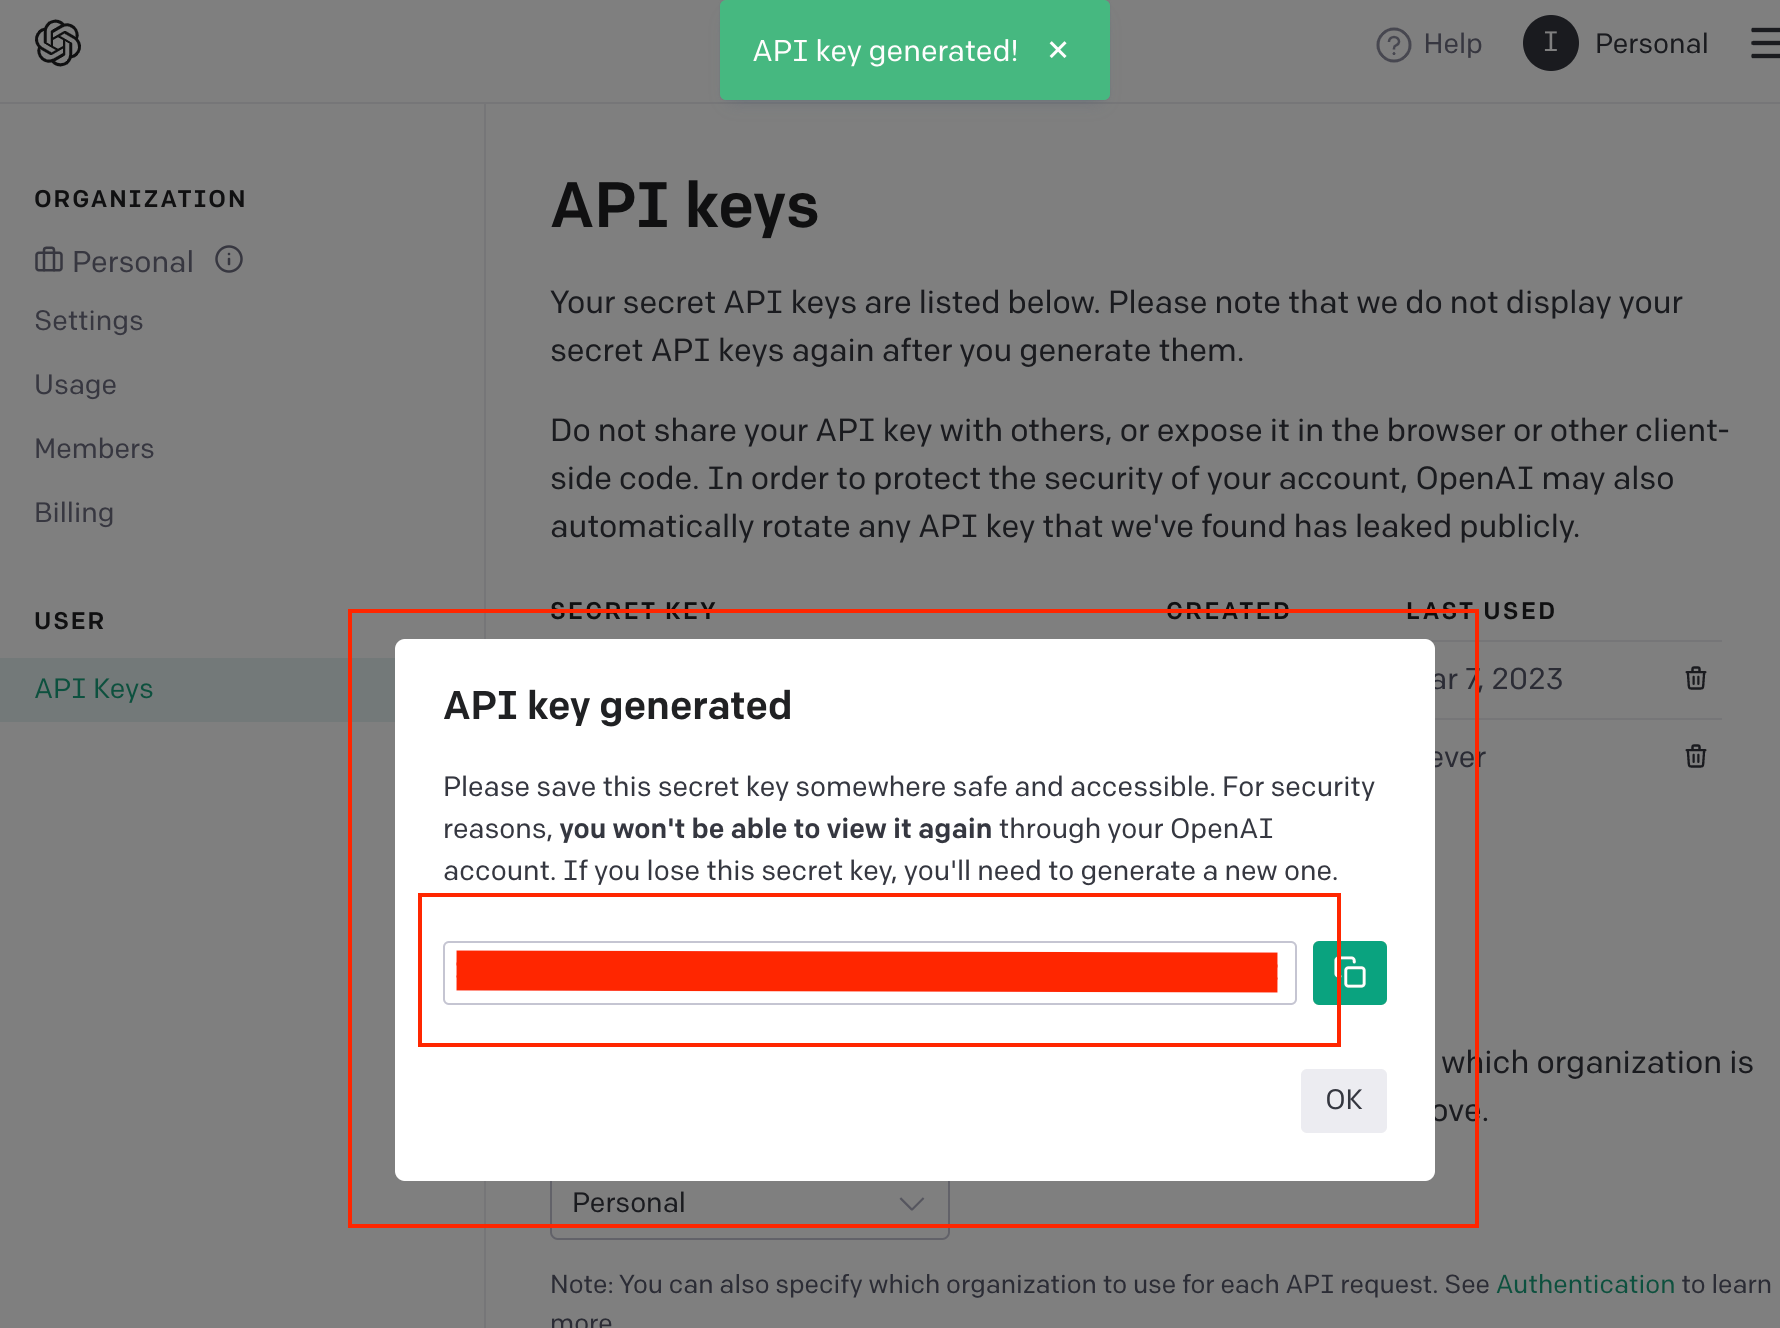
Generate OpenAI API Keys
- Go to Open AI platform, login, in the API Keys section, click 'Create new Secret Key'.
- Save the OpenAI API Key that is generated, and store it safely as we will use it shortly.
Deploy - yGuy/chatgpt-mattermost-bot
- Clone the repo
git clone https://github.com/yGuy/chatgpt-mattermost-bot - Go into repo directory
cd chatgpt-mattermost-bot - Create docker image
docker build . -t yguy/chatgpt-mattermost-bot
After any change you make in the repo, you will need to run this command - Run Docker as a service with the command below, replacing the variables MATTERMOST_URL with your Server URL, MATTERMOST_TOKEN, & OPENAI_API_KEY with the tokens you generated in the previous steps.
Addition variables that can be edited:
# Set this if using a custom username for the bot, default = @chatgpt
MATTERMOST_BOTNAME: "@chatgpt"

# Console logging output level, default = INFO
DEBUG_LEVEL: TRACE

# Node environment, default = production
NODE_ENV: production
Docker Run:
- Simply run this command to run the docker container.
docker run -d --restart unless-stopped -e MATTERMOST_URL=https://mattermost.server -e MATTERMOST_TOKEN=abababacdcdcd -e OPENAI_API_KEY=234234234234234234 --name chatbot yguy/chatgpt-mattermost-botDocker Compose:
- Create a docker-compose.yml
- Enter the content below replacing the environment variables:
version: "3.7"
services:
  chatgpt-bot:
    image: chatgpt-mattermost-bot:latest
    build: https://github.com/yGuy/chatgpt-mattermost-bot.git
    restart: unless-stopped
    environment:
      MATTERMOST_URL: https://mattermost.example.com
      MATTERMOST_TOKEN: 1234567890abcdefghijklmnop
      OPENAI_API_KEY: sk-1234567890abcdefghijklmnopqrstuvwxyz0987654321ab
3. Run docker compose up -d to start up the container.
4. Run docker ps to verify your service is running.

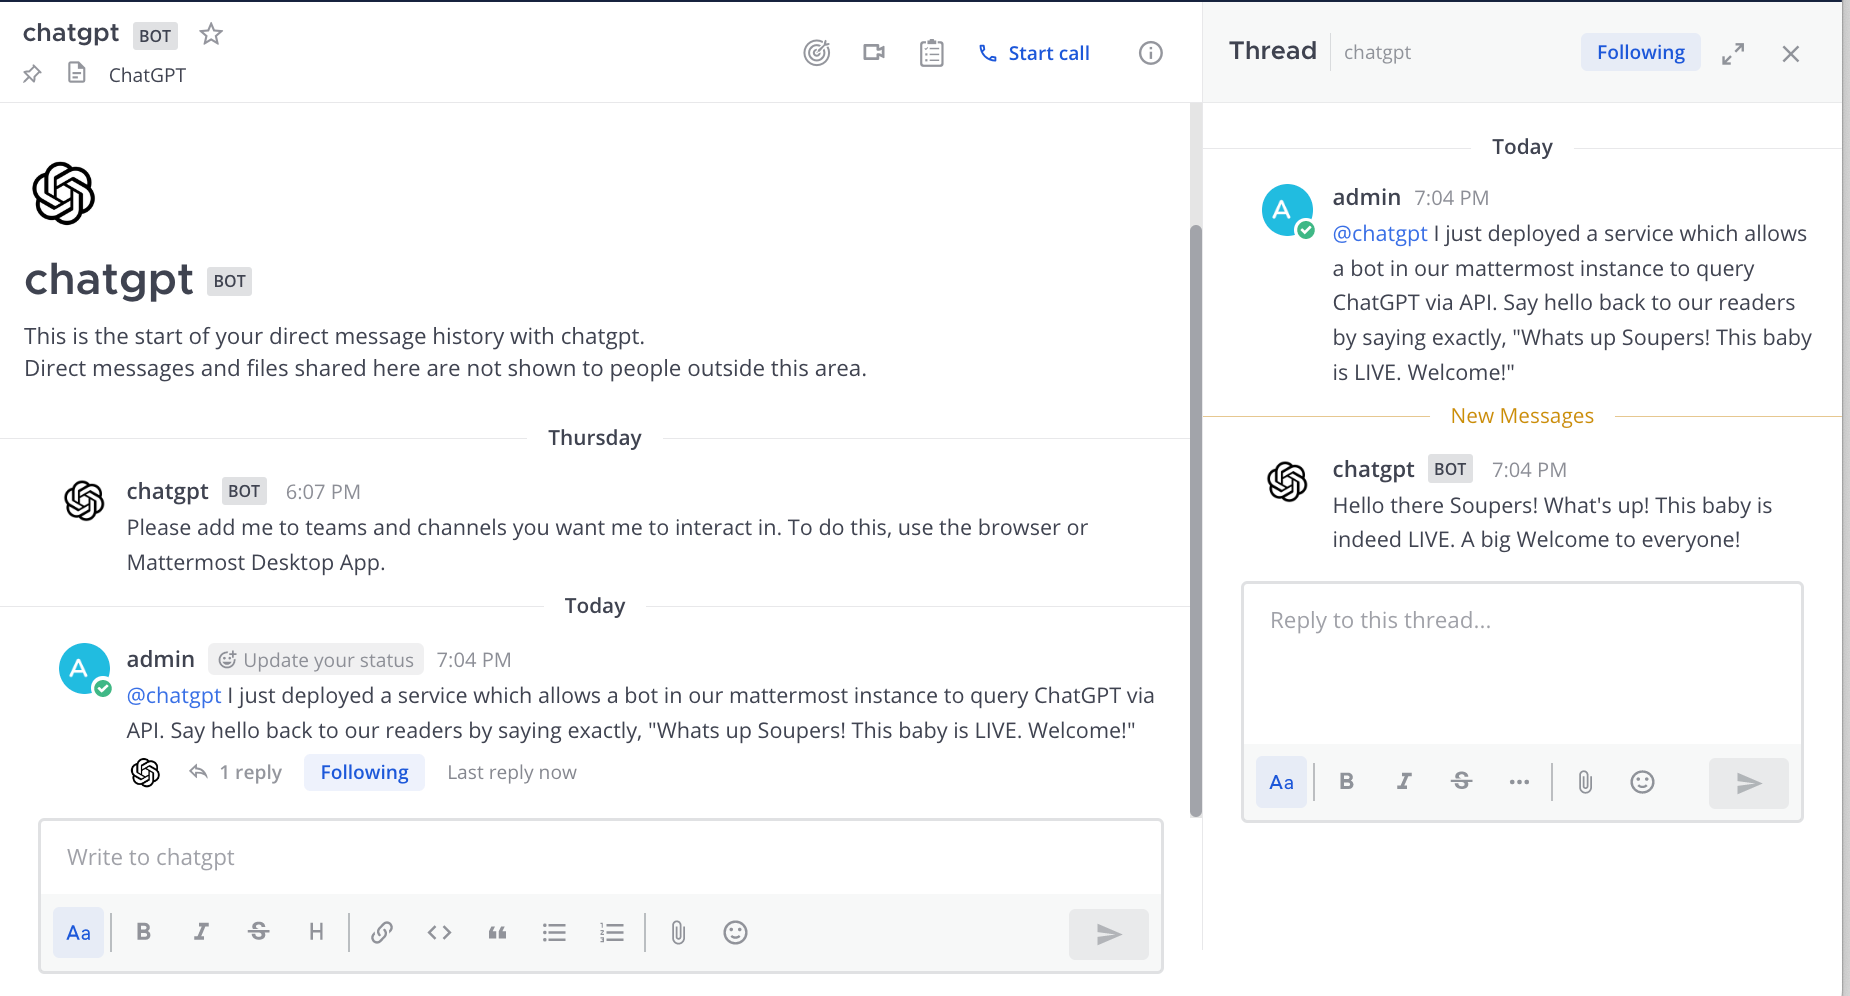
Test Bot
- Start up a DM with your bot you named in the first part of Setup, ours is named chatgpt.
- Enter @chatgpt followed by your prompt and you should get a response back from OpenAI ChatGPT.
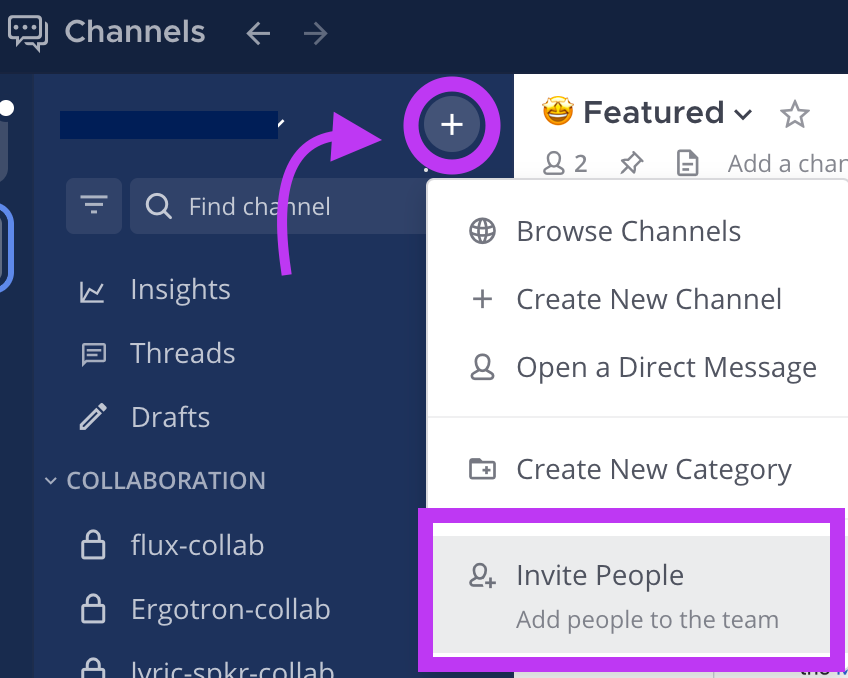
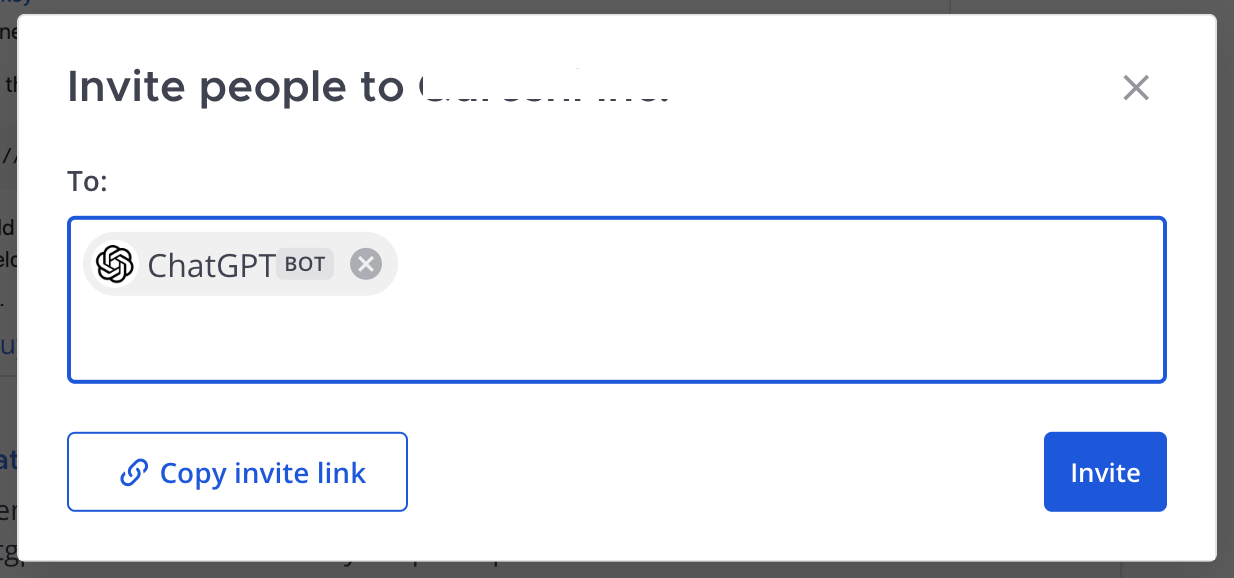
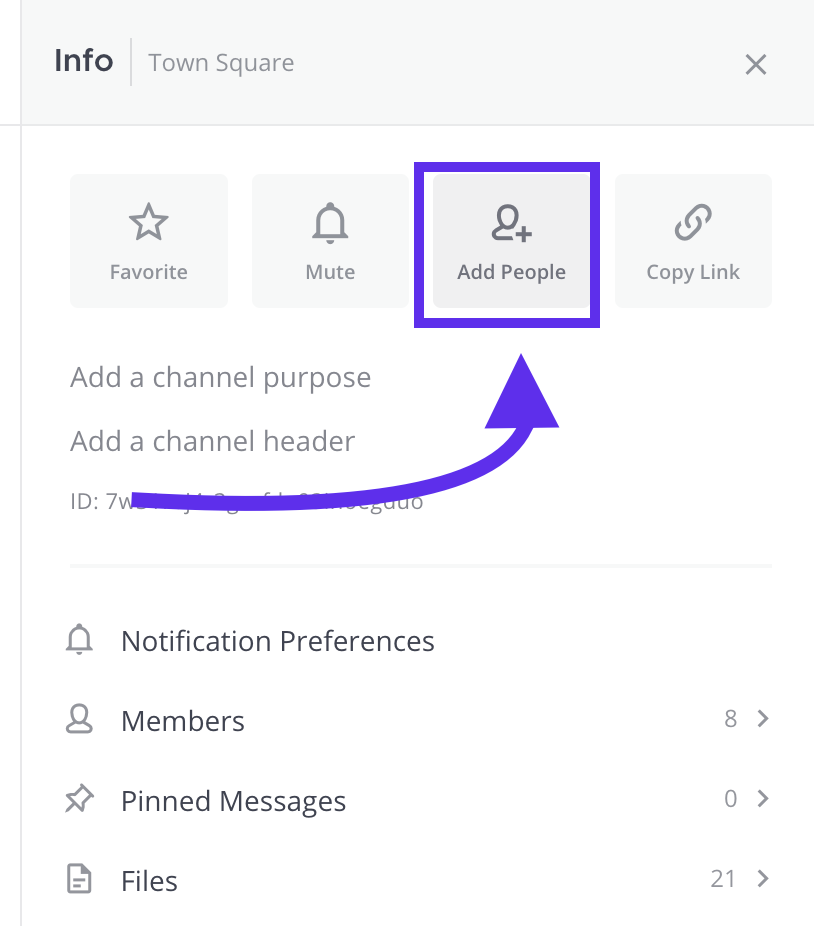
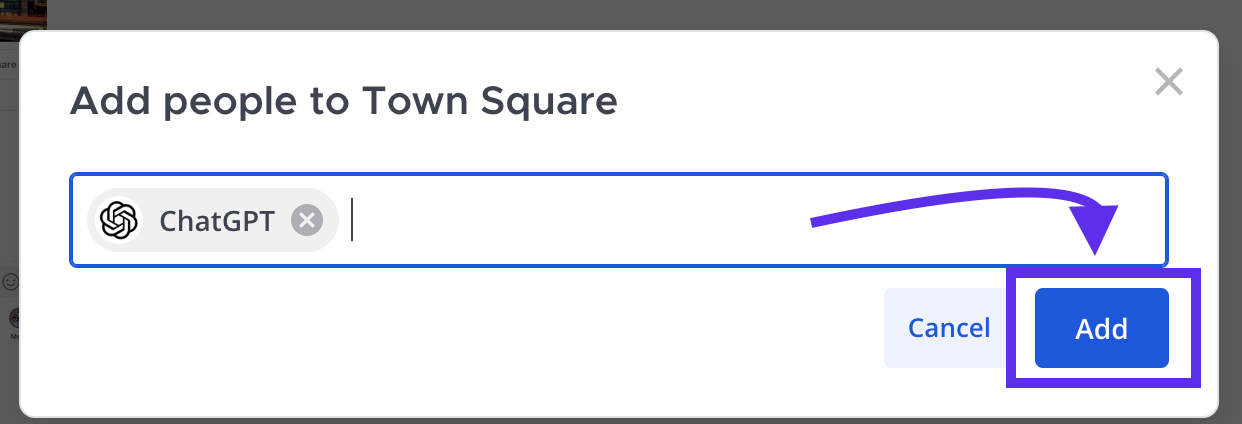
🎉 Congrats, you have successfully created a ChatGPT Bot for your Mattermost instance! To start using it, add @chatgpt to a team and invite it to any channel where you @mention it to invoke it.
Want to use ChatGPT without all this work? Over seas and having trouble accessing ChatGPT? Subscribe to our ChatGPT tier and get invited to our InterestingSoup Mattermost instance, where you can use ChatGPT's full functionality right within Mattermost.